
Seller: How do I respond to an RFP?
Viewing Your RFP
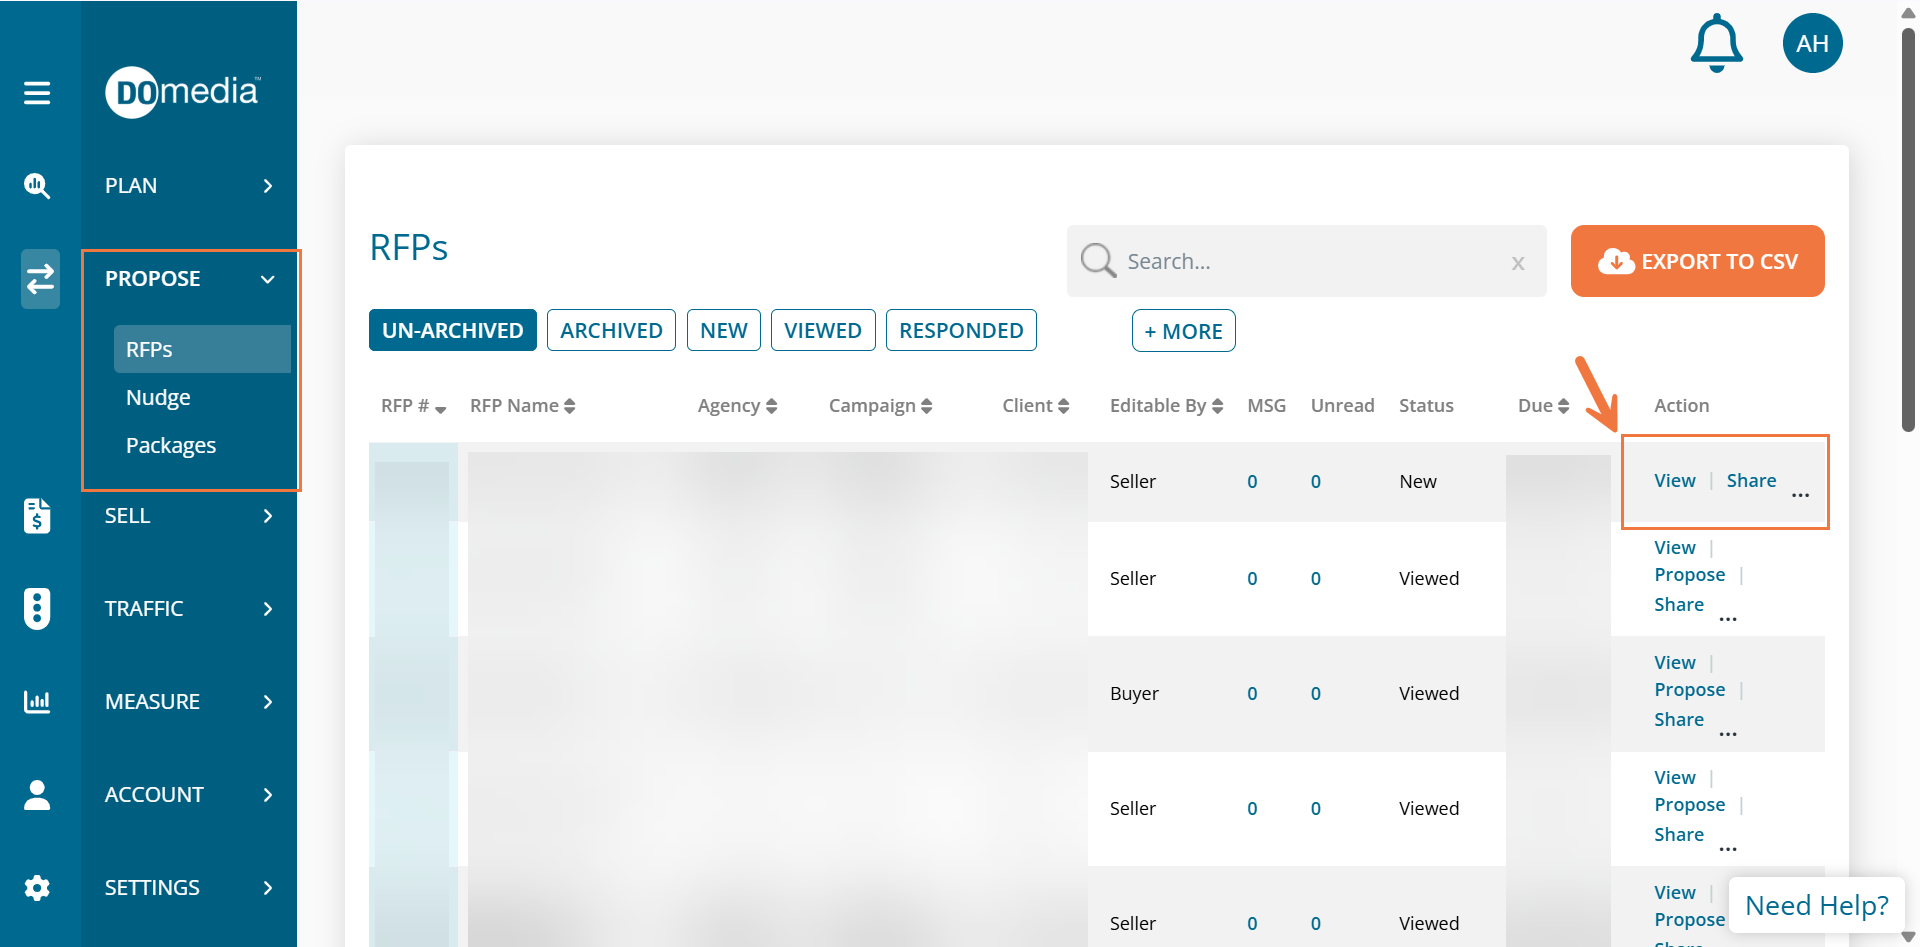
Congratulations on receiving your RFP! To view your RFP you can click the direct link included in the email notification you received to access it or if you are a paying seller, view it from your RFP Dashboard by clicking RFPs under the Propose menu and then View under the Action column.
If you need to share this RFP with someone else on your team, click Share under the Action column and then select your coworker.
*Note using the links from the email notifications is a must for Free Sellers. If you are a Free Seller, this support article will better assist you.
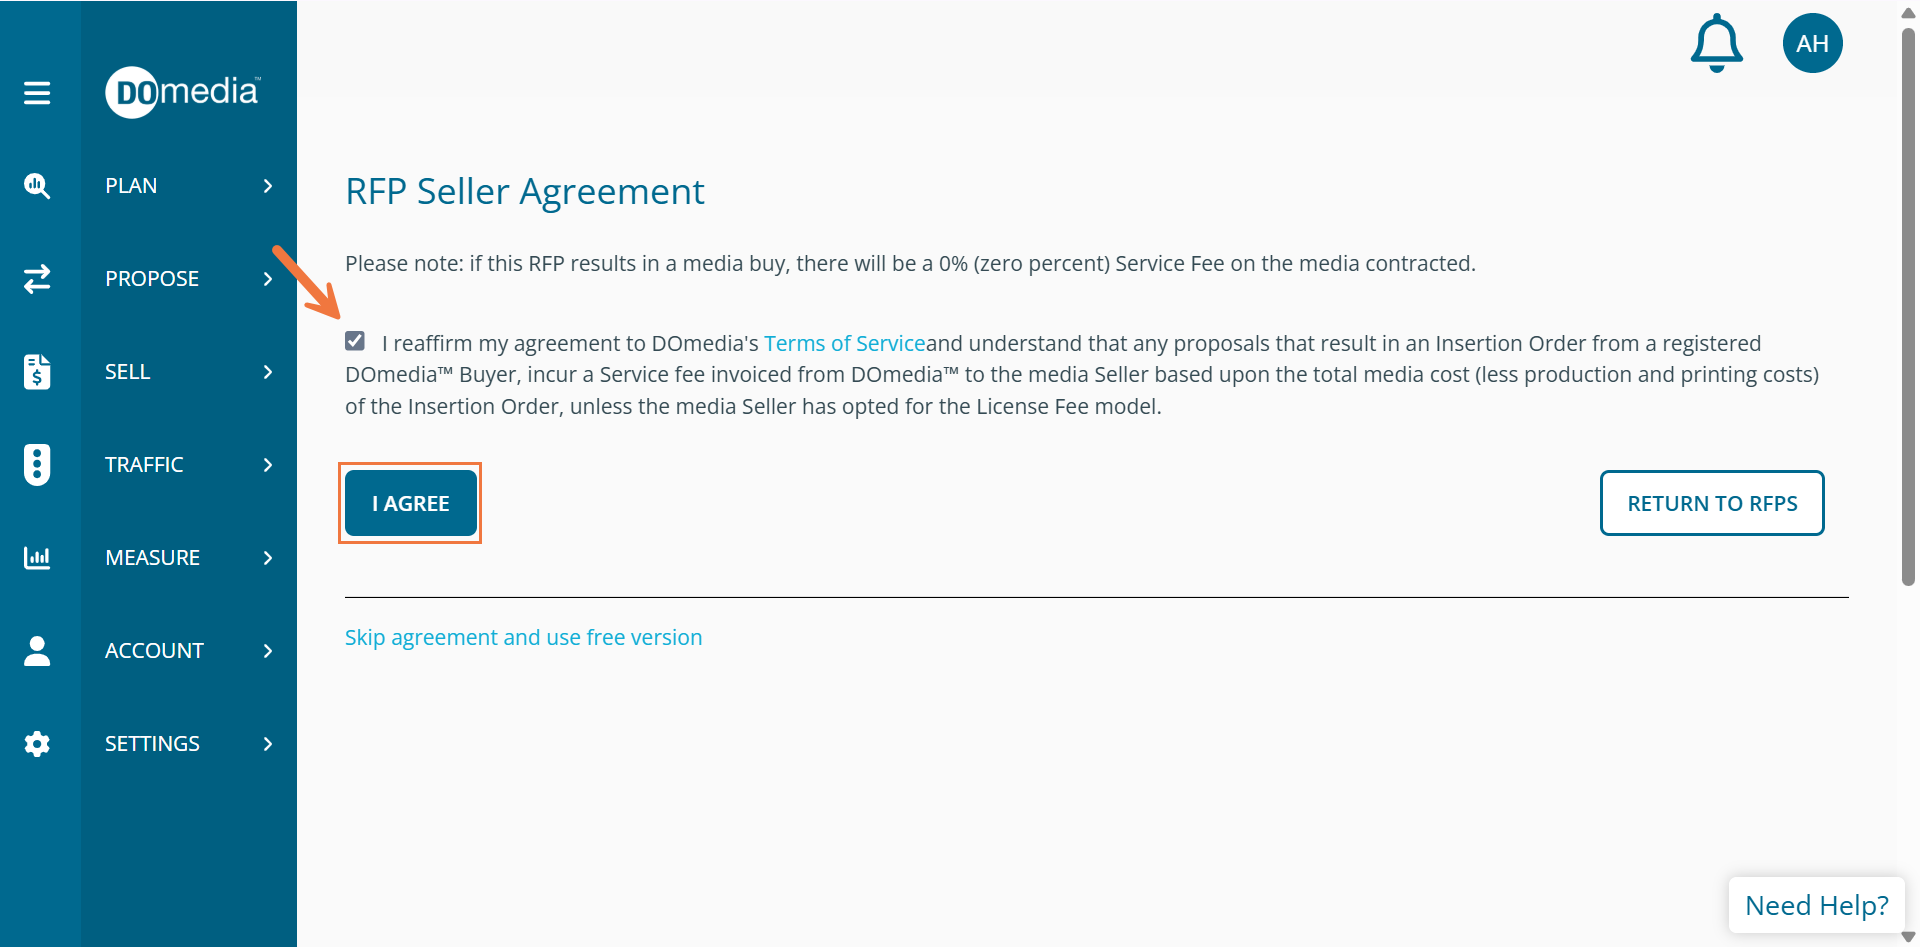
Note: You must agree to DOmedia's Terms of Service after clicking View in order to use any of the tools we offer to assist with keeping your RFPs and contracts organized as well as other handy tools to get your proposals submitted more efficiently. (Please note: if this RFP results in a media buy, there will be a 0.5% (one half of one percent) Service Fee on the media contracted.). As stated above there is a free seller option, but again does come without many of the added benefits of DOmedia.
Create Proposal - Step 1: Project Brief
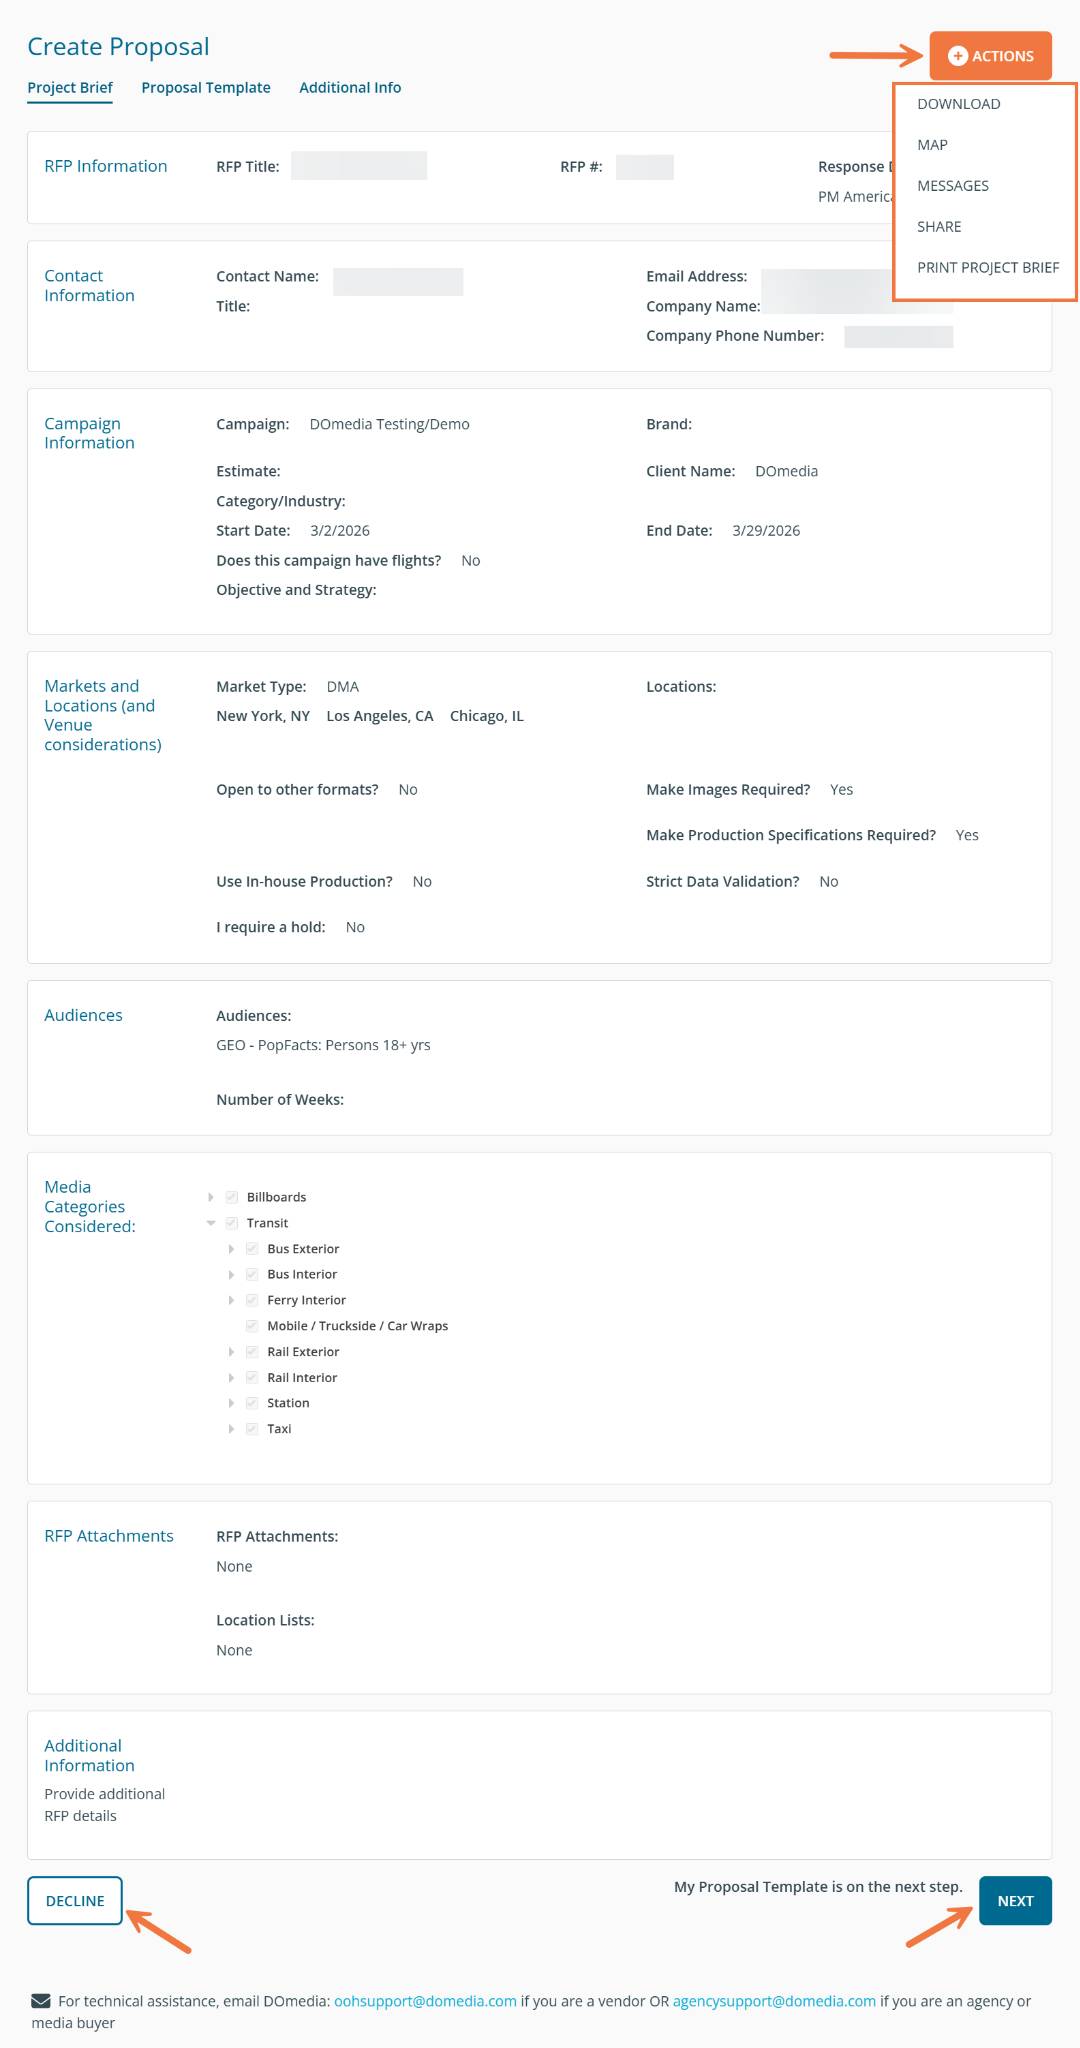
Once you've agreed to DOmedia's Terms of Service, you will arrive at 'Create Proposal - Step 1: Project Brief'.
Here you will find campaign level details outlined by the buyer. The Project Brief screen will show you the contact information for the agency representative, Campaign Information, the desired Markets and Locations, any Audience Demographics that requested, and also lists attachments and any Additional Information.
If you have inventory to propose select 'Next' in the bottom right-hand corner of the page. Or, you may decline the RFP by selecting the 'Decline' button located at the bottom left-hand corner of the page.
Please also note the other actions available via the +Actions button - Download, Map, Messages, Share, Print Project Brief
Create Proposal - Step 2: Proposal Template
If you chose to proceed with the RFP, you will be taken to the second step of the proposal. From here you will see the grid with what is being requested by the buyer.
*Note that you can click Field Definitions for guidance on the standard columns included in the grid
If the RFP is Seller Editable (which it typically will be if you were just issued it), there are several ways and tools available for you to get your proposal into the grid (detailed below).
*Note that if you find that you cannot edit the grid and see that it is listed as Buyer Editable, click the Request Unlock button to send an email notification to the buyer letting them know they need to unlock it.

Below are the ways that you can get your proposal into the RFP!
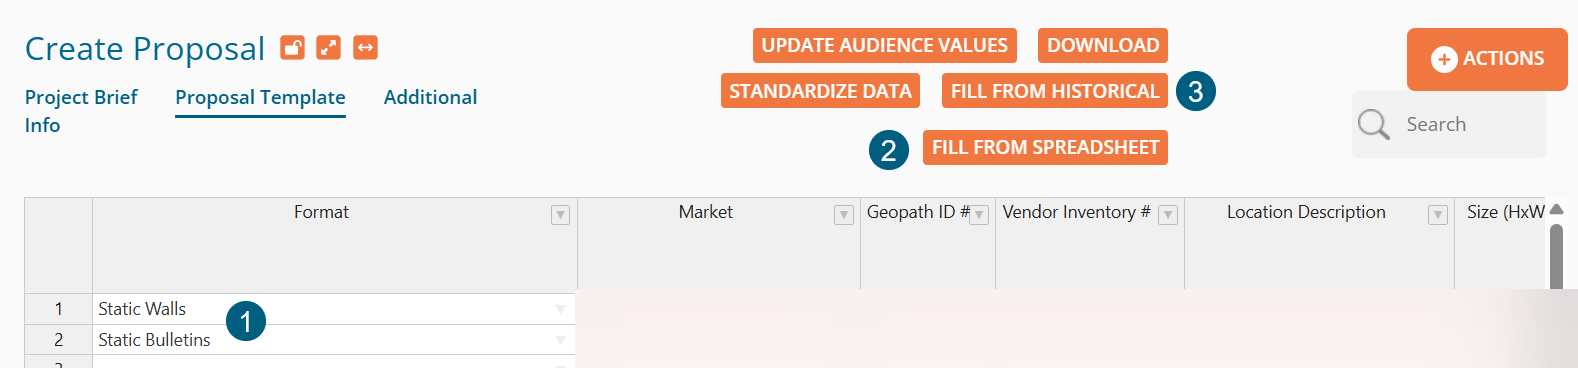
Option 1: Enter Information Directly into the Grid
Simply manually enter the information you wish to include in the grid. You can begin by typing values into the first row - this represents your first location or media offering in your proposal. You can enter values directly into the grid or cut and paste them from another spreadsheet.
Option 2: Fill From Spreadsheet
To start this process it is best to download just the headers for the specific RFP you are working on. Click on the Download button and then select Proposal Grid - Headers Only to do so.
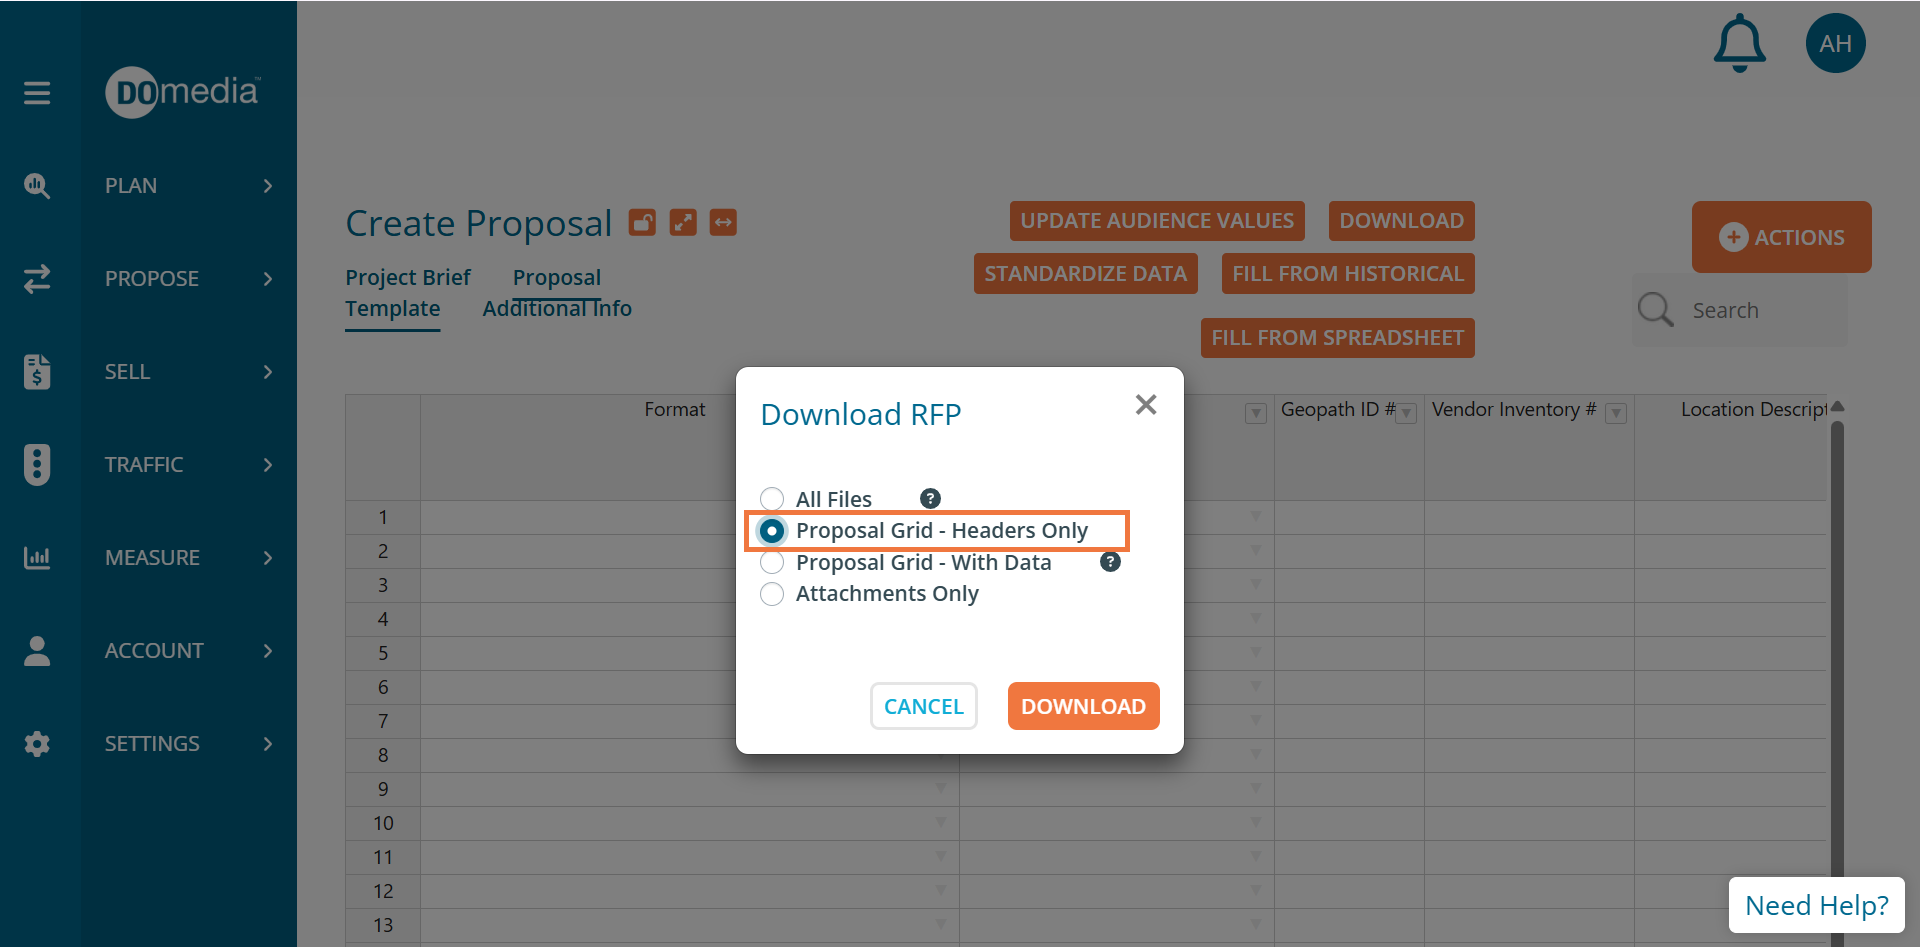
A .zip file will download to your computer. Click on the Zip file to extract the Excel spreadsheet and open.
Now, you can work your magic and add your proposal information under the appropriate column headers. Once complete, save the spreadsheet as an .XLS or .XLXS to a folder (that you'll be able to find) on your computer.
Go back into DOmedia to upload the saved spreadsheet by clicking Fill From Spreadsheet.
Choose the file from your computer and indicate whether to replace (overrides current data) or append your data (adds this data to the bottom of the existing data) to the current proposal data.
Click 'Upload Spreadsheet' to have your proposal data fill the proposal grid.

Option 3: Fill From Historical
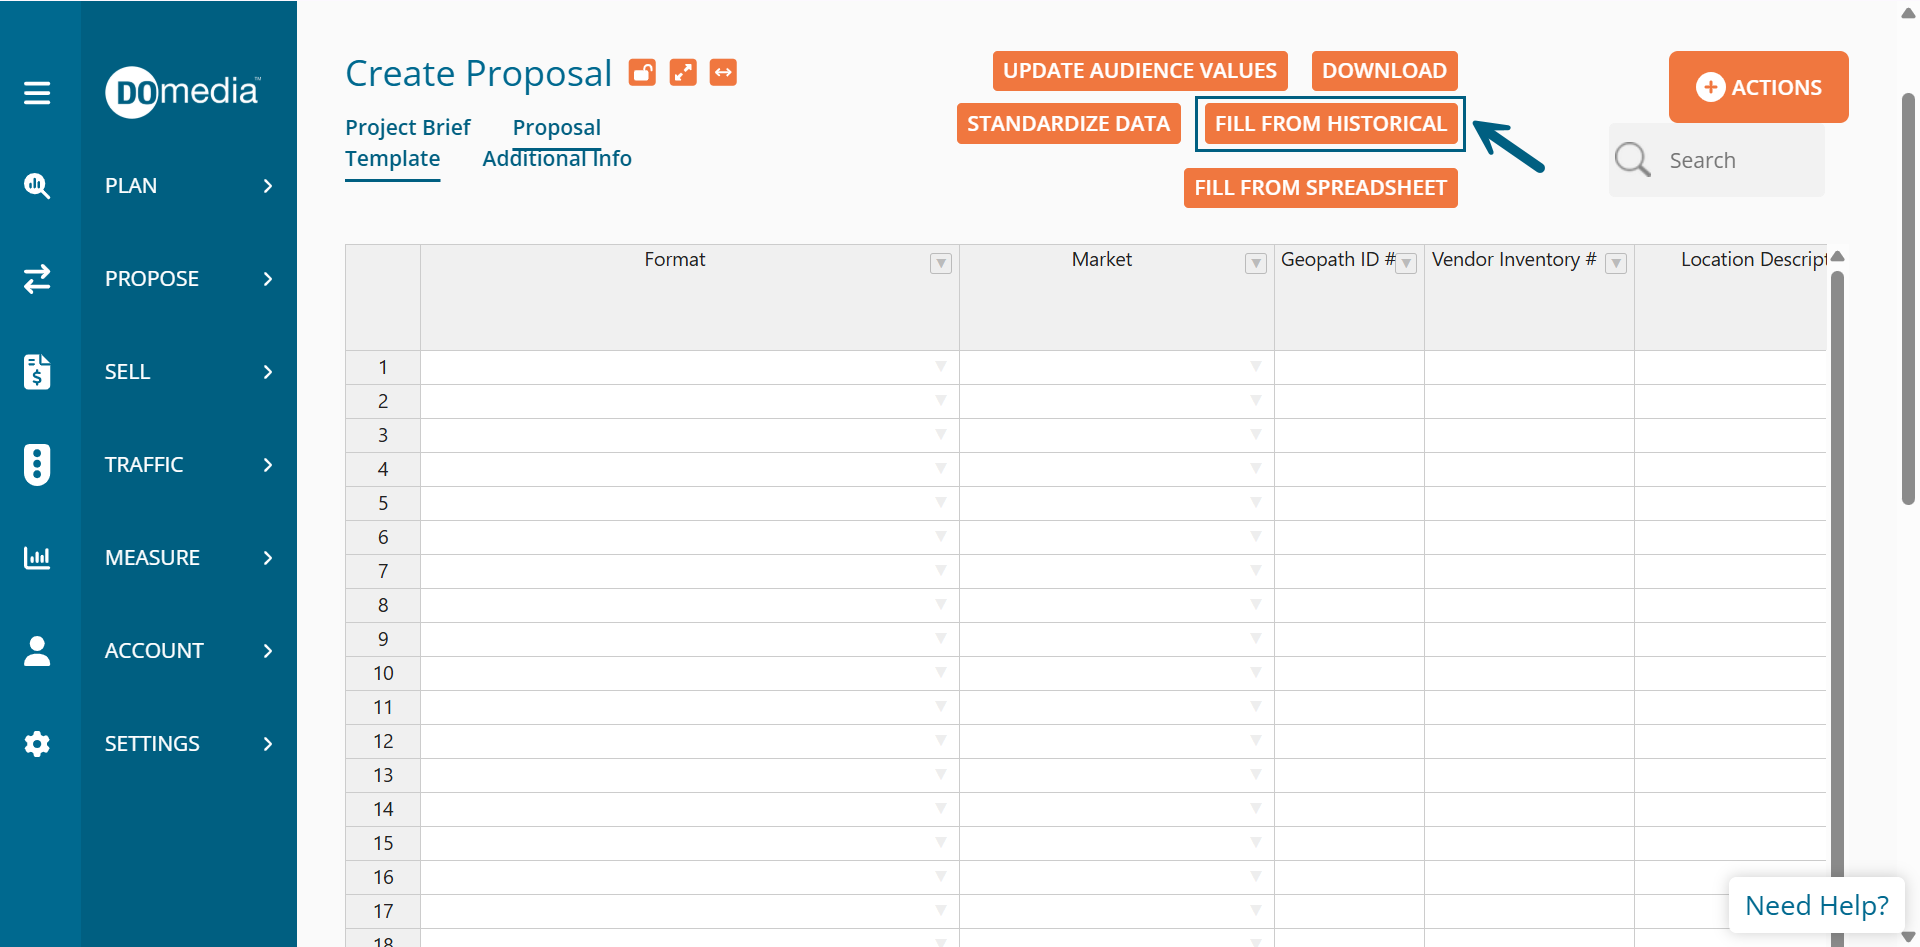
The Fill From Historical tool is a great way to fill out proposals and spend less time typing by using the information you've submitted in your proposals in the past. To start this process, click the Fill From Historical button.
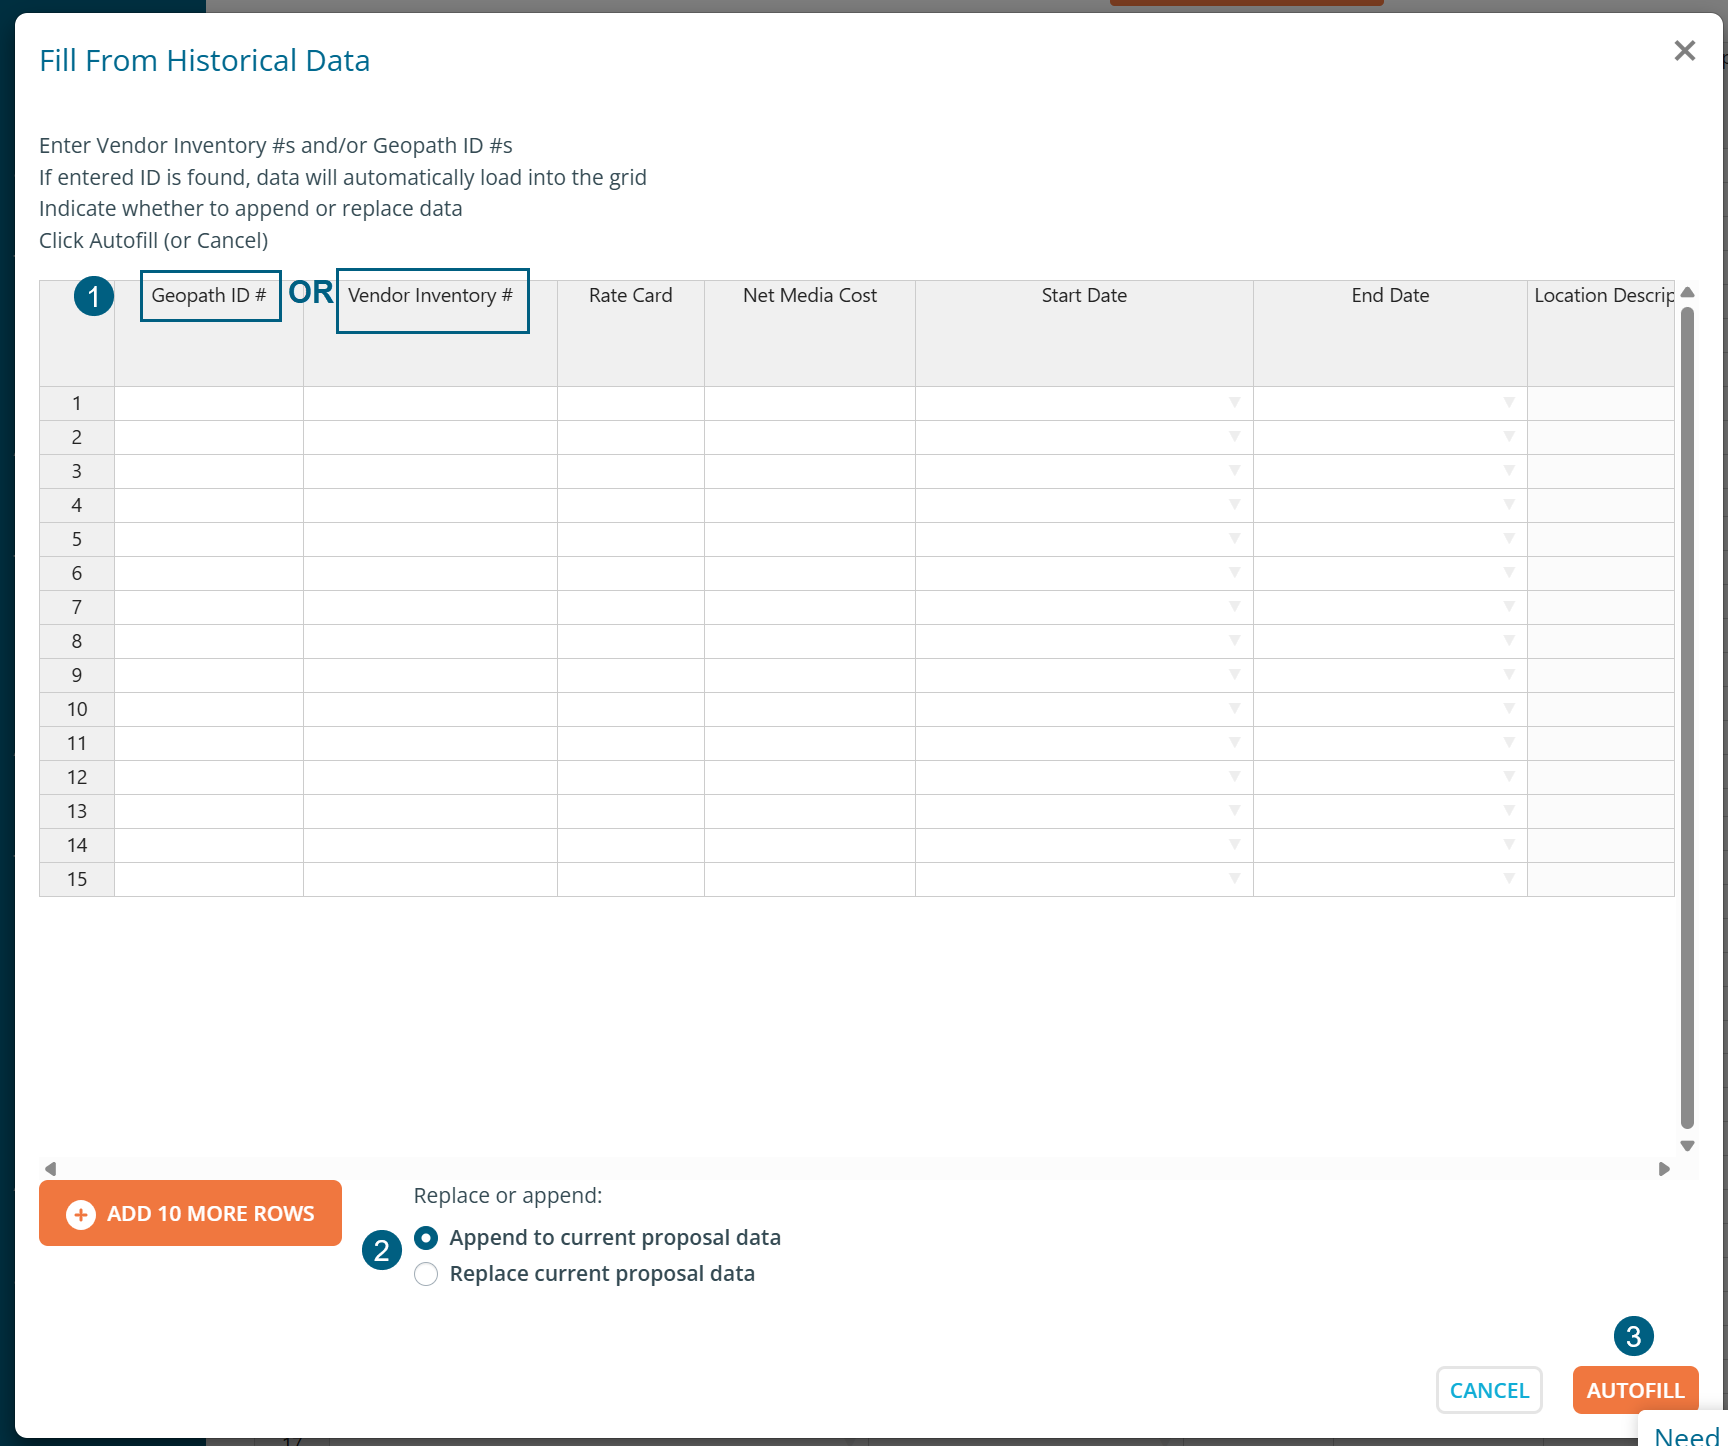
Now, enter the Geopath ID # (COMMB ID for Canadian vendors) or Vendor Inventory # associated with your inventory. You can confirm that the system recognizes what you've entered if the Location Description populates.
Start and End dates, as well as Rate Card/Cycle and Net Cost/Cycle can also be added under the appropriate columns.
Indicate whether to replace (overrides current data) or append your data (adds this data to the bottom of the existing data) to the current proposal data before clicking 'Autofill'. Note you can also add these additional fields later from the grid.
Option 4: Add to RFP via Inventory Search
For those users who have their inventory set up in the DOmedia system, units may be selected and added to a RFP proposal from Inventory Search. Please note that before you can use this method, you must click Save For Later from the bottom of Step 2.
After running a search of your inventory (Plan menu > Search option), to add specific units to a RFP from your search results, select the desired units and click 'Add to Proposal'.
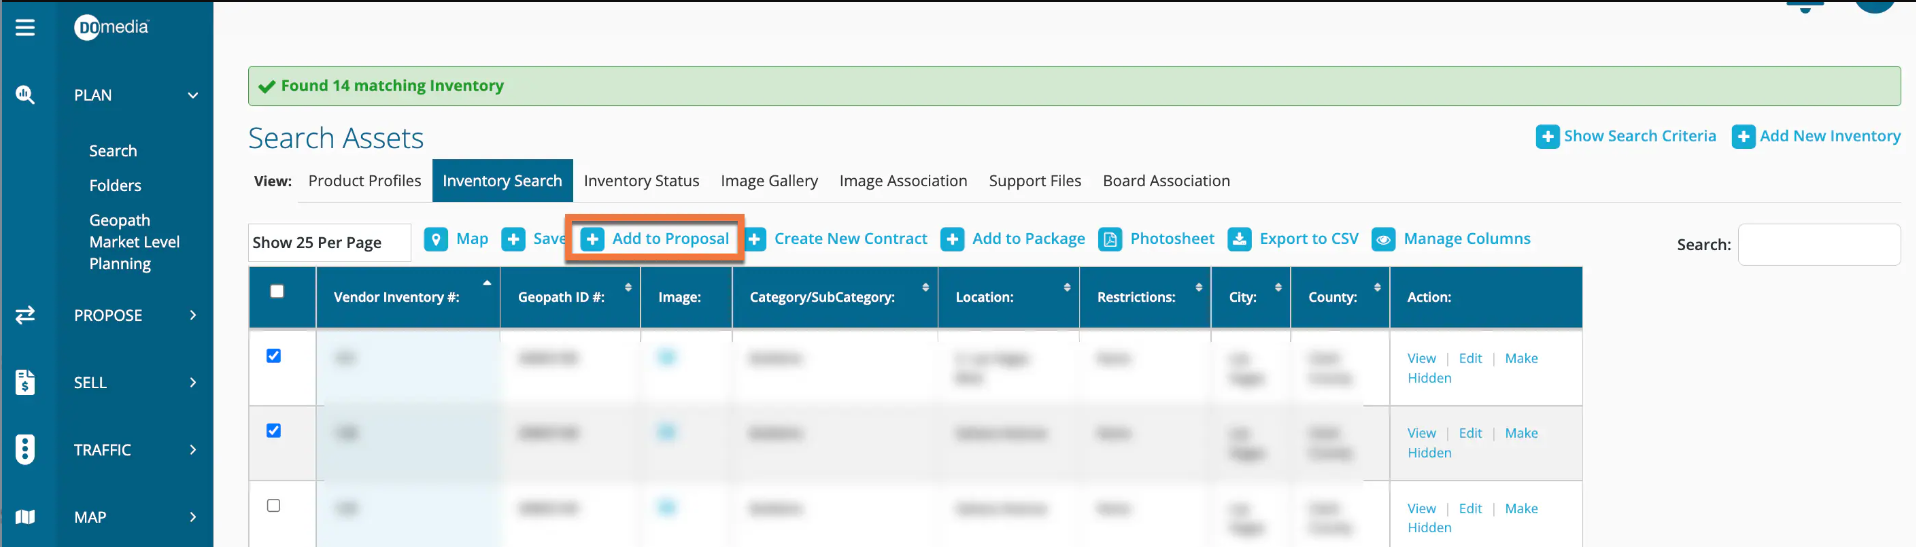
Under Add to Existing RFP, select the desired RFP and click 'Add to Existing RFP'.

Click here to find out more about what proposal information will automatically appear in the proposal grid.
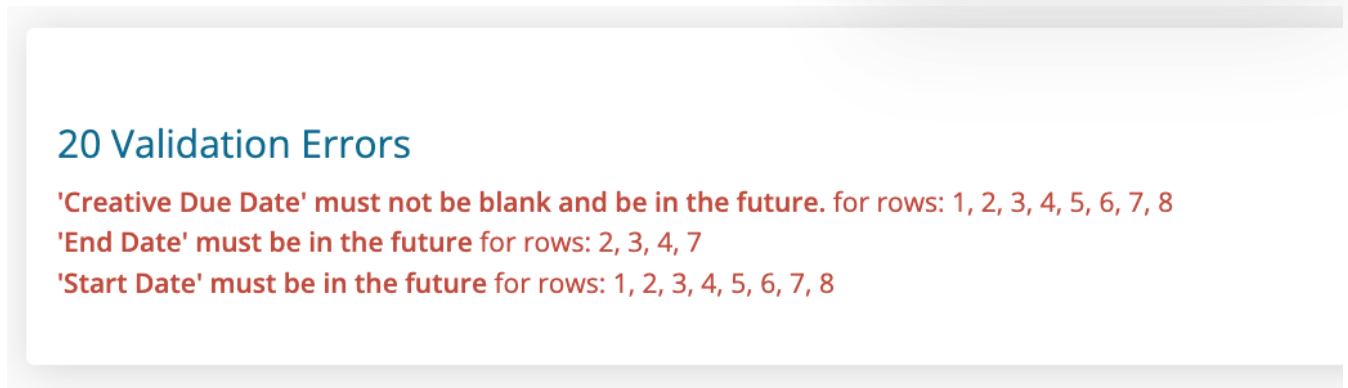
Once you have your proposal data in the grid, you may see a message that there are Validation Errors. This signifies that our system is finding a Validation Error within your data. Validation Errors occur when the data within a cell does not match a system response or accepted format.
For more information on correcting these, please see - How to fix Validation Errors
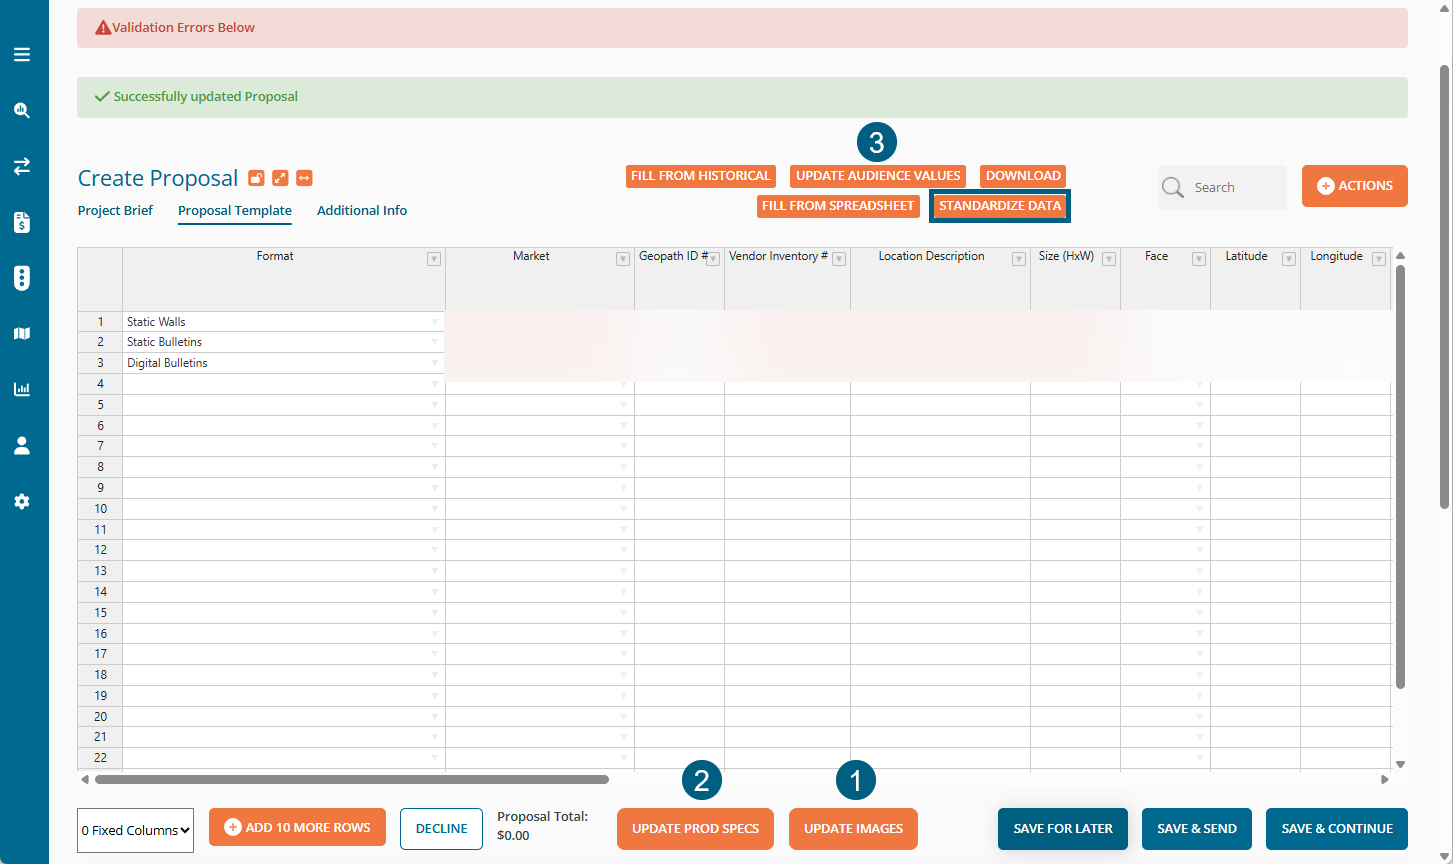
Extra Adds
After your proposal data is clean and looks good you can proceed to uploading images, prod specs, and Geopath data (if applicable). See the below support articles for more detailed help with these, although the buttons can be seen above and below the grid.
How to upload Images to an RFP
Once you have everything added and are happy with your proposal on Step 2, click 'Save for Later' or 'Save & Continue to come back to your work or move to Step 3. If you are confident you are ready to submit to the buyer, click Save & Send. Note if you have validation errors in your grid you may receive a popup alerting you to that and giving you the option to Proceed With Errors. However, some agencies do enforce strict validation on some fields. If this happens the popup will explain which fields need to be updated.
Create Proposal - Step 3: Additional Information
The last step of responding to a RFP is adding additional information to your proposal, such as attachments and other information or comments for the agency.
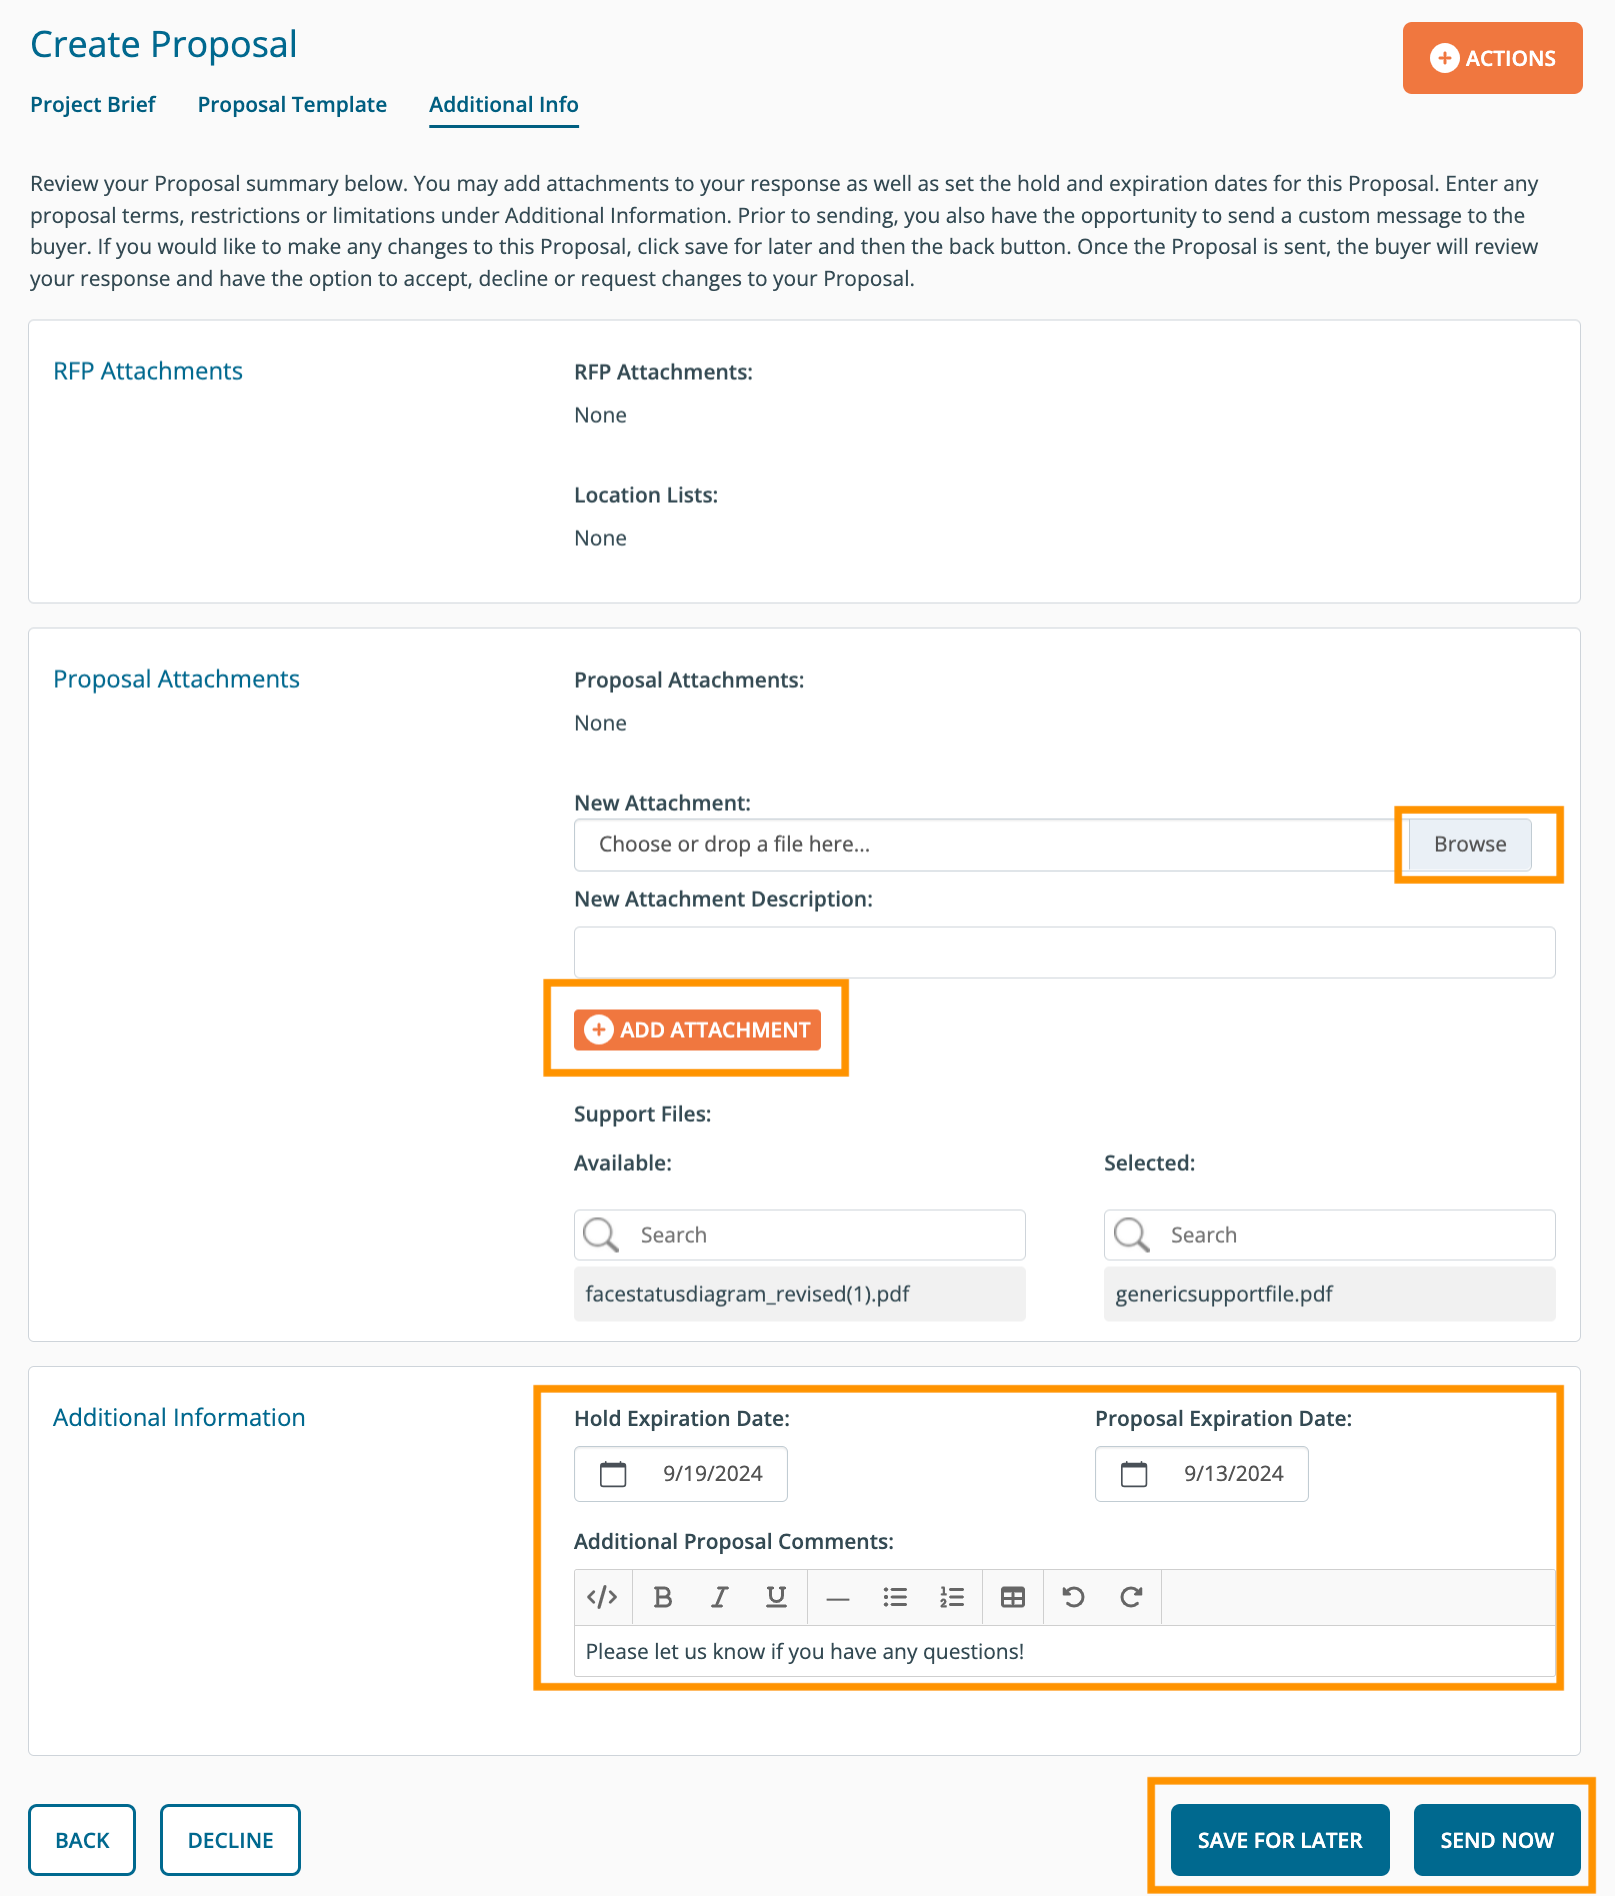
Once you have finished adding attachments and additional info, click 'Save For Later' to come back to your work later or 'Send Now' if you are ready to submit this to the buyer. You may receive a Validation Error pop up, you can choose to return to the data grid and fix the Validation Errors or proceed with errors. The buyer will then receive and email notification regarding your proposal submission.
You have completed responding to a RFP! If you are a paying seller you can reference this proposal at any time from the RFP Dashboard. If you are a free seller you will need to hold onto the email notification you received as it contains your link to the RFP.