
Seller: How to Add or Update Images on a RFP
Overview:
As a seller, you'll be able to add and update images within a RFP. This is a great way to show off each of your assets and make your inventory more appealing to buyers.
First, navigate to the RFP from the link included in the email notification you received or if you are a paying seller, from your RFP Dashboard (instructions below).
Click the left menu bar and drop down to 'Propose' and then click 'RFPs'. From the RFP Dashboard, click 'Inventory' under the Action column for the desired RFP.
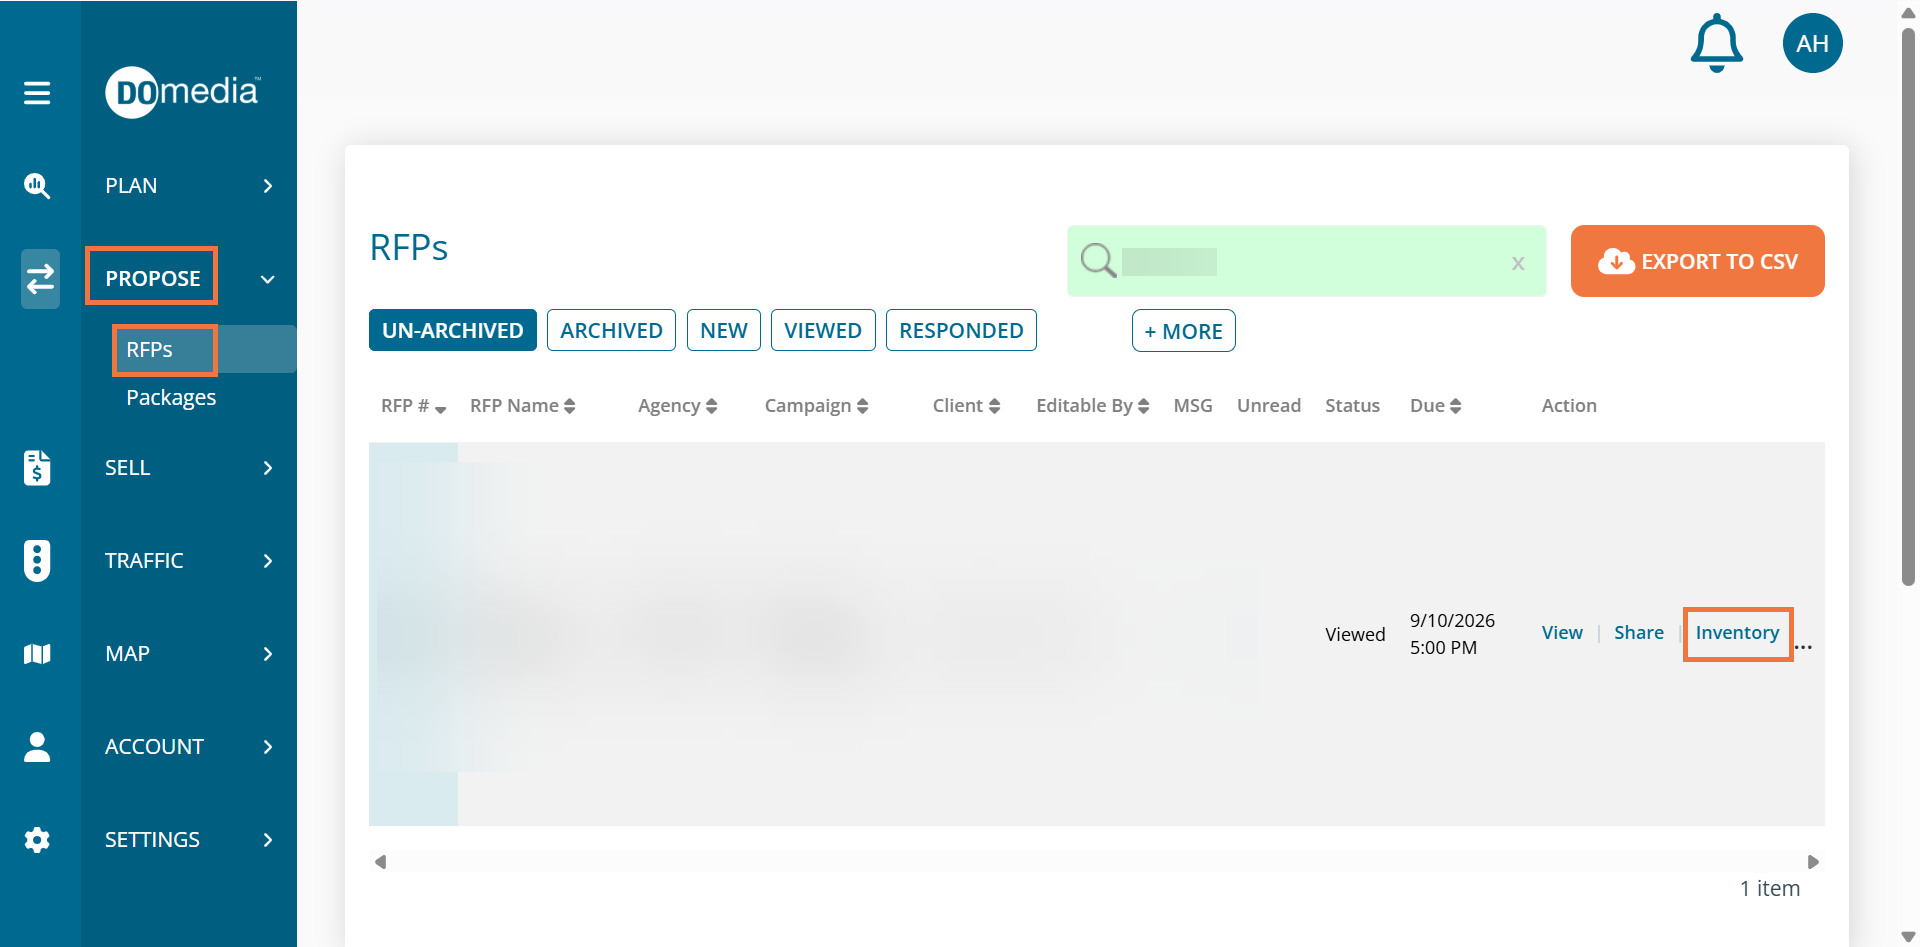
Note: If you are far enough along in working on the RFP, you will be able to jump right to the Images page by clicking the three dots in the action column and selecting Images.
If the agency has placed a strict validation on images for the RFP and there are units that are missing images, clicking Save & Continue will take you to where you can preview and upload the missing images.
If there is no image requirement or all units had images associated within your DOmedia inventory, clicking Save & Continue will automatically take you to the final page where you can add attachments or comments. You can click the Image tab in the upper left corner to go back to this page.

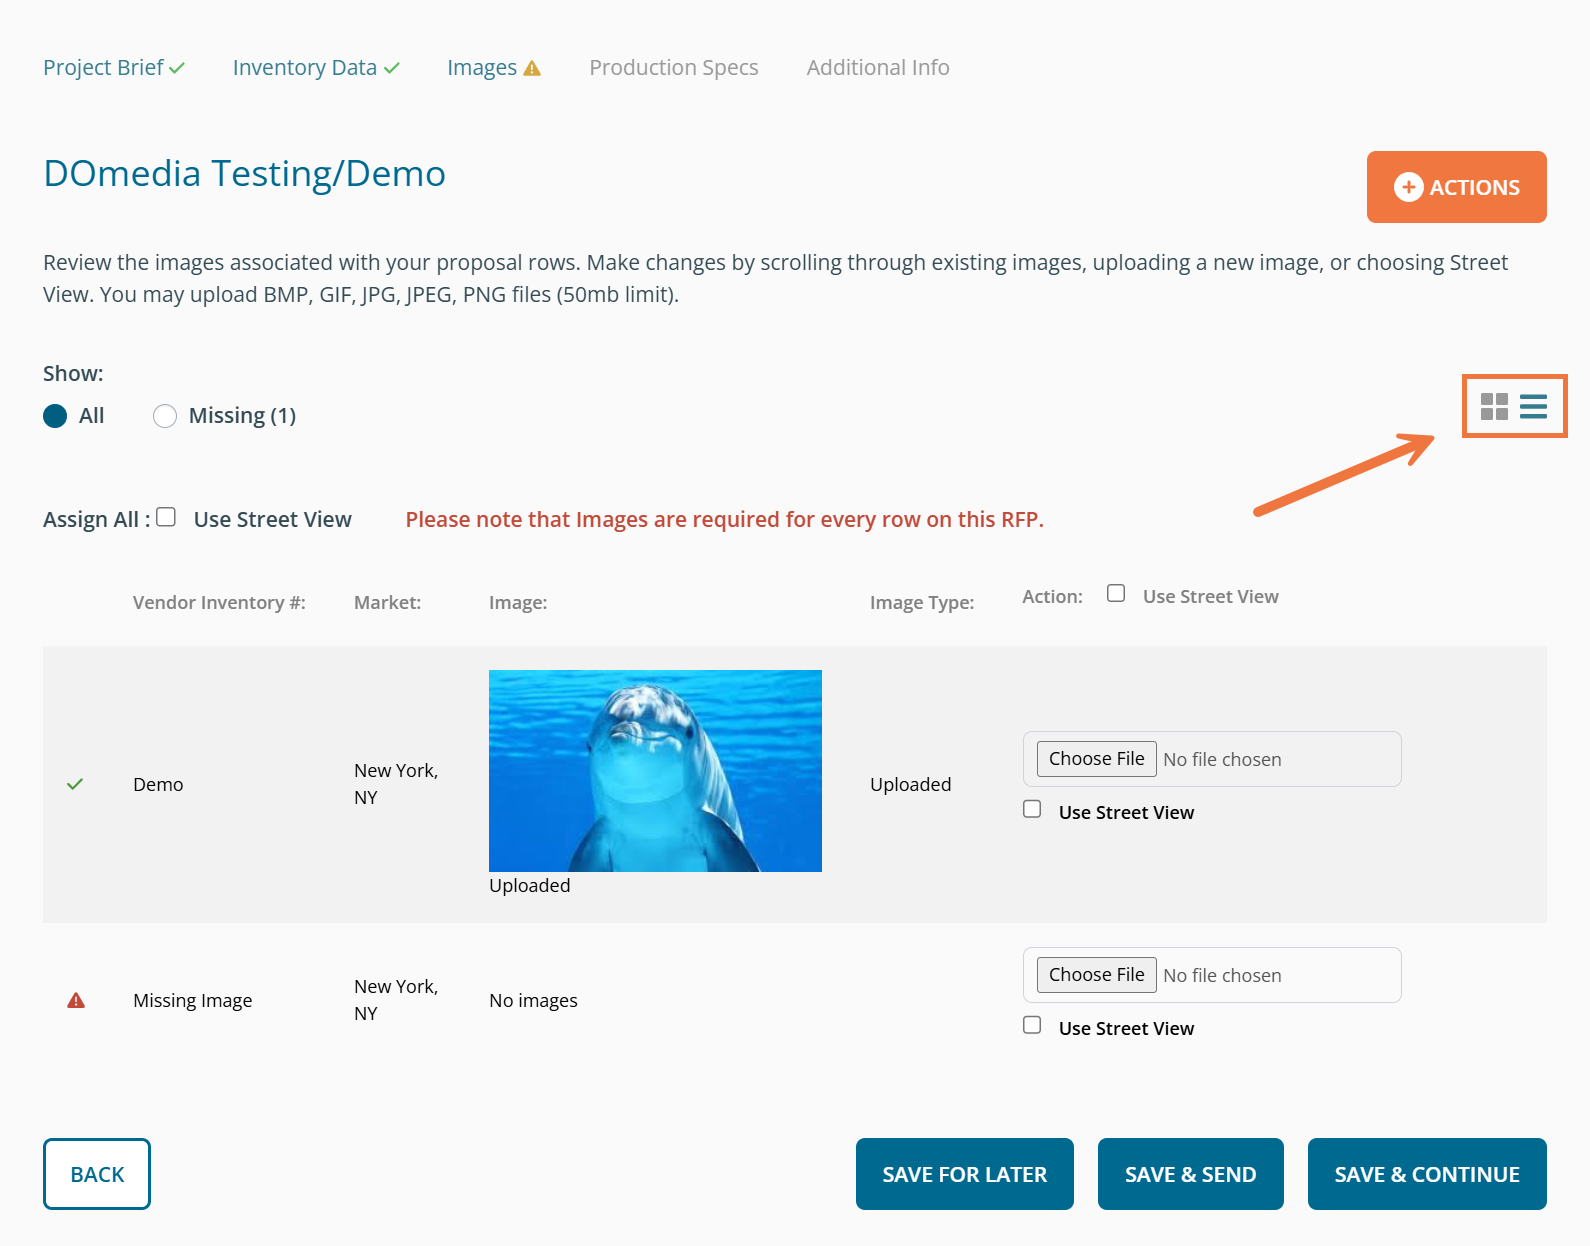
There will be a tile for each unit where you can preview their photos.
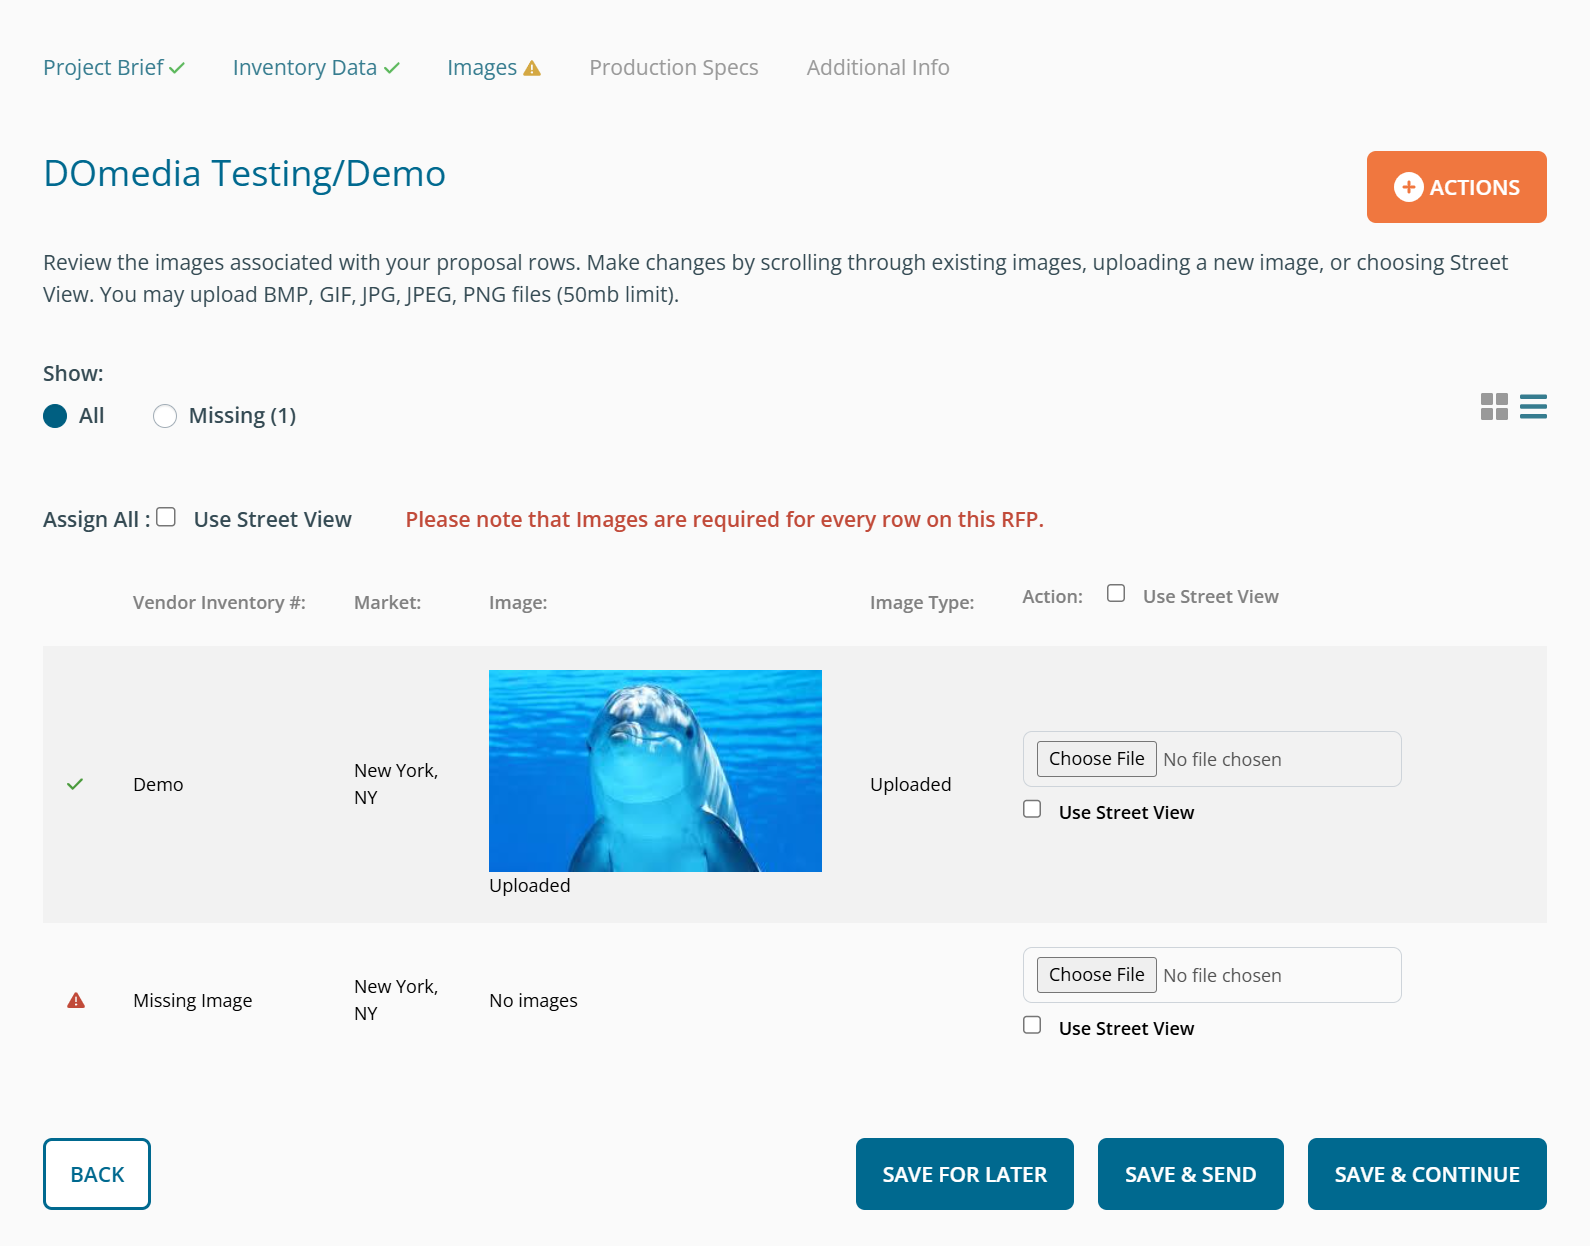
Units that are missing images will have a red triangle. Click Choose File to select an image from a computer. If your unit has a lat/long listed on the RFP, you can use Street View to pull an image.
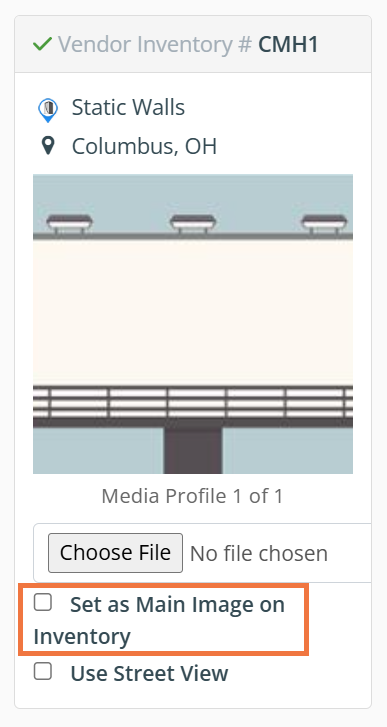
For units listed in your DOmedia inventory, you can upload a new photo on this step if you do not want to use the current one that is associated. Clicking Set as Main Image on Inventory will replace the current image associated.
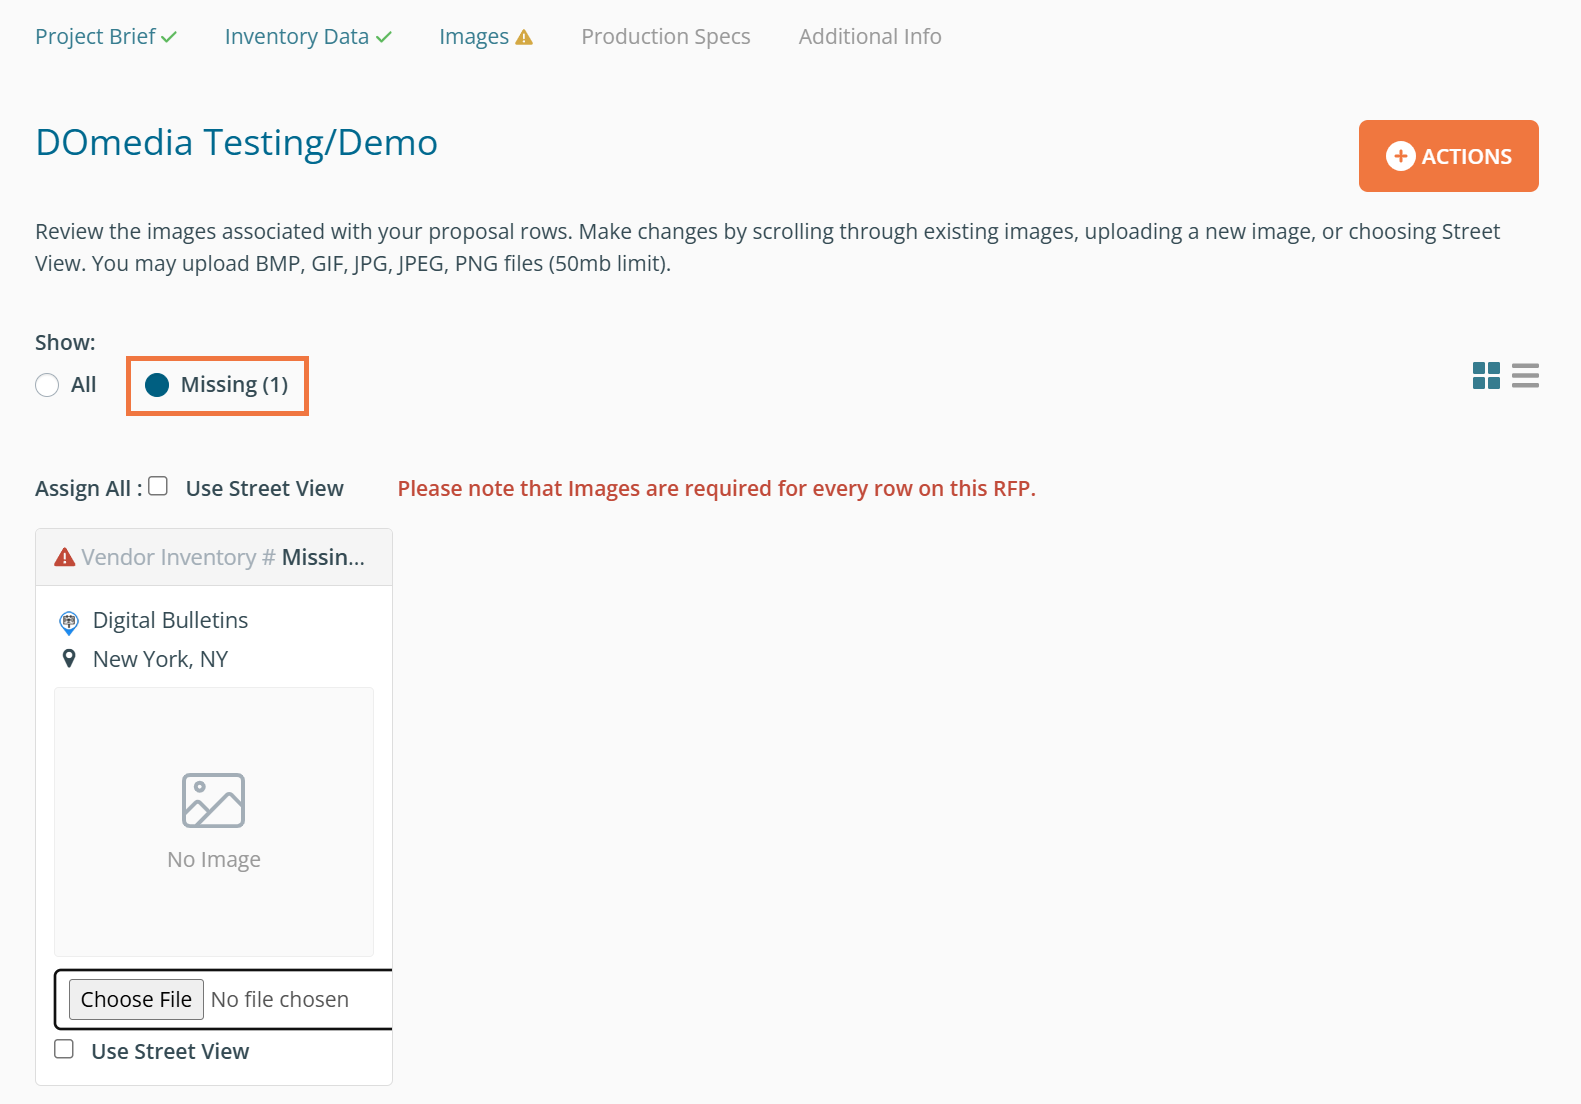
You can adjust the view to only show units which are missing the images as well.
You can also toggle between grid or list view by clicking the icons below the Actions button.
Make sure to click Save for Later to save progress as you are working or click Save & Continue to move to the next step.
