Buyer: Audience Planning Tool: Building Audiences
The audience planning tool allows you to compare inventory based on your target audience. This article highlights how to set up audiences.
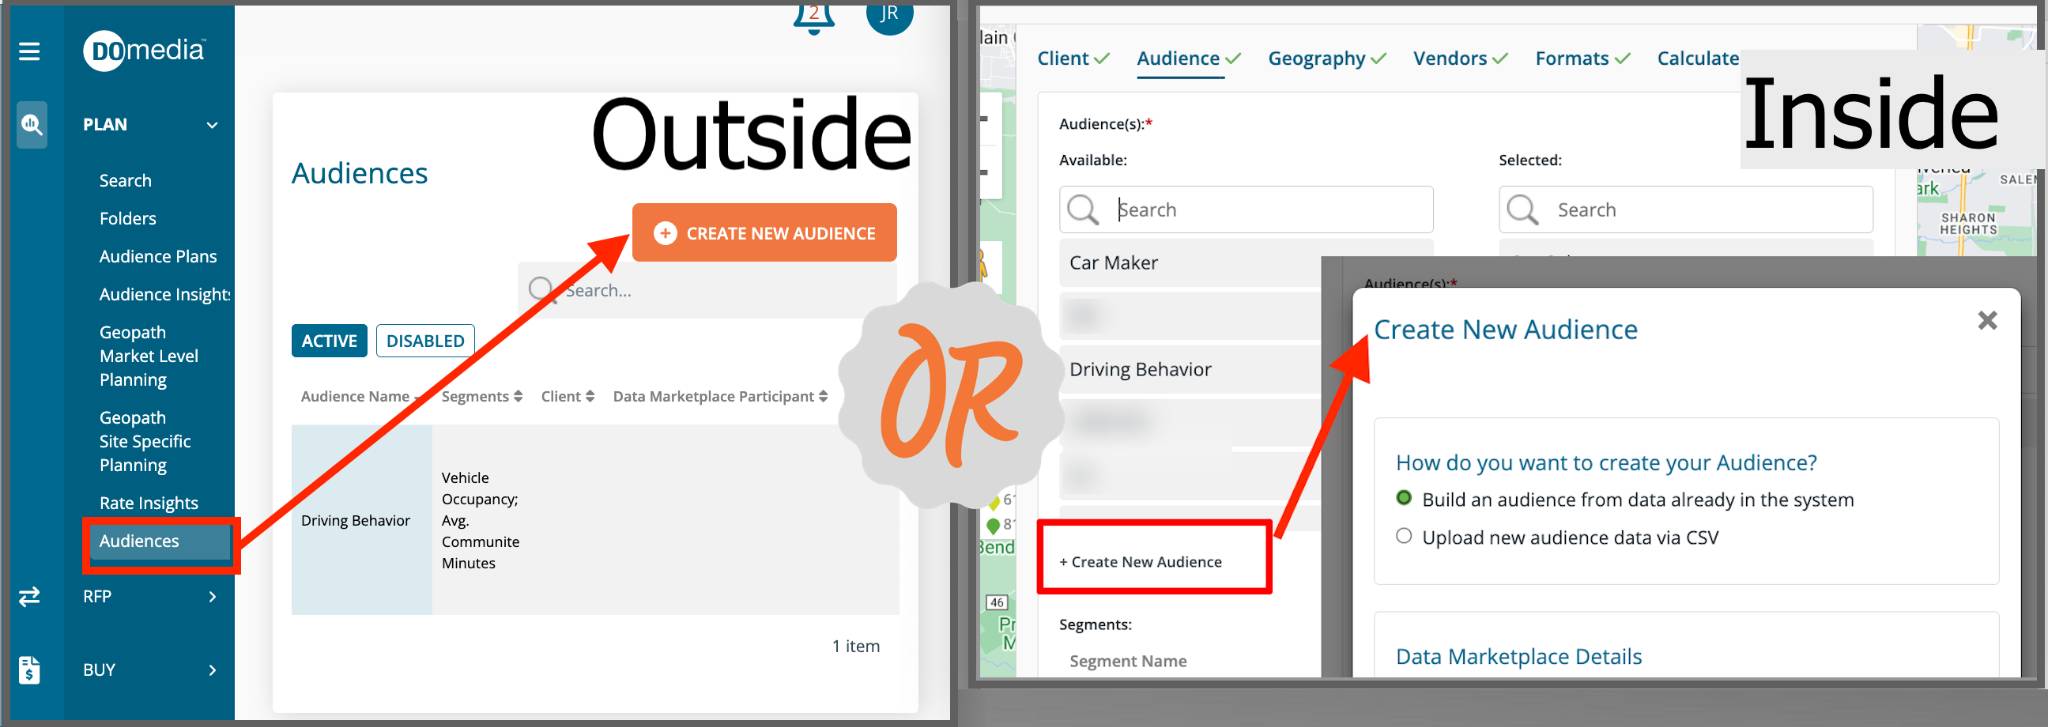
You can create audiences outside as well as directly inside of plans. Below is how audiences are created outside of plans.
There are two options to create audiences:
- Option 1: Group individual audience segments together via Data Providers (e.g. Geopath)
- Option 2: Upload custom audience data from spreadsheets.
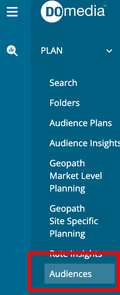
1. In navigation click Plan > Audiences
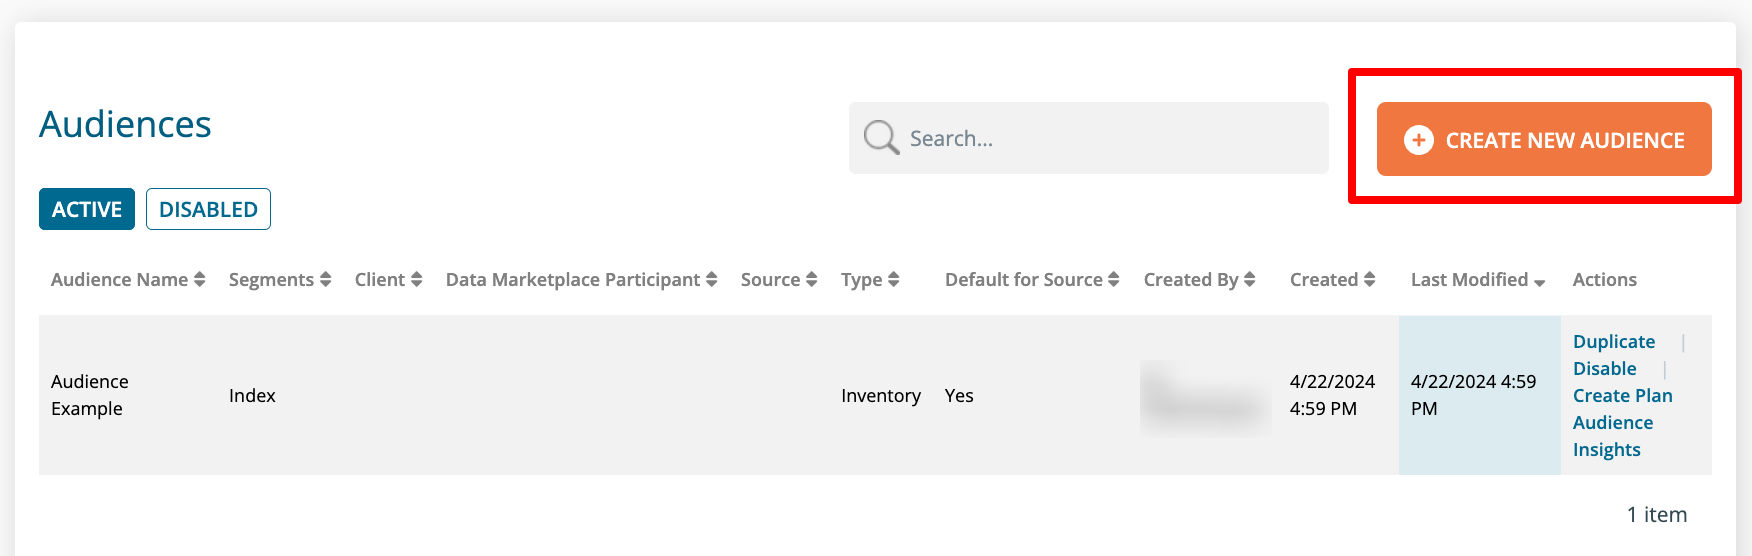
2. On the audiences list you will see audiences all audiences you have access to based on your client permissions. Click Create New Audience:
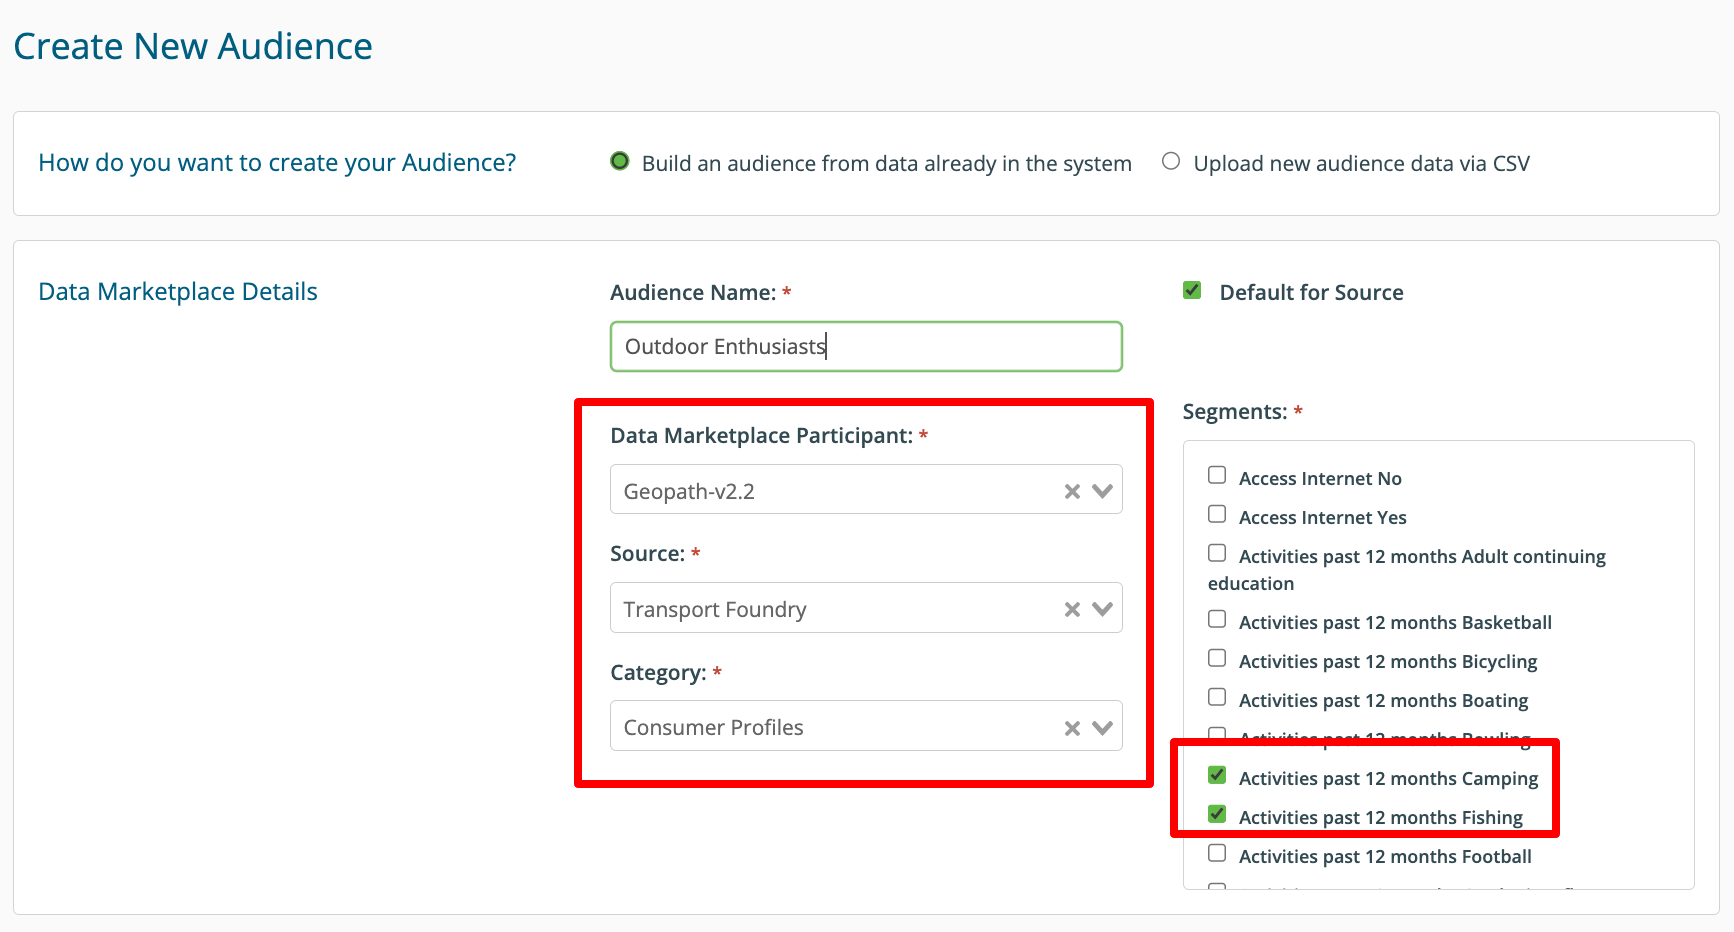
3. When creating an audience determine whether your audience will be based on data already available in DOmedia from a data provider such as Geopath or if it needs to be uploaded.
Option 1: How to create an audience from data providers:
- Give your audience a name. This is the label that will appear on your plans.
- Select a Data Marketplace Participant (data provider). If there is a data provider you would like to have access to that you do not see in this list, reach out to agency support.
- Select a source (where the audience data comes from) and category (a group of related audience segments)
- Finally, select the individual segments that will comprise your audience.
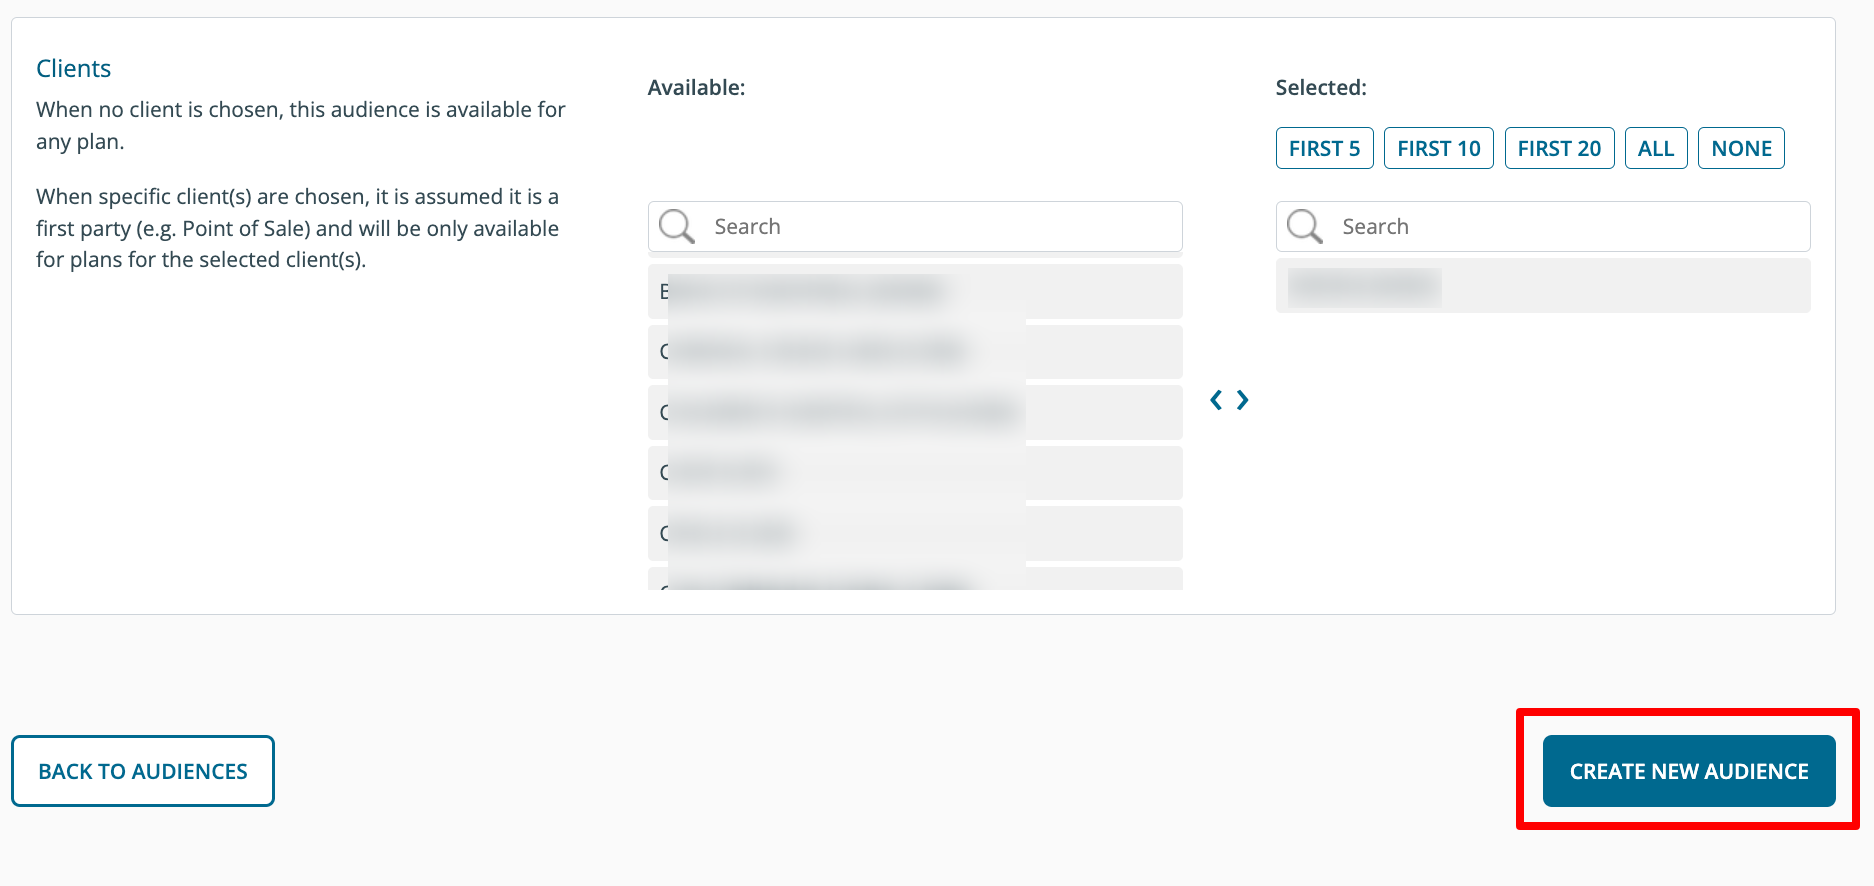
4. Determine whether your target audience should be available to all clients. By default, this audience will be available to all coworkers. If you chose a specific client only coworkers authorized on that client will see the audience you're creating:
Click Create New Audience:
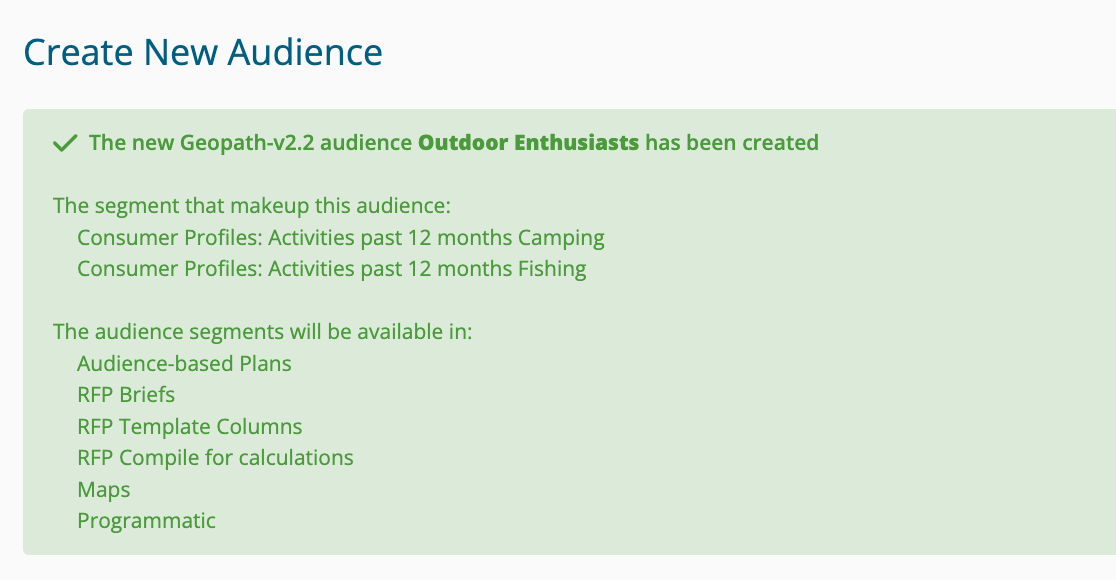
5. You will see a success message:
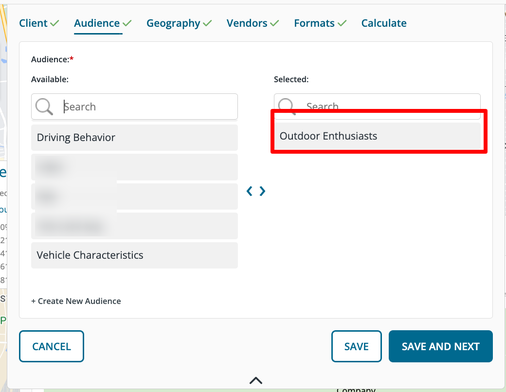
6. You will see your new audience(s) available when planning:
Option 2: How to upload new audience data via CSV:
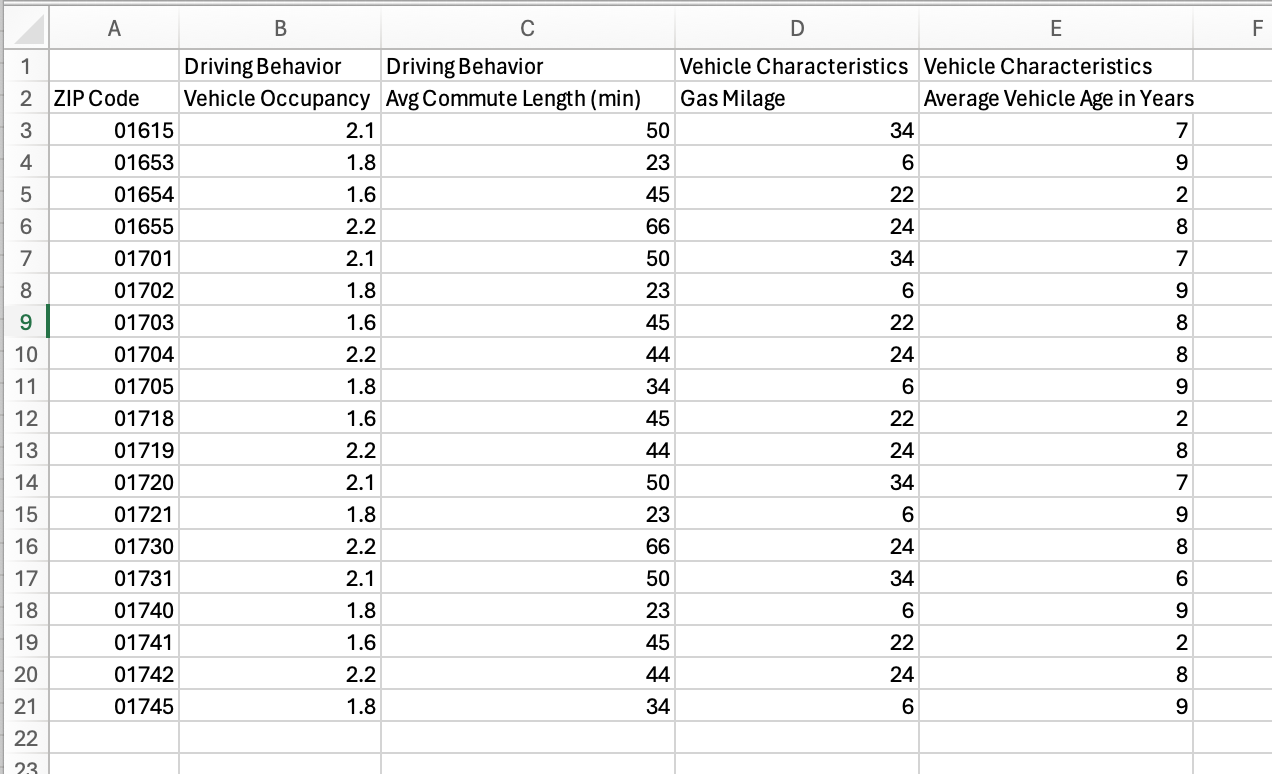
Three types of data can be uploaded:
- Raw numbers - will be indexed by the system (e.g. impressions, minutes)
- Indexed numbers - will not be manipulated (e.g. brand affinity rating)
- Text - simply appears in the plan results

- Select upload new audience data via CSV.
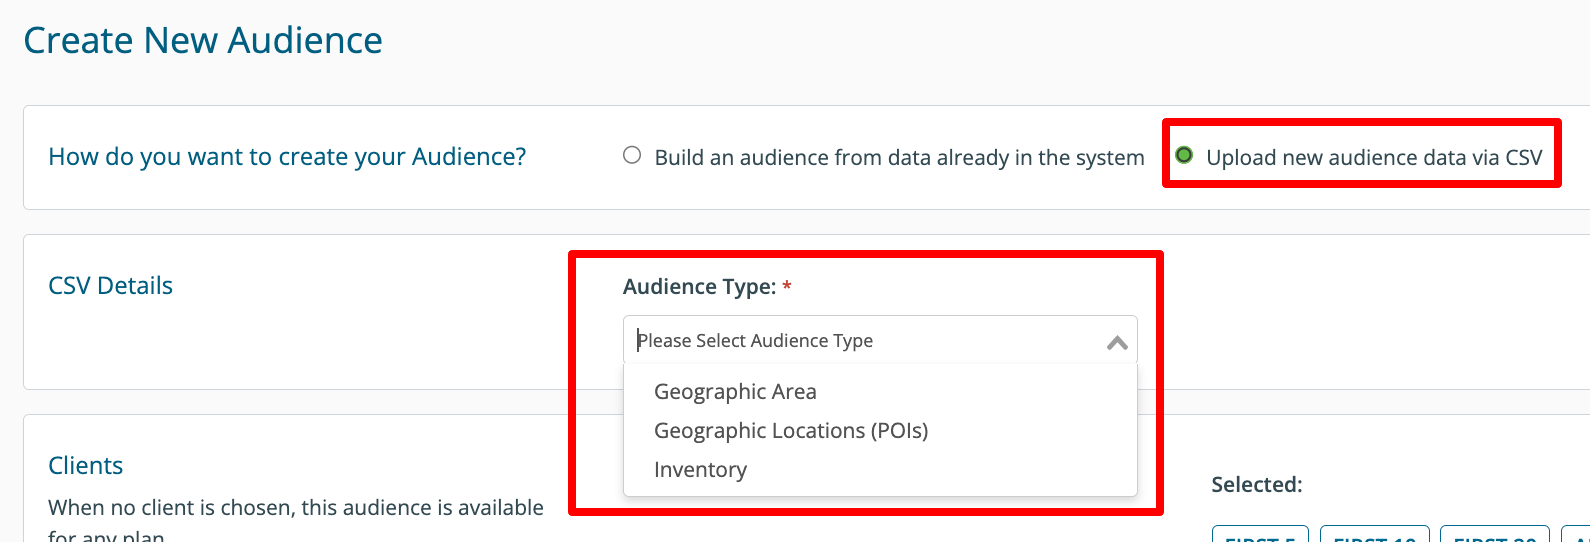
2. Determine what type of audience data you have. Select either Geographic Area, Geographic Locations (POIs) or Inventory. Each geographic area has its own specific template.
- Geographic Area options include ZIP Code, CSBA, County, DMA, or US State.
- This option is great for describing areas in aggregate such as voting behavior and unemployment rates.
- Geographic Locations (POIs) include Target Locations, Addresses, and Lat/Longs
- This option is great for clients' point-of-sale data and geofencing
- Inventory options include Campaign- Contracts, Campaign- RFPs and DOmedia Asset IDs.
- DOmedia Asset IDs are a unique identifier in DOmedia. It is different than Vendor Inv # and Geopath ID. If you need help finding the DOmedia Asset IDs, reach out to agency support.
3. Download the corresponding template:
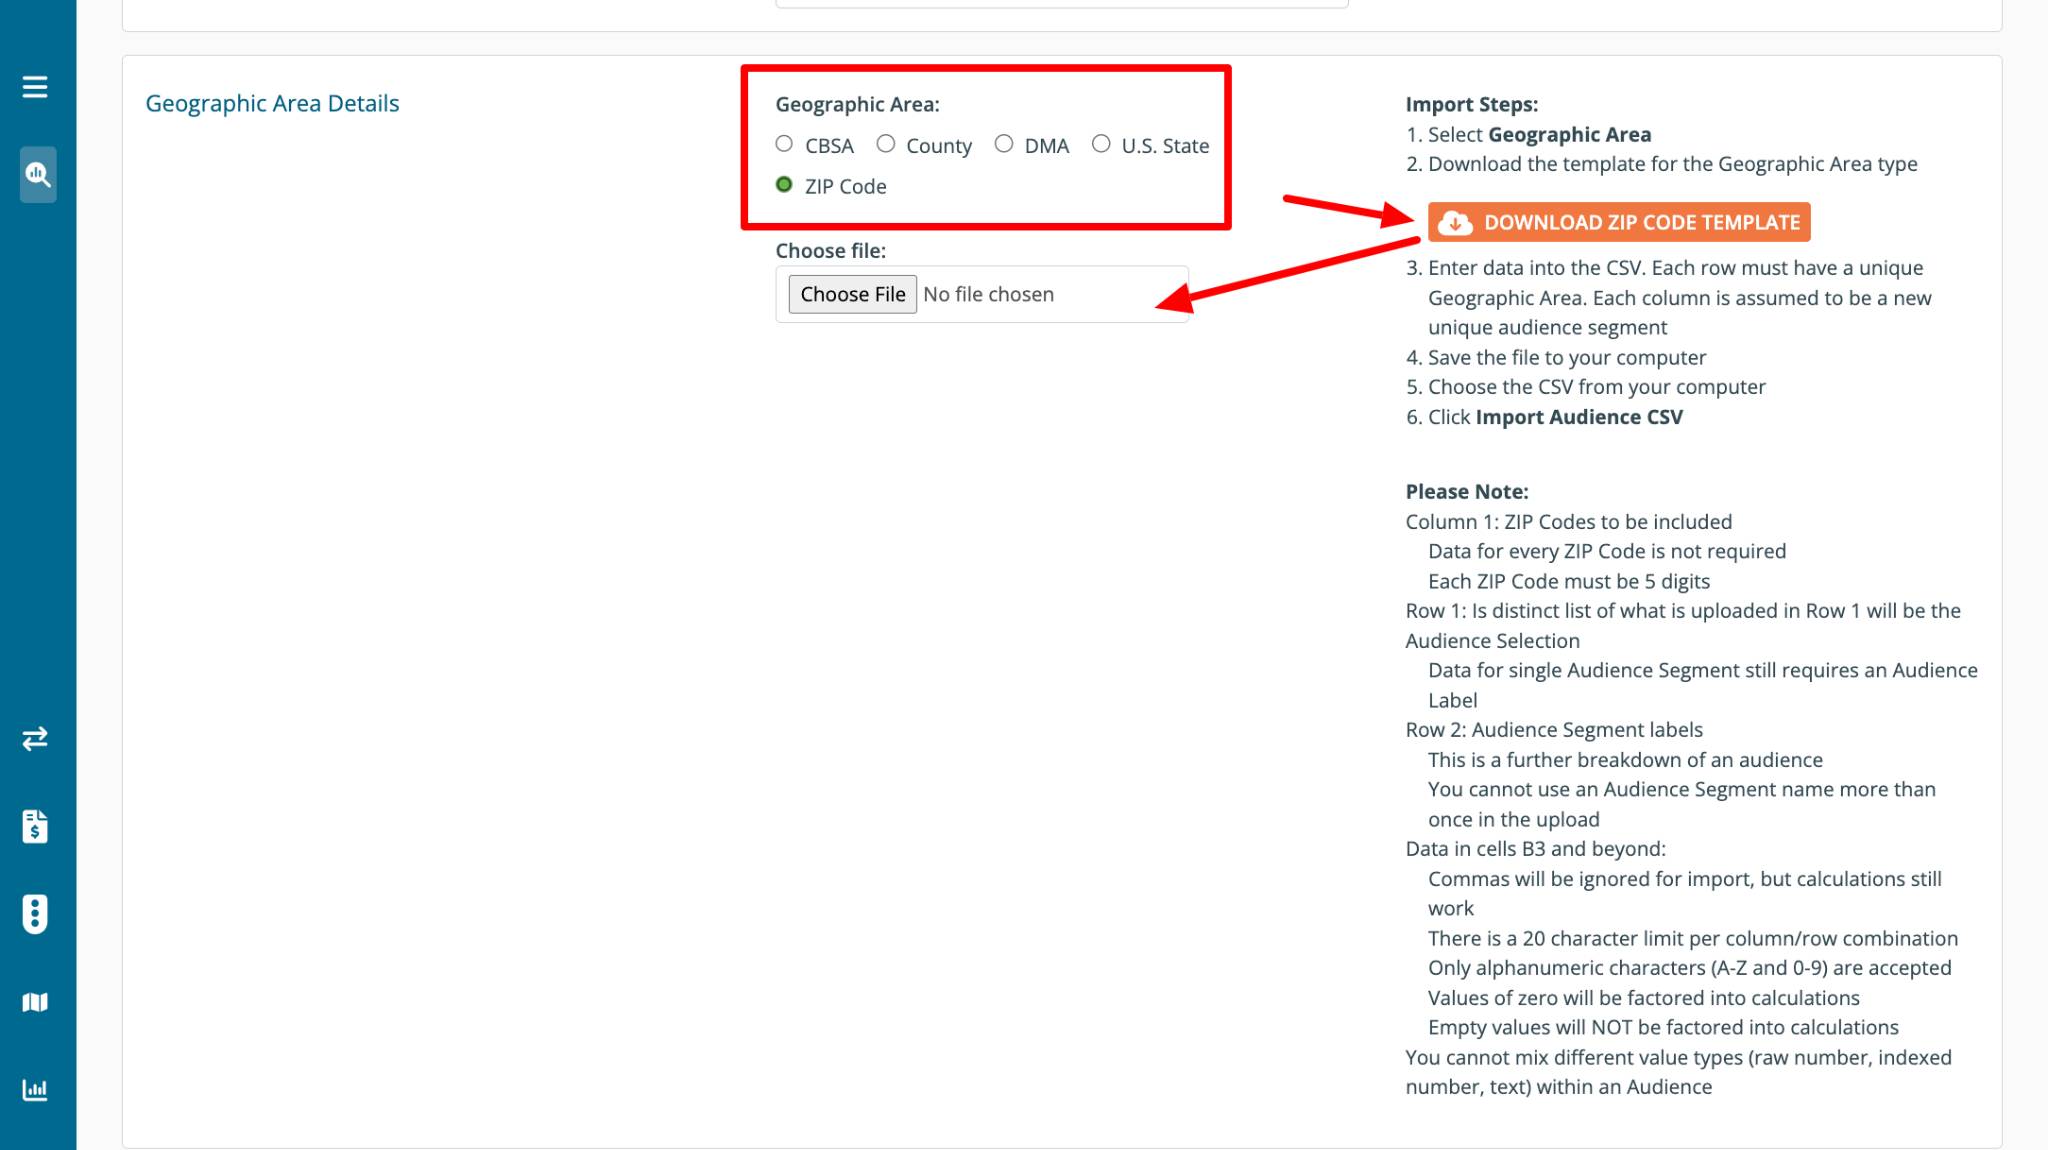
- ZIP Code example: if you have 3rd party data about the vehicle occupancy (avg # of people per vehicle) at the ZIP code level, select ZIP Code.
- Tip for ZIP Codes: Excel sometimes removes leading zeros. If you have a ZIP code that is less than 5 numbers, the system will put zeros at the front of the ZIP code.
Key Concept - when uploading audience data: Rows are the locations/areas and Columns are the audiences
4. Move your data into the template carefully following the instructions on-screen to ensure proper ingestion:
5. Save the file to your computer.
6. Click Choose File and select the file from your computer
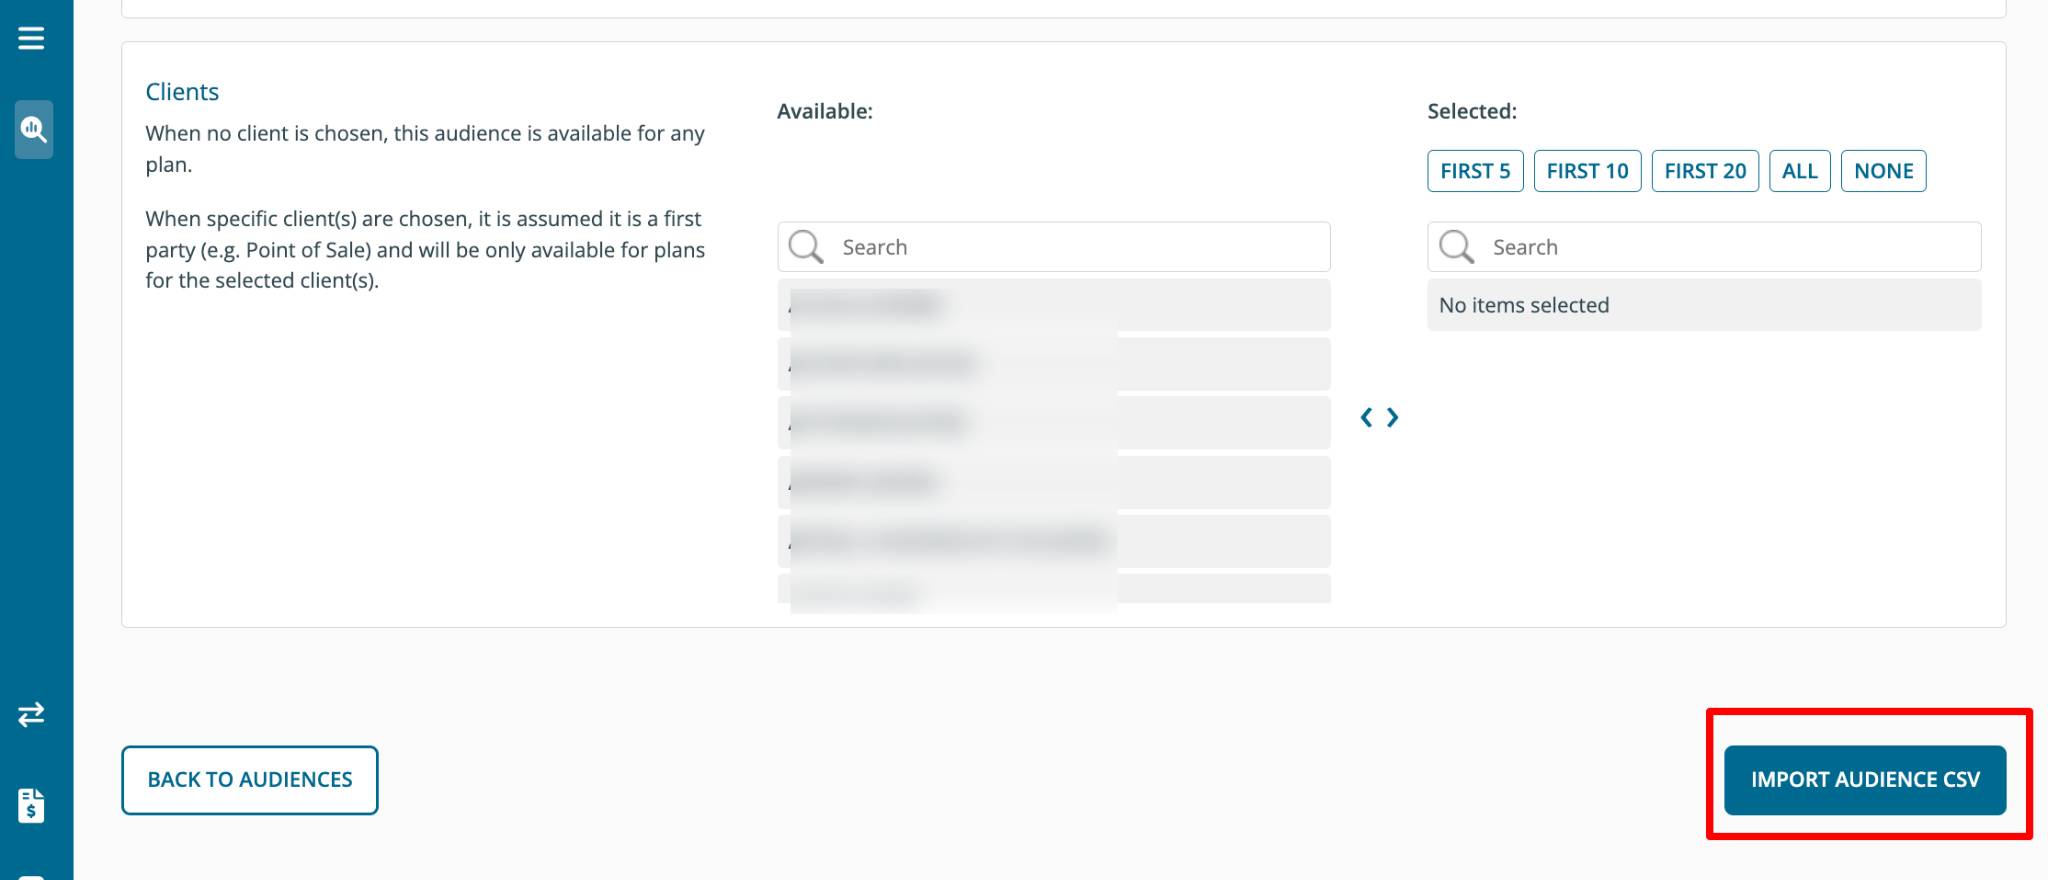
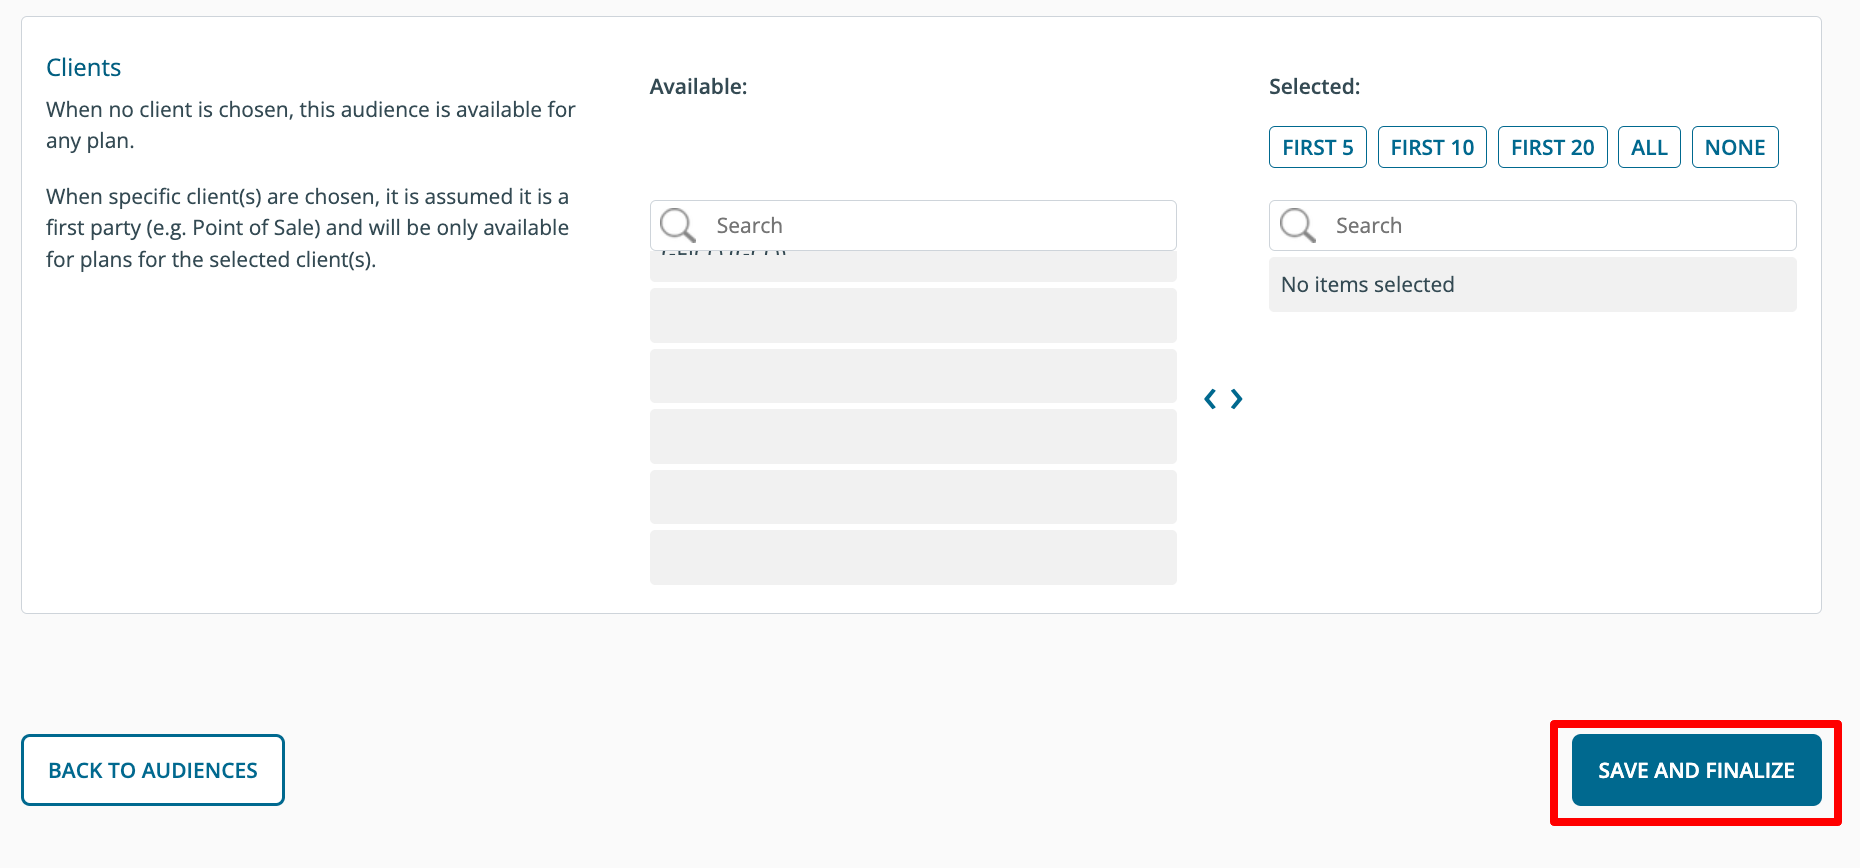
7. Determine whether your target audience should be available to all clients. By default, this audience will be available to all coworkers. If you chose a specific client only coworkers authorized on that client will see the audience you're creating:
8. Click Import Audience CSV:
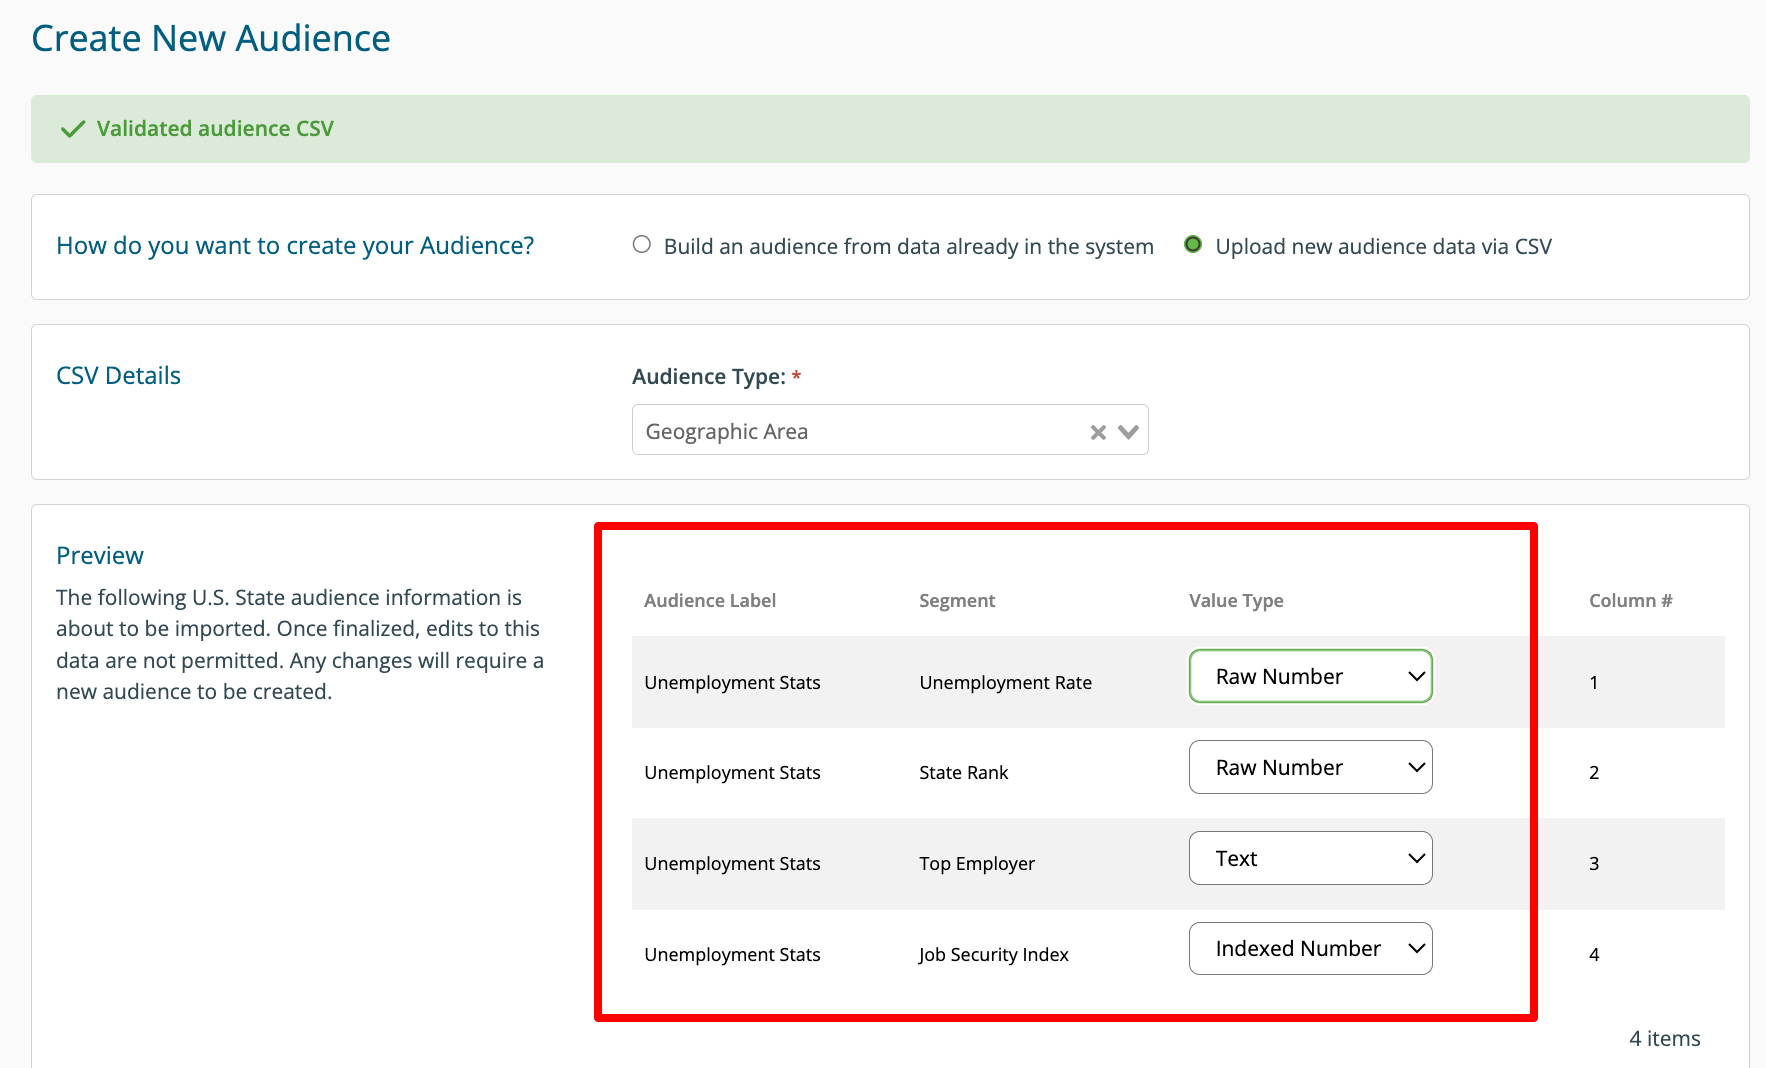
8. Use Preview to confirm your audience labels and segments are grouped properly. Confirm your value types are set up correctly for calculations. Raw Numbers will be indexed for you. Index Numbers will be preserved as-is. Text will display and not affect calculations.
9. Click Save and Finalize:
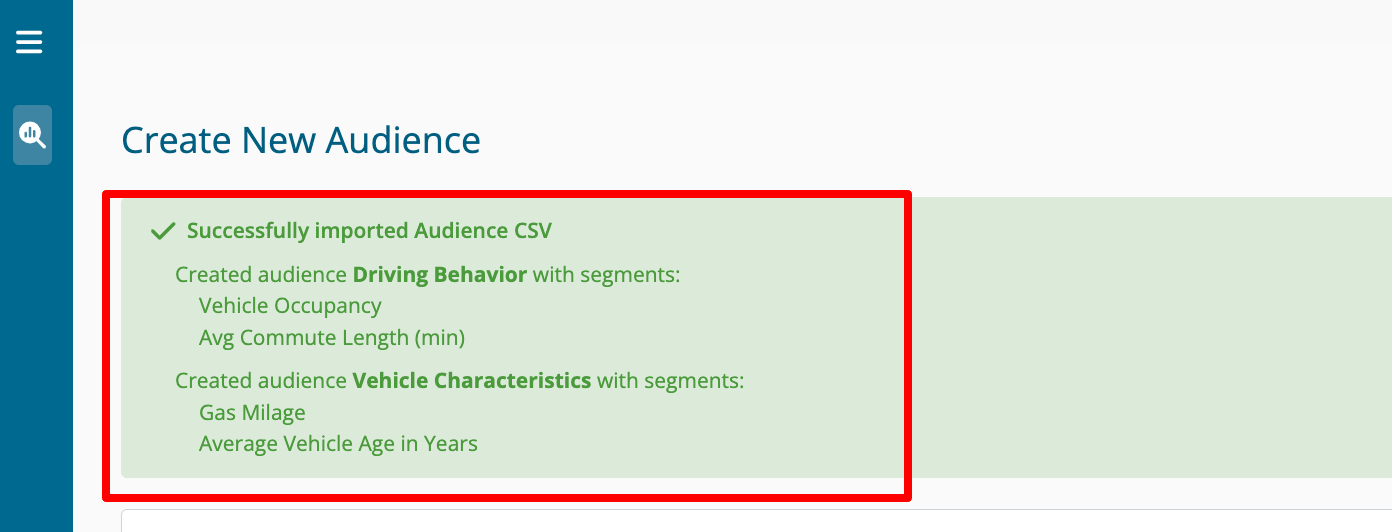
10. You will see a success message:
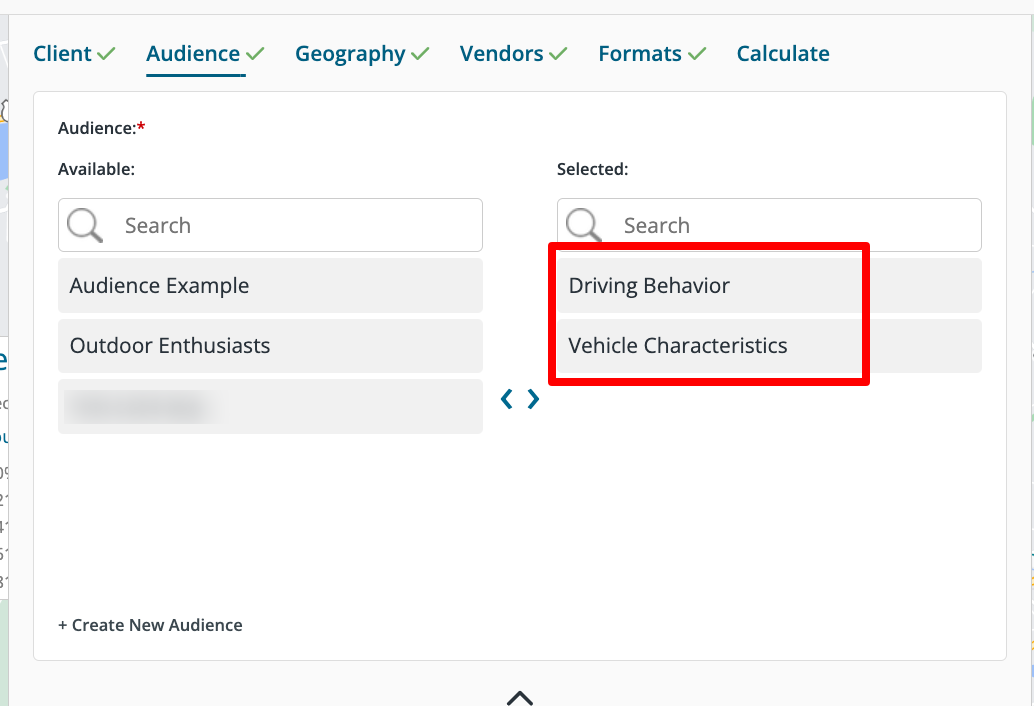
11. You will see your new audience(s) available when planning:
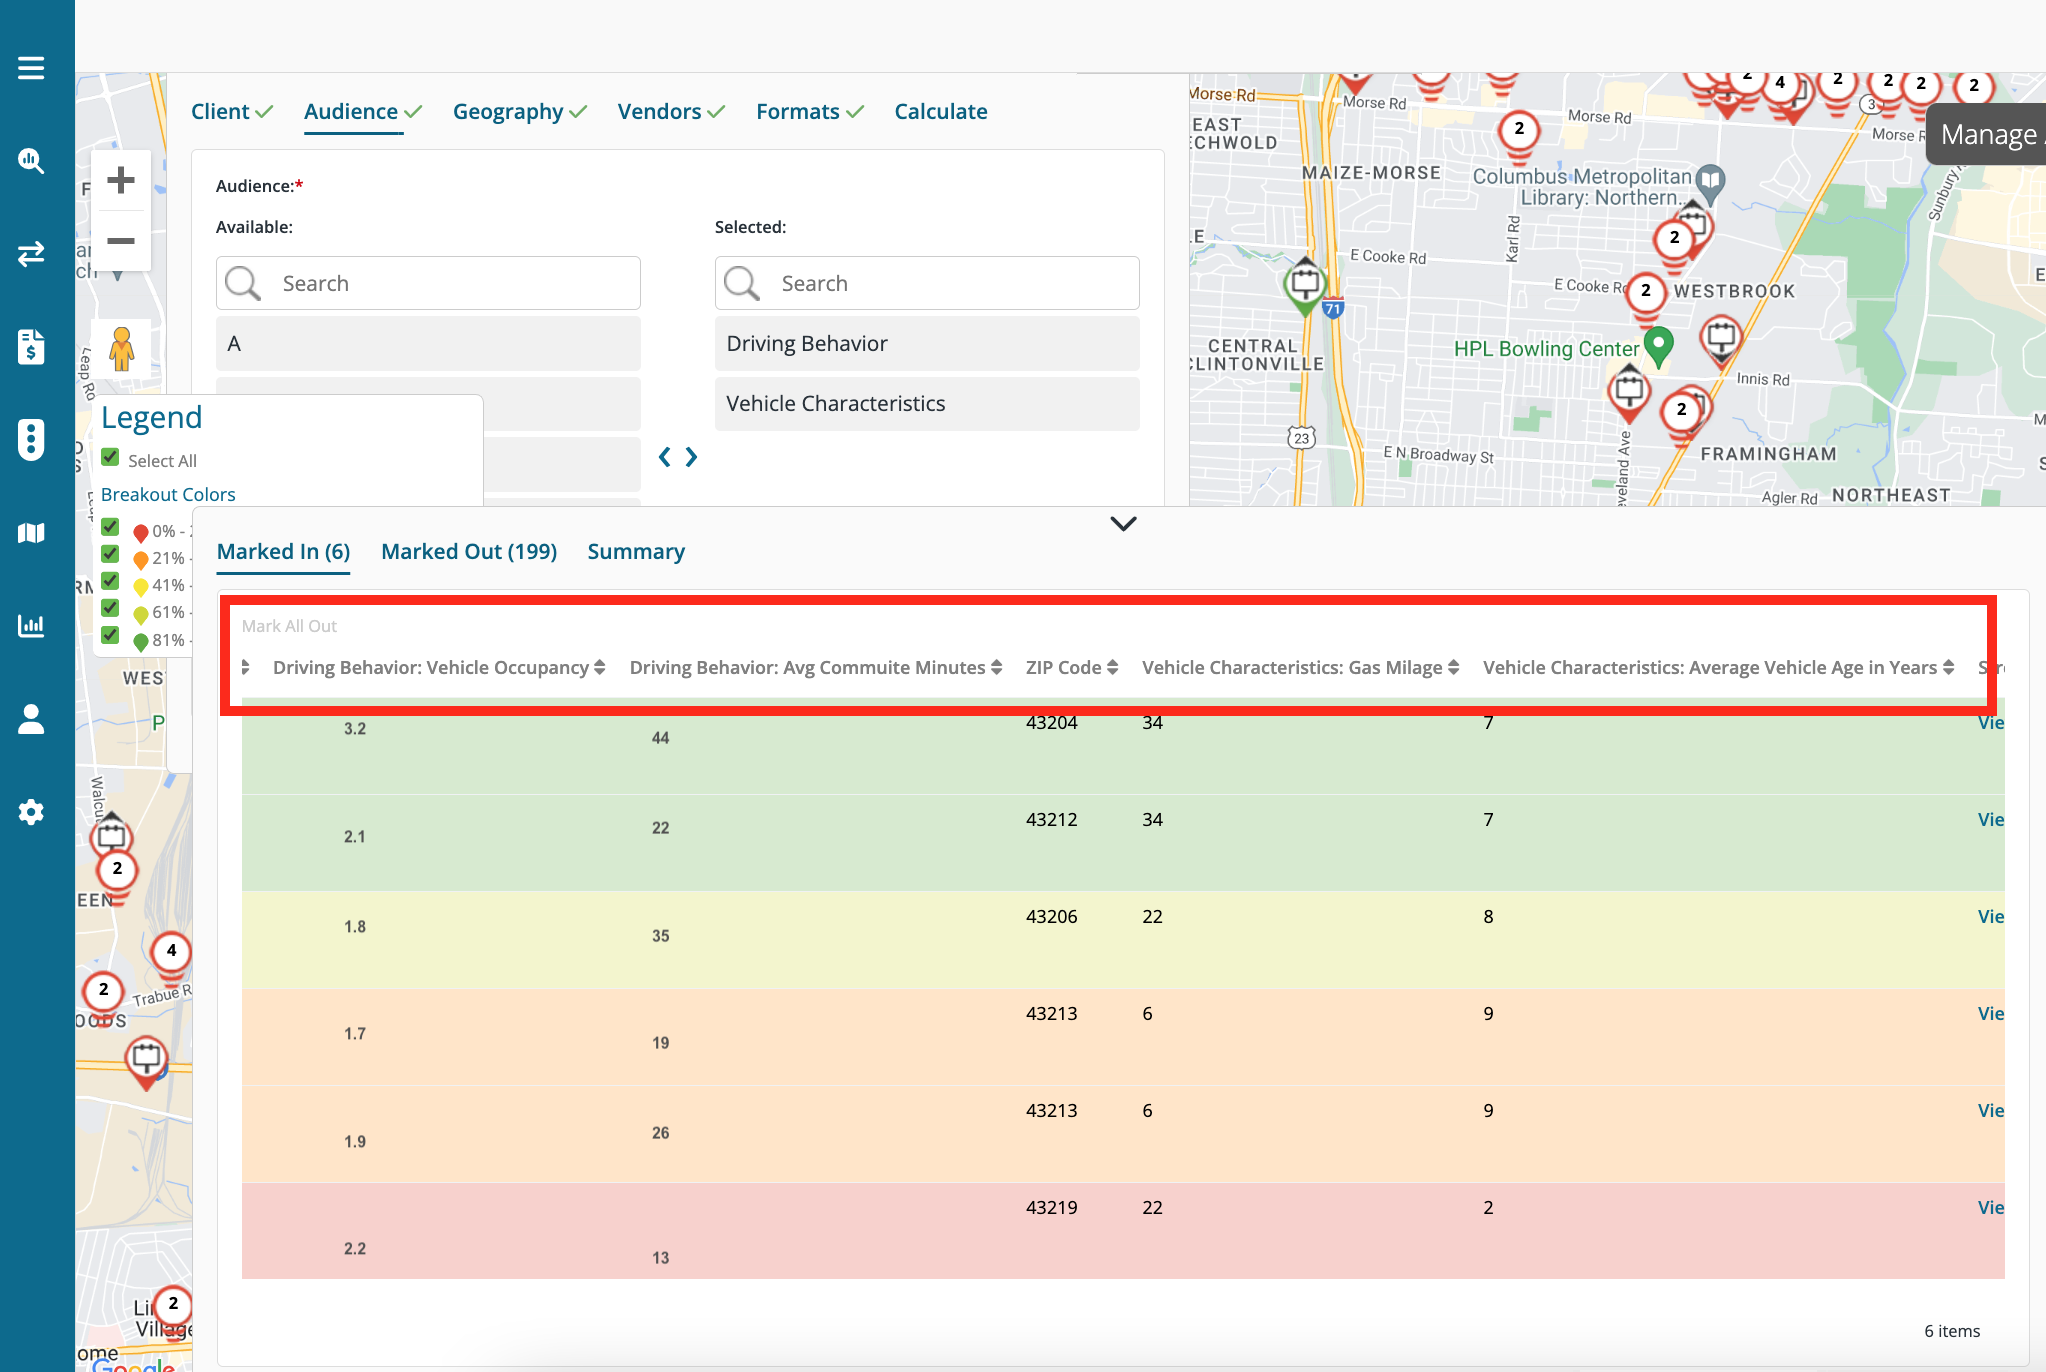
12. You will see your audience labels and segments in the results: