
Buyer: Audience Planning Tool: Overview
The audience planning tool allows you to compare inventory based on your target audience. This article highlights how to build plans.
Workflow Tip: you can create a plan and turn it into an RFP. You can also take an RFP and generate a plan. This article explains creating a new plan. If you create a plan from RFP - Client, Audience, Vendor, and Format are preselected.
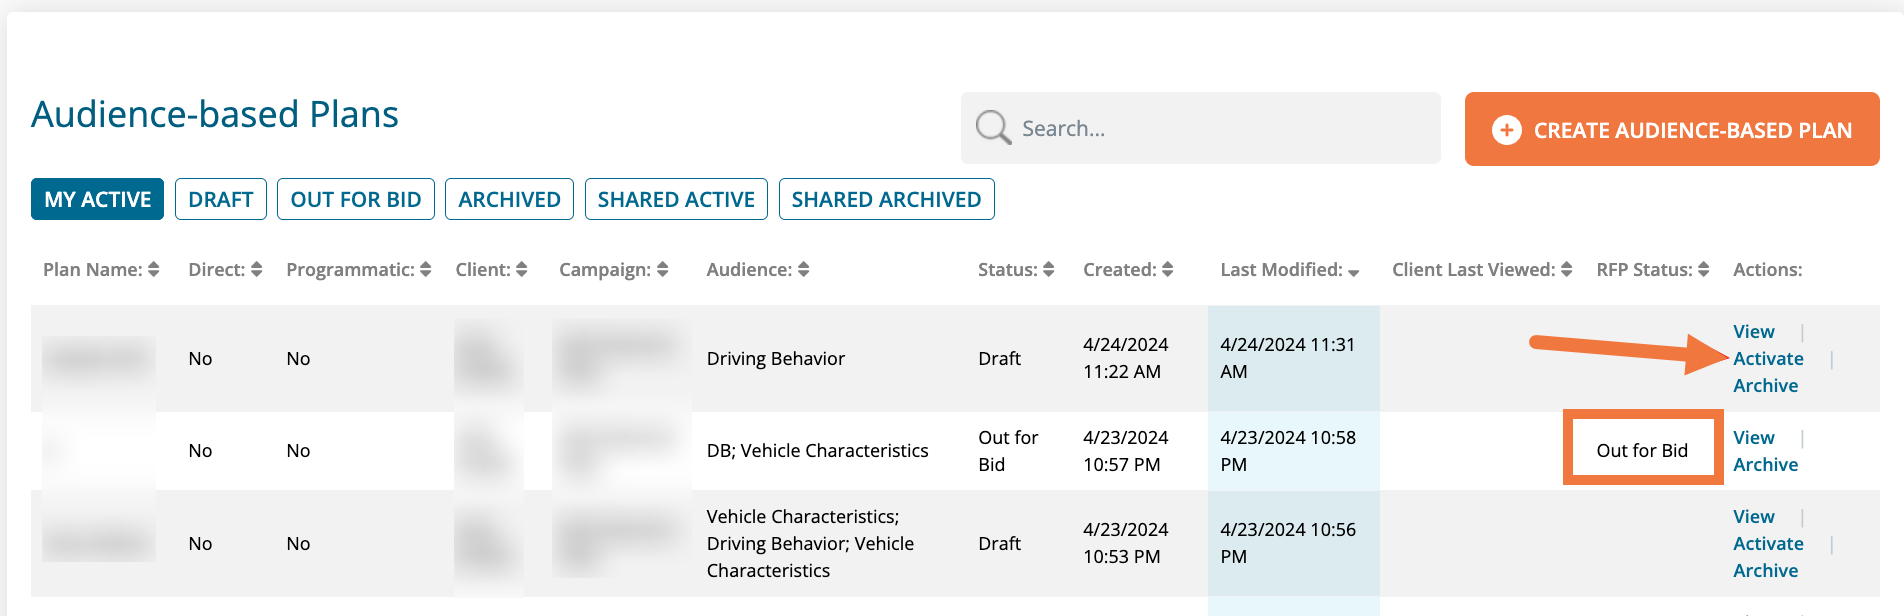
- Click on Plan > Audience Plans on the left-hand side menu. Here, you will see a list of your audience plans and their status.
- Click on Create Audience-Based Plan.

3. Fill out the plan parameters.
Workflow Tip: You can fill out parameters in any order and continually adjust the inputs.
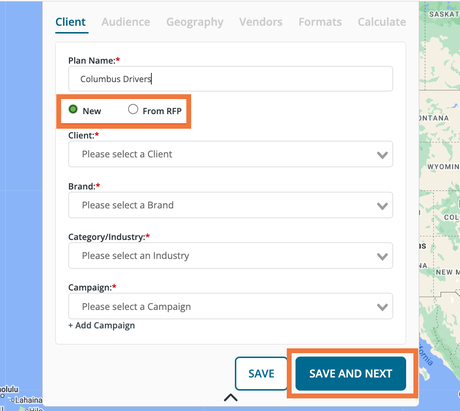
- Client:
- Give the plan a name.
- Determine whether you are creating a new plan or want to generate it based on inventory in an RFP.
- Associate it with a client and campaign.
- Category/Industry:* - if you have Client/Industry enabled you will see a dropdown of all industries for your company. This allows you to group your clients based on what category/industry they compete in (e.g. food delivery, airline). This will allow for benchmarking.
- Click Save and Next:
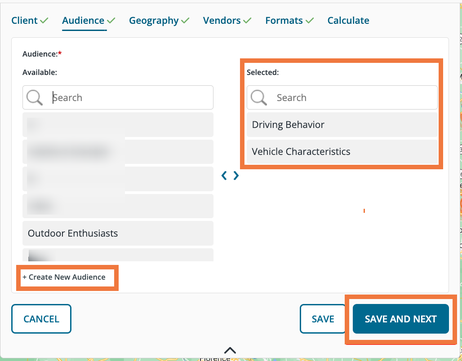
- Audience:
- Select or create your audience. When you choose multiple, a composite score is calculated for all audiences included.
- If your audience is not there, you can create it within the plan. To learn more about building audiences click here.
- Click Save and Next:
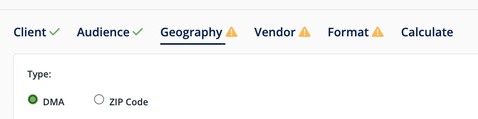
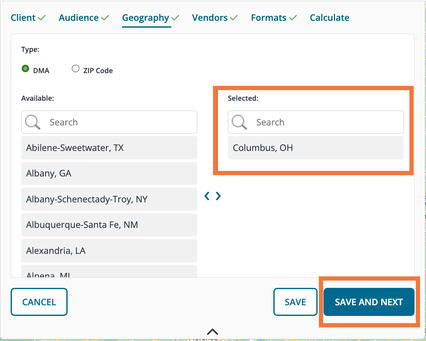
- Geography:
- Select the DMAs for the plan.
- Click Save and Next:
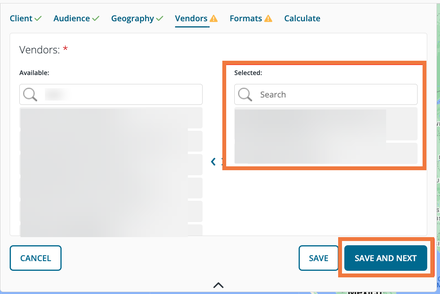
- Vendors:
- Select the vendors for the plan.
- Click Save and Next:
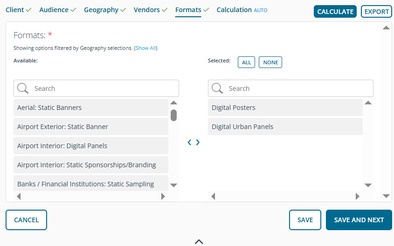
- Formats:
- Select the formats for the plan
- Click Save and Next:
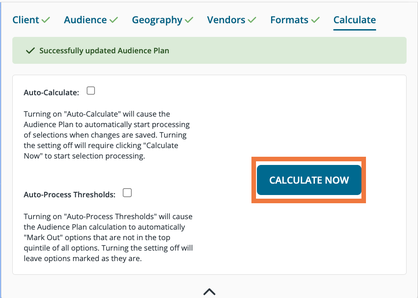
4. Calculate:
- Auto-calculate Turning on "Auto-Calculate" will cause the Audience Plan to automatically start processing of selections when changes are saved. Turning the setting off will require clicking "Calculate Now" to start selection processing.
- Threshold Turning on "Auto-Process Thresholds" will cause the Audience Plan calculation to automatically "Mark Out" options that are not in the top quintile of all options. Turning the setting off will leave options marked as they are. This is recommending when you have a large plan.
- Click Calculate Now:
5. In the Task Manager click View after the calculation is complete:

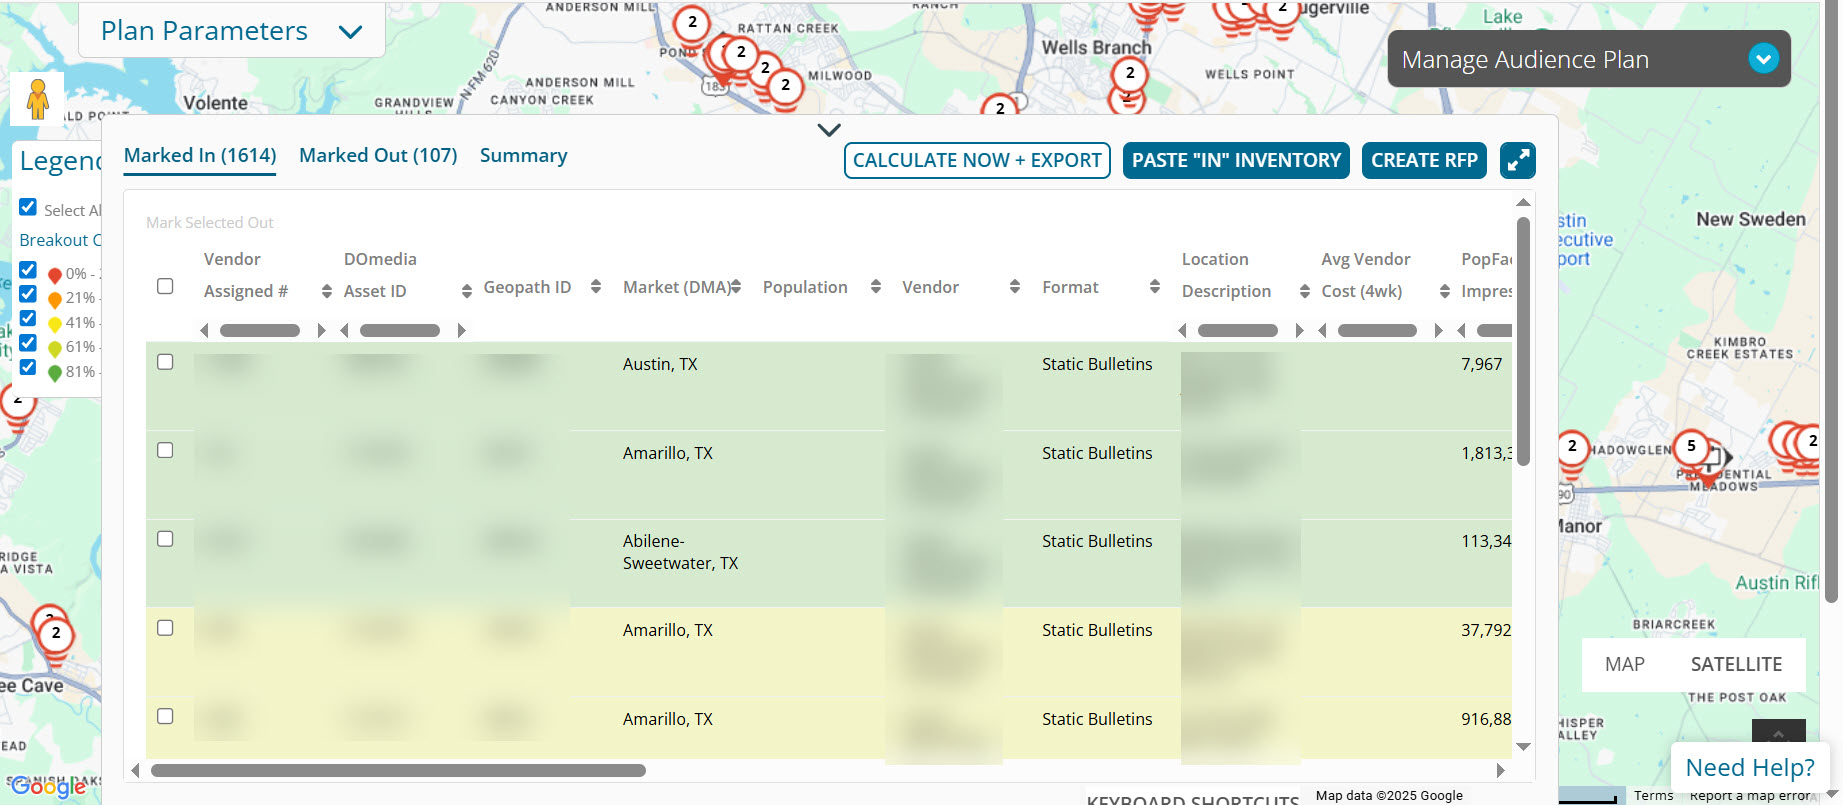
6. View the plan results
- The plan will reload and center on the inventory.
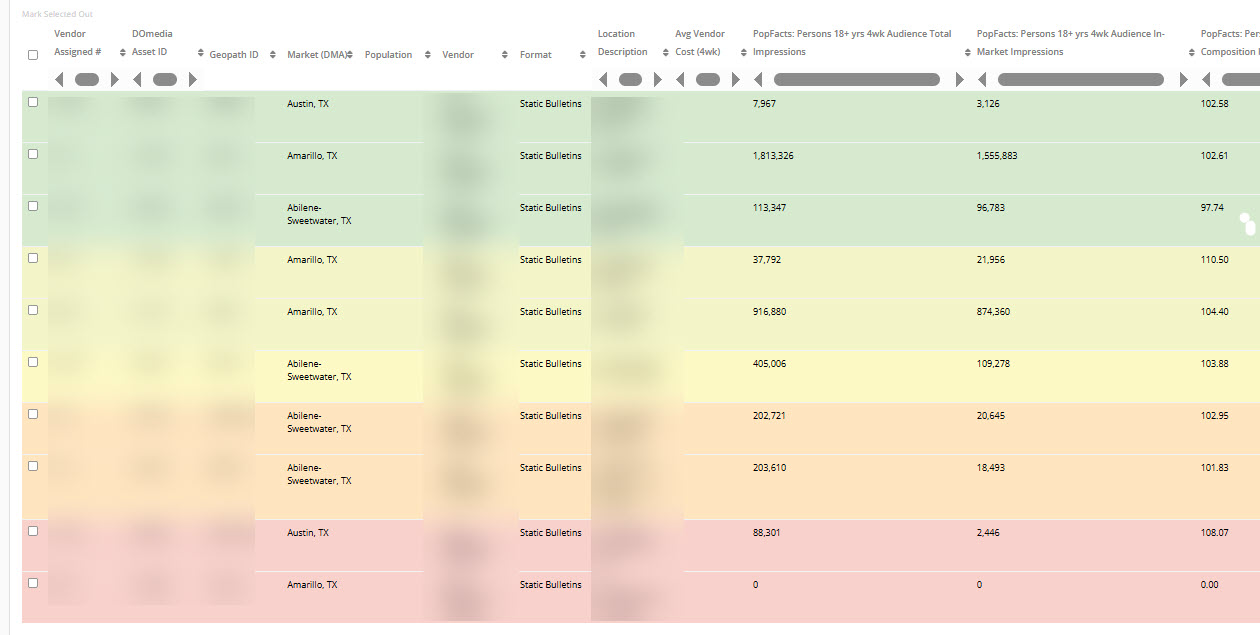
- Inventory is color-coded based on quintile breakouts.
- To learn about the calculations click here.
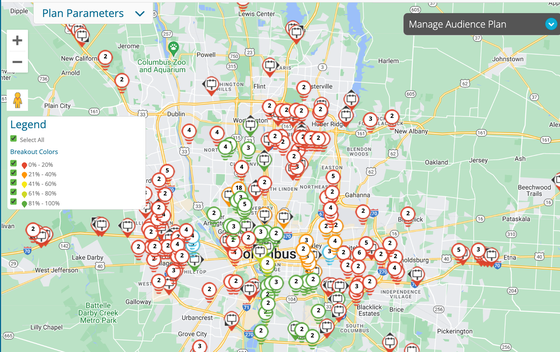
- In Inventory Details (bottom left) inventory is sorted from best to worst for reaching your target audience on the Composite Score Column
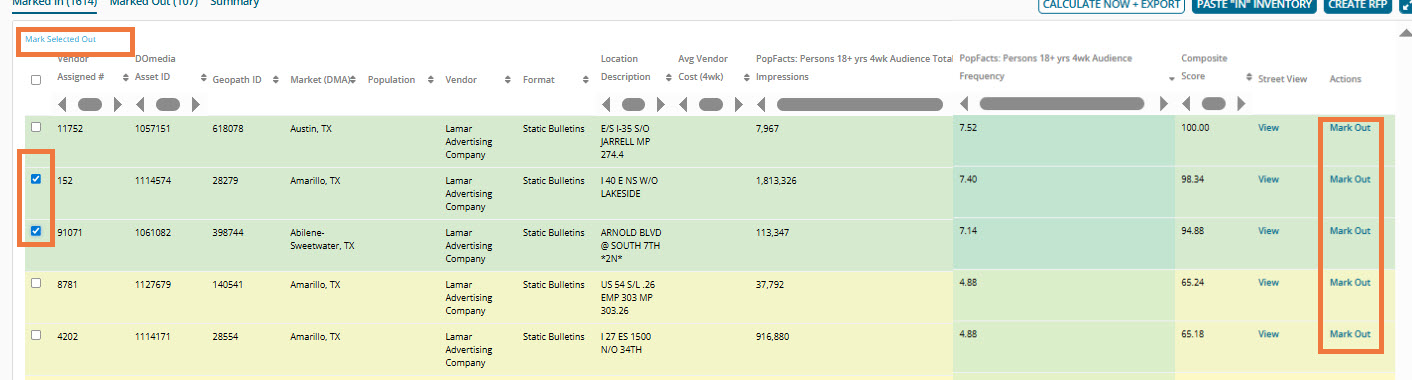
7. Mark Inventory In/Out
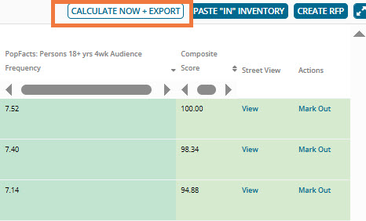
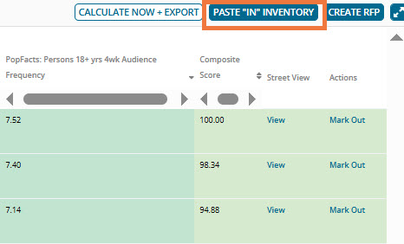
8. Optional: Export Plan Results to Excel. In the locations table click "Calculate Now + Export". Everything in the table will be exported
9. Optional: Paste Assets to Mark "in" for the plan
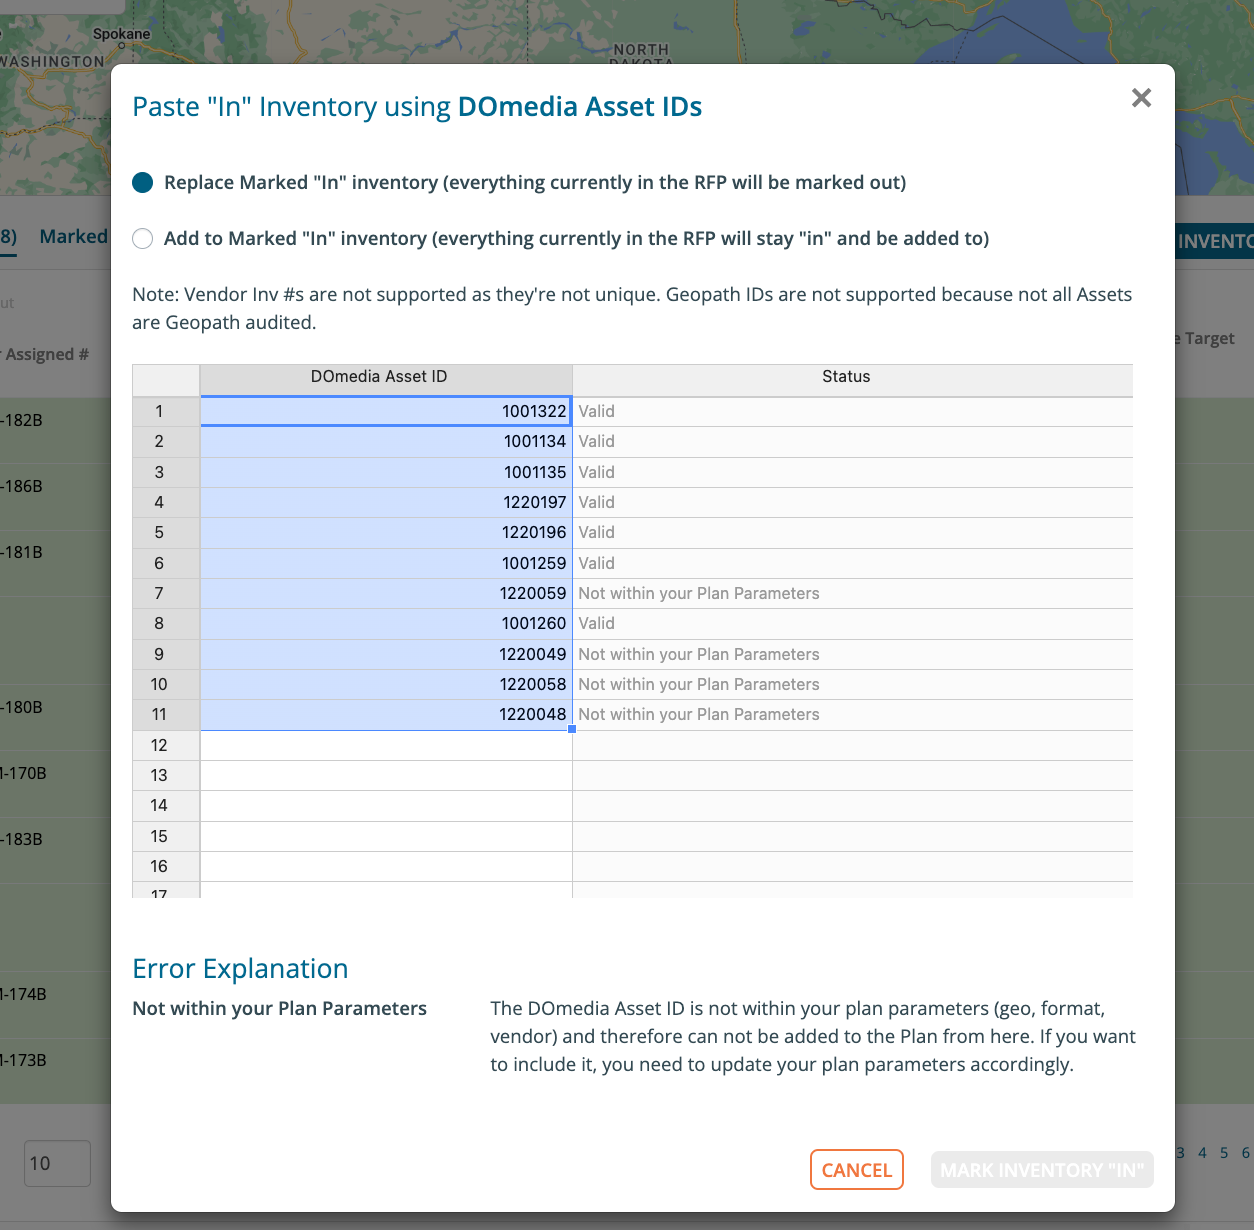
If you have a particular set of assets you want to plan on, click "Paste "In" Inventory"
You will see a popup where you determine whether you want to REPLACE everything in your plan with the assets you're pasting in, or if you want to APPEND to what's already in the plan. When you paste in DOmedia Asset IDs the system evaluates whether the asset can be added by checking if it's valid Asset ID and fits within Plan Parameters. If you see the status that an Asset is not within your plan parameters you can remove the asset or change your plan parameters.
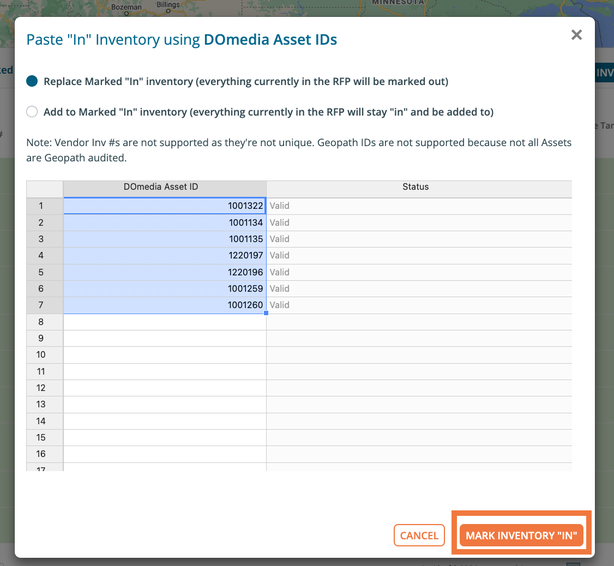
Once the list of Asset IDs is valid click "Mark "In Inventory". This will trigger a recalculation of the plan
10. Optional: Issue an RFP based on the plan.
- These options will carry over client, campaign, campaign dates, audience, markets, and vendors into a new RFP. Specific units from the plan are not included in the grid to vendors.
- Option 1 - Inside the plan - click Create RFP in the plan details table.
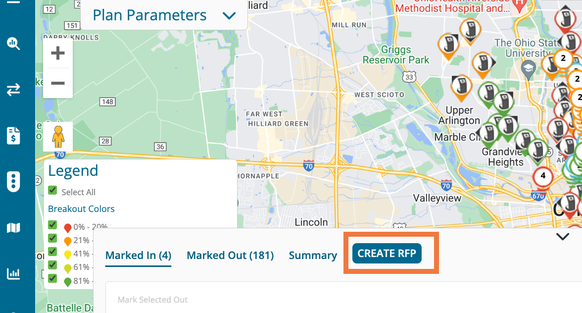
- Option 2 - Go to the Audience Plans Dashboard - click Activate on the plan:
Workflow Tip: RFPs and Plans stay in sync. Marking inventory in/out from the plan affects the RFP and vice versa.