How do I use a shared map?
I just received a link to one of DOmedia's interactive maps - how do I use it?
To start, click the link and DOmedia's interactive map will open in a new tab.
While viewing the map, there are various navigation tools that can be used. These tools are the same as those found on Google Maps.
Map / Satellite - There are two different views available in DOmedia's mapping tool. Select which of the two views you'd like to use in the bottom right-hand corner of the map.
Map: This view shows a map with a traditional depiction of roads, parks, borders, bodies of water, and more
Satellite: This view shows aerial imagery
Pan - To pan (move the map), click and hold your mouse, then drag the map. By using the arrow keys on your keyboard, you can move the map north, south, east, and west.
Search Bar - The search bar returns Google search results and populates them on the map (i.e. Starbucks locations, hotel locations, etc.). To clear the icons that represent your search results on the map, right-click anywhere on the map, and then click 'Clear Search Markers'.
Zoom - The + and - buttons found in the upper left-hand corner of the map allow you to zoom in and out of the map. You can also zoom in and out using the scroll wheel on your mouse.
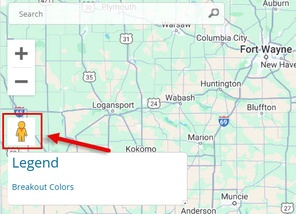
Street View - By clicking on the yellow person icon on the left-hand side of the map and dragging this icon to any area on the map, street-level imagery of that location is provided.
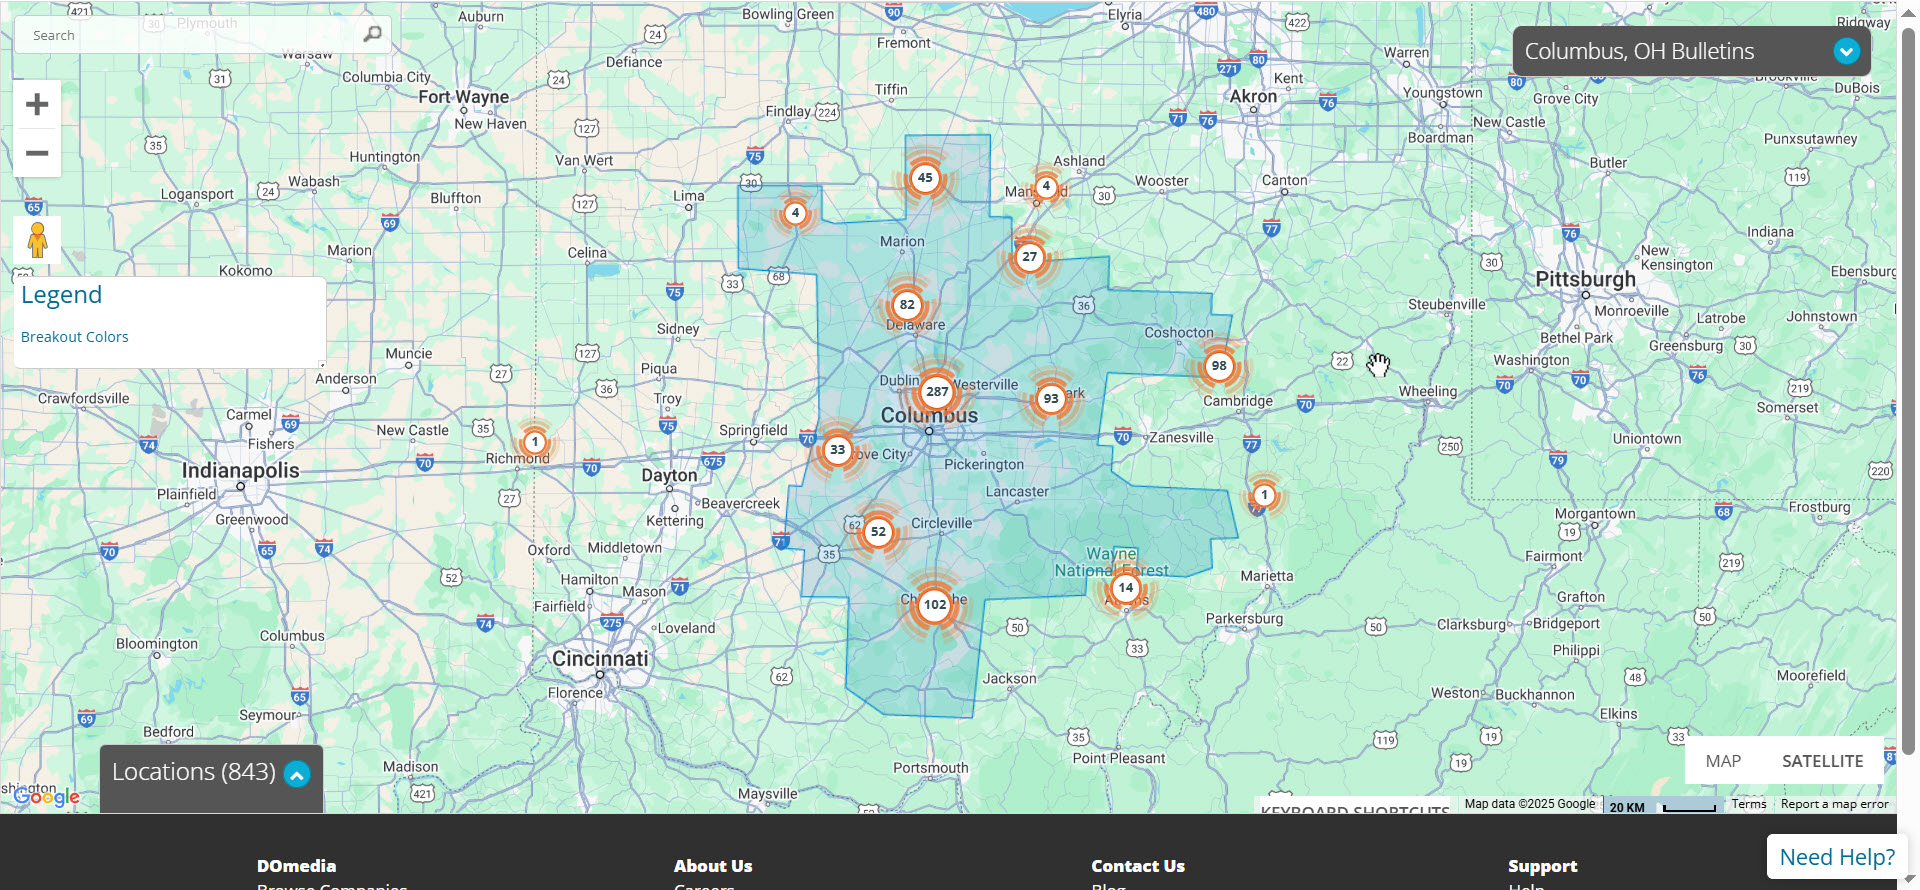
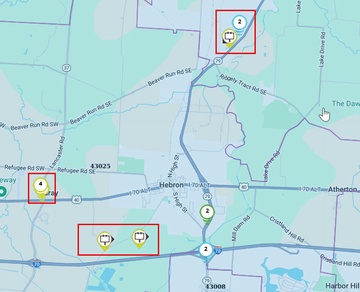
Asset Icons - Each icon represents a specific media asset on the map and provides additional location information when clicked.
Measure distance from / to here:
By right-clicking anywhere on the map, you will have the option to measure the distance from that particular location. Then right-clicking on another location on the map and clicking 'Measure the distance to here' will display that calculated distance. Right-clicking on the map also gives you the option to clear those distance markers.

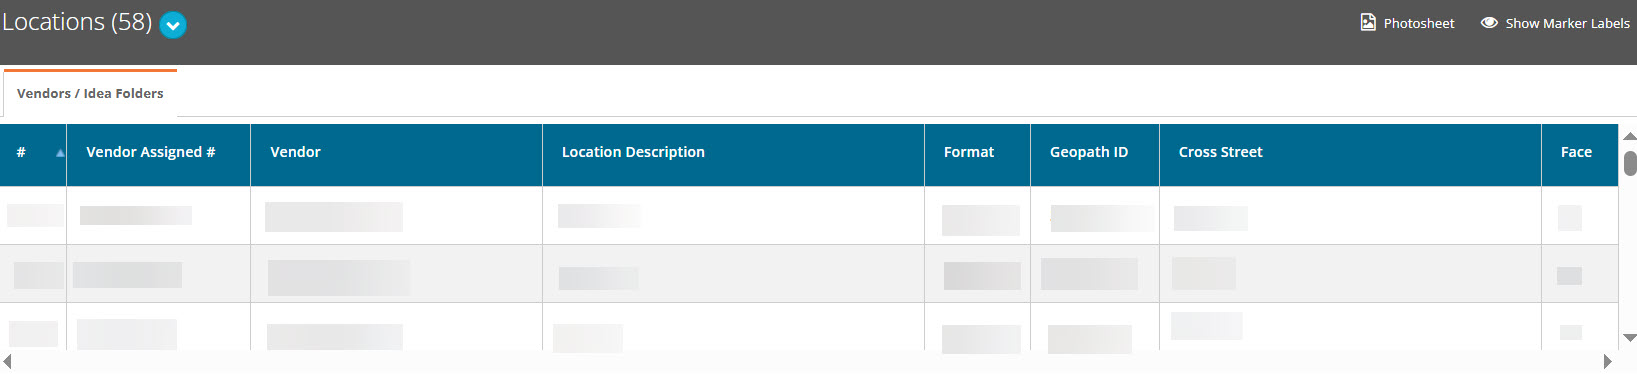
Locations panel - This tool is found in the bottom left-hand corner of the map and provides a list of each asset included in the map and populated in the current view. Specific details about each asset, such as marker label number, vendor, location description, format, vendor assigned number, cross street, and face (the direction, north, south, east, or west that the asset faces) are also provided.
Show / Hide Marker Labels - The toggle to show or hide marker labels is located in the upper right-hand corner of the Locations panel. Showing marker labels will display the marker label number next to each asset icon as it correlates to the Locations list.

Client Location Lists tab - This tab can be viewed from the Locations panel. It provides a list of each client location asset included in the map and populated in the current view. Specific details about each asset, such as marker label number, Location Name, Address 1, Address 2, City, State, Zip Code, Latitude, Longitude, and Radius (miles) will often be provided.
Search Results tab - This tab can be viewed from the Locations panel. It provides a list of each resulting location from your search that is included in the map and populated in the current view. Specific details about each location, such as Marker Label Number, Name, and Location Address are also provided.

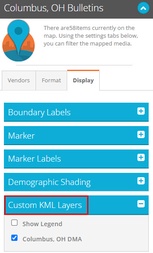
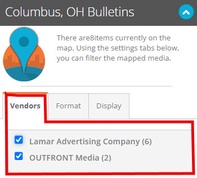
Panel in Upper Right - This tool is found in the upper right-hand corner of the map and provides advanced settings that can be used to filter mapped media.
Vendors tab - Media assets are filtered by the company and can be viewed by a company or collectively. The Vendors tab lists every vendor included in your current view of the map with the number of units populated in the current view for each vendor in parentheses. Each vendor is represented by a different color. A legend of these colors is displayed in the Vendors tab.
By checking and unchecking the box next to each vendor, you can adjust which companies are populated on your map.
Formats tab - Media assets are filtered by categories (i.e. bulletins, walls etc.) and can be viewed separately or collectively. The Categories tab lists every media category included in your current view of the map with the number of units populated in the current view for each media category in parentheses. Each category is represented by a unique icon. A legend of these icons is displayed in the Categories tab.
By checking and unchecking the box next to each category, you can adjust which categories are populated on your map.
Client Lists tab: This tab displays the Client Location Lists that are included in the map.
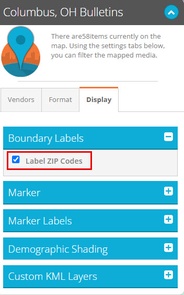
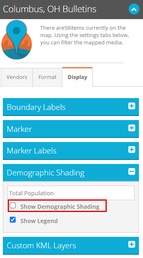
When the user created the map, there are options to display zip code labels, demographic shading, and custom KML layers. These could be shown on the map you receive. Examples of these mapping additions are shown below.
Zip Code Labels - Displays outlines for the zip codes contained in the map.
Demographic Shading - Displays shading based on a selected demographic that is shown in the Legend along with the values associated with the different degrees of shading. This shading is determined by U.S. Census Bureau data.
Custom KML Layers - Displays a selected Custom KML Layer on the map.