
Buyer: RFP Dashboard Overview
Access the RFP Dashboard by selecting RFP then RFPs on the left-hand side menu bar.
Available RFP Filters
Once on the RFP Dashboard screen you will see filter buttons in the upper left.
ALL lists both your RFPs and those issued for clients you are authorized on.
MY RFPS lists the RFPs that you have issued.
SHARED RFPS lists RFPs your coworkers have issued for clients you are authorized on.
DRAFT lists RFPs in Draft status.
OUT FOR BID lists RFPs sent to vendors.
BUYER ONLY lists RFPs issued internally.
How to Apply Filters
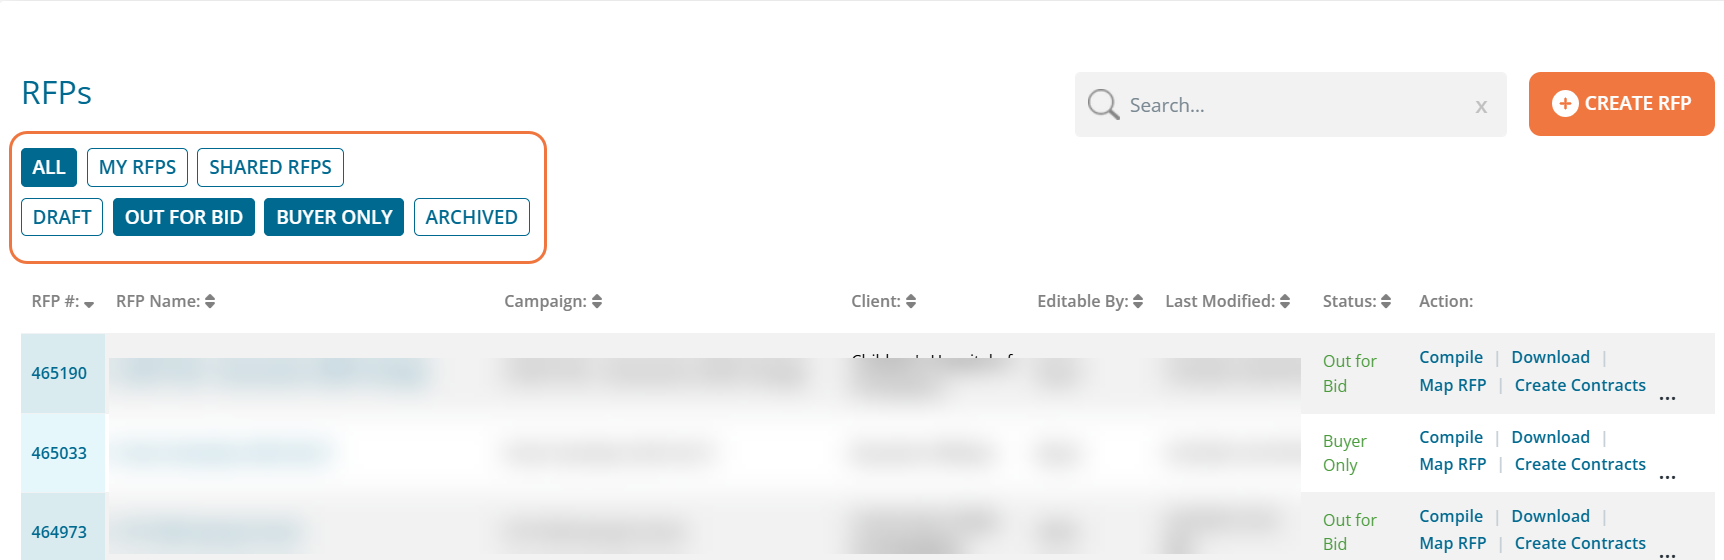
In the first row of the filtering section, you will see All, My RFPs, and Shared RFPs to filter the list based on the RFP Issuer.
You can refine further in the second row by selecting the RFP status filters to apply.
Selected options will turn blue, so you always know what filters are active. Unselected options will remain white and be removed from your view.
RFP History and Vendor Proposal Status
From the RFP Dashboard, you’re able to see the RFP ID number, name, associated campaign and client, if it's able to be edited by the buyer or seller, last modified date, and its current status. If applicable, you can also view production specifications and if your production team has approved the production costs.
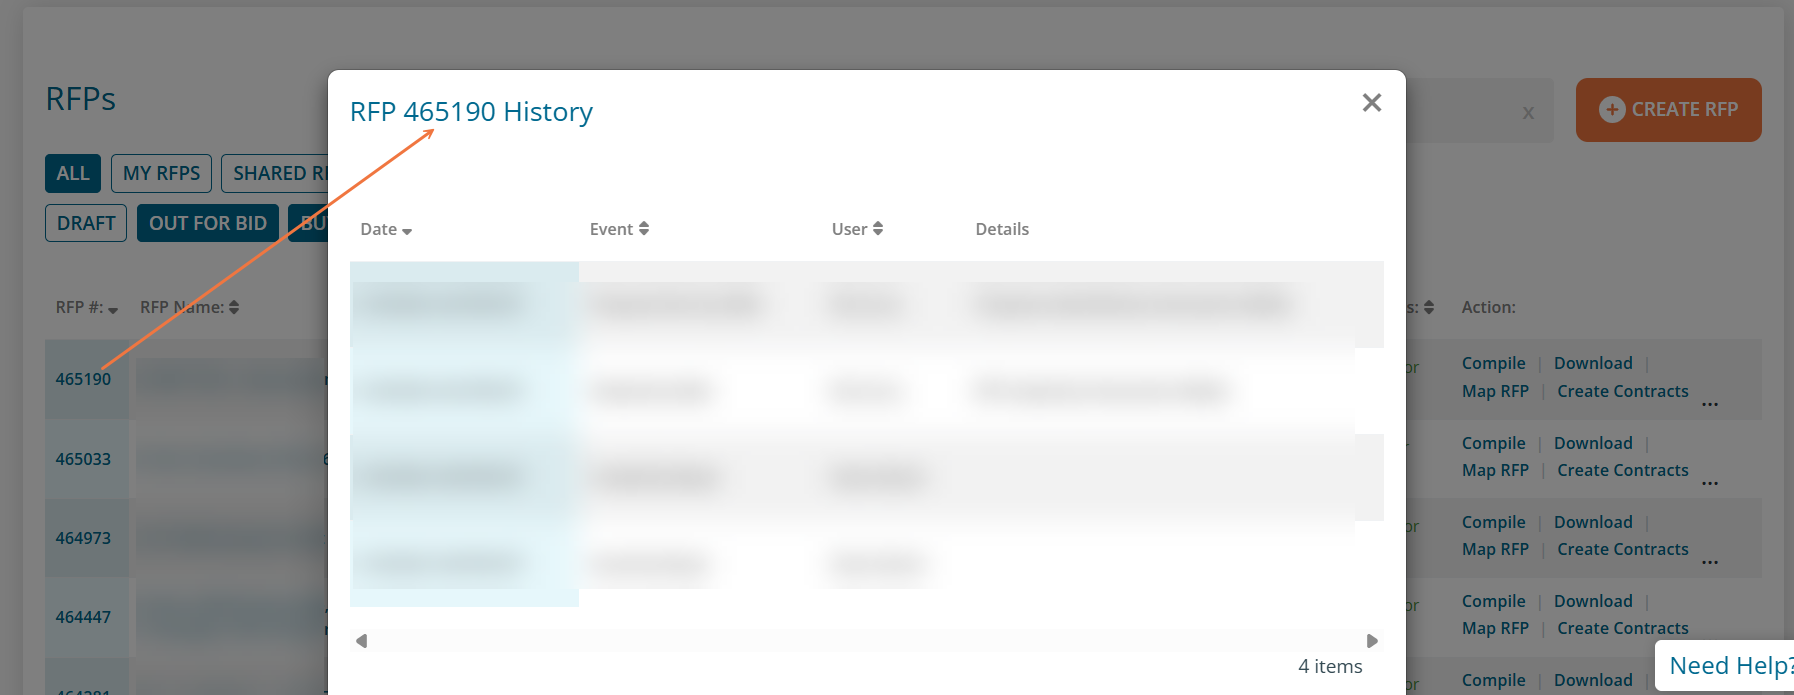
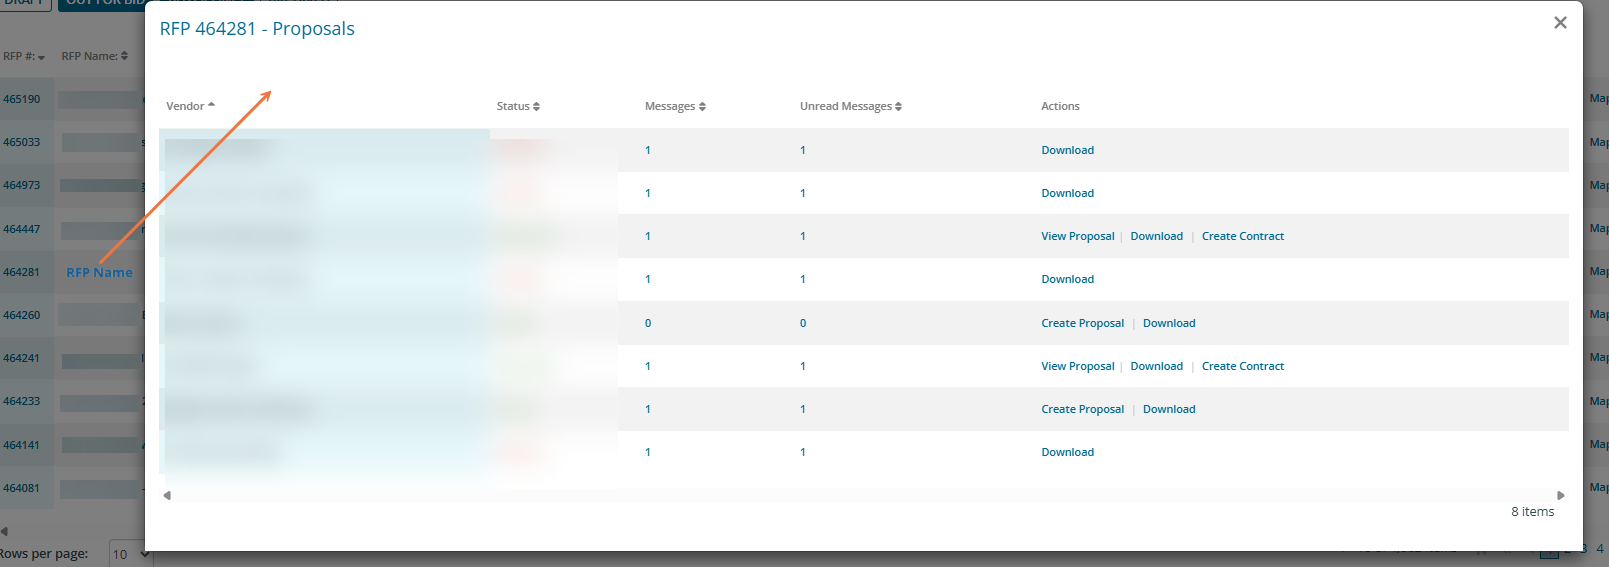
Clicking on the RFP ID # will allow you to see the RFP history, and clicking on the RFP Name will allow you to see and interact with the individual vendor proposals.
Click the More Actions icon "..." for additional Actions as defined below.

RFP Actions Defined
Compile: Compiling will bring all of the vendors' proposals together in one grid. You will be able to select which assets will be included or not in the campaign and take further actions, like creating contracts or client authorizations.
Download: This will allow you to download all of the data for the RFP as Excel or Powerpoint files. The PowerPoint option lets you customize how you would like the PowerPoint to look and what information is added.
Map: Mapping an RFP allows you to view all of the proposed assets on a live map and send as a link to clients.
Create Contracts: This button will enable you to create contracts directly from the RFP Dashboard. Select the contract type, and which vendors you want to create contracts for, then click next. To learn more about creating contracts, visit this article.
View: Allows you to view the RFP in its current state with information about the campaign, contact info, objective, markets, media formats, and vendor recipients.
Revise: All of the information from view, but with the ability to edit some fields. You can update Markets, Formats, and add Target Location Lists. After making any changes, you can select which vendors receive notification of the revised RFP.
Duplicate: This create a new RFP that has the same information/settings as the original. This includes all information on Steps 1, 2, and 3 of creating an RFP. Any proposed assets are not included.
Message: This allows you to message the vendors that you’ve selected for the RFP. You can select 1 or more vendor companies, and everyone on that list will receive a notification of your message.
Cancel: Canceling the RFP will notify all vendors.
Archive: Archiving the RFP will move it to the 'Archived' view tab on the RFP Dashboard.
Add Vendor: This is where you can add additional vendors to the RFP.
Add Coworkers: This action allows you to add coworkers to the RFP. This means they will be able to access it and they will be included on all email notifications related to the RFP.