Buyer: How do I navigate within a map?
How do I navigate within a map?
There are various navigation tools that can be used to explore media assets and locations. These tools are the same as those found on Google Maps. Note: Depending on where your map was created and what is contained within the map, the menus and options available to you may vary from map to map.
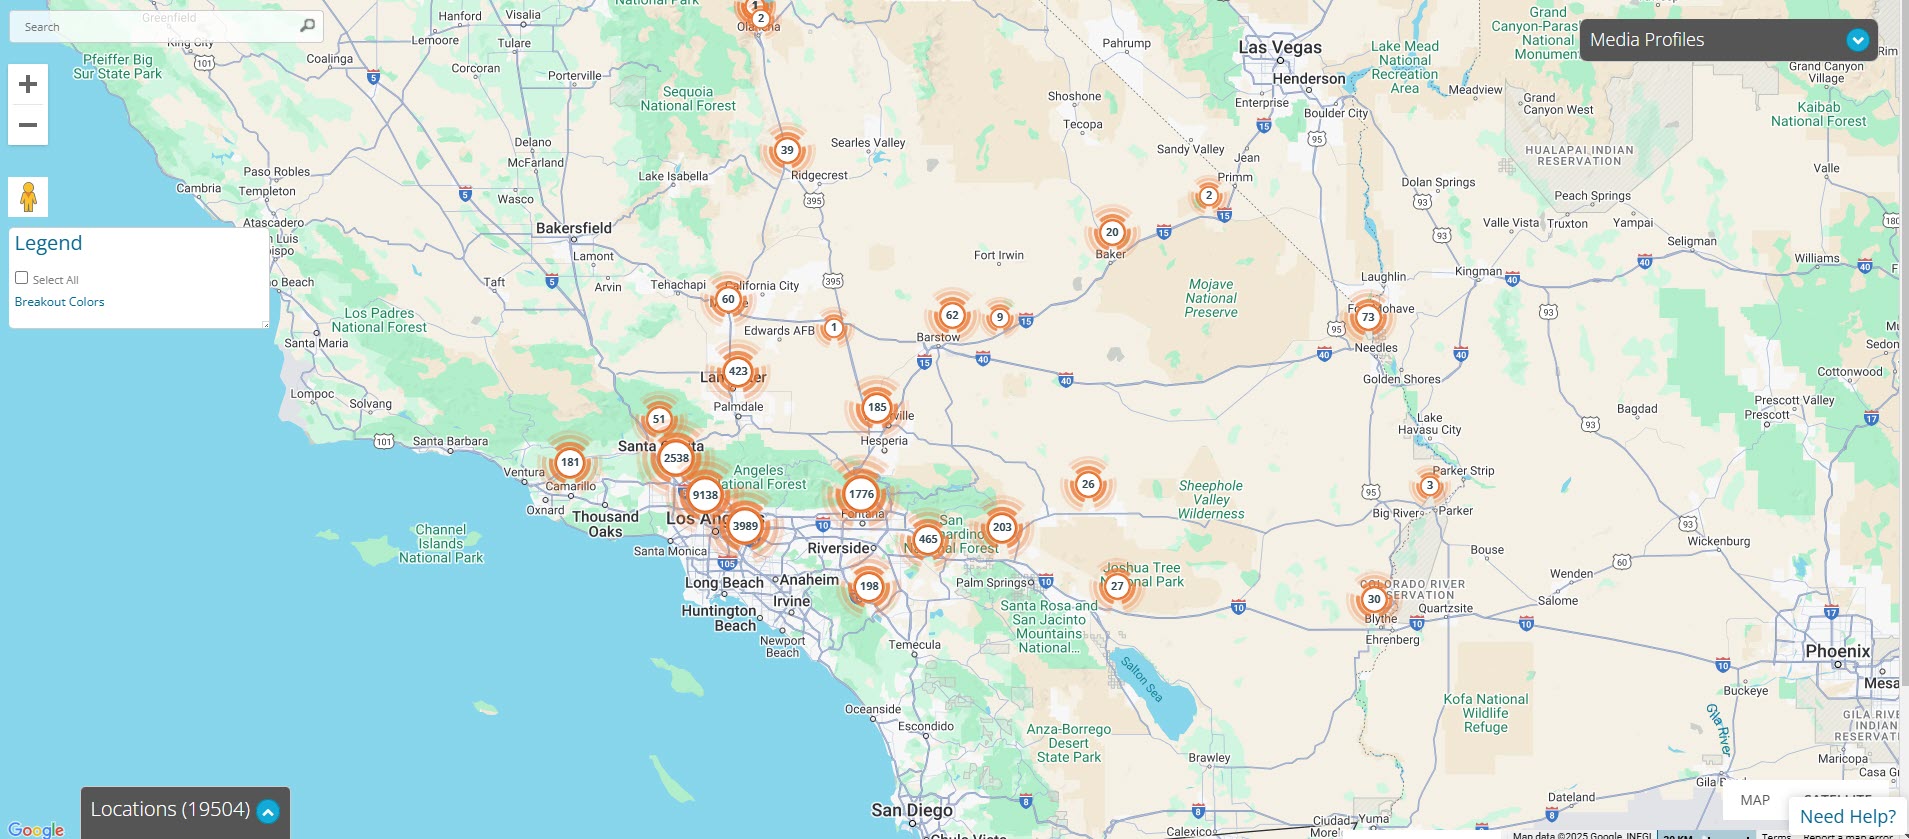
Clustering - When a map has 1,500+ locations, clustering is applied to simplify the way those locations display by dividing them into easily navigated clusters. Clustering essentially groups locations to make a map easier to both understand and navigate. Clicking on a cluster will zoom further into the map, auto-adjusting the locations now clustered. Once you have zoomed into the map far enough by clicking on a cluster, you will have all of the functionality of a normal DOmedia map (filtering companies and formats, displaying zip code labels, etc).
Map / Satellite - There are two different views available in DOmedia's mapping tool. Select which of the two views you'd like to use in the bottom right-hand corner of the map.
Map - This view shows a map with a traditional depiction of roads, parks, borders, bodies of water, and more
Satellite - This view shows aerial imagery
Pan - To pan (move the map), simply click and hold your mouse, then drag the map. You can also use the arrow keys on your keyboard to move the map north, south, east, and west.
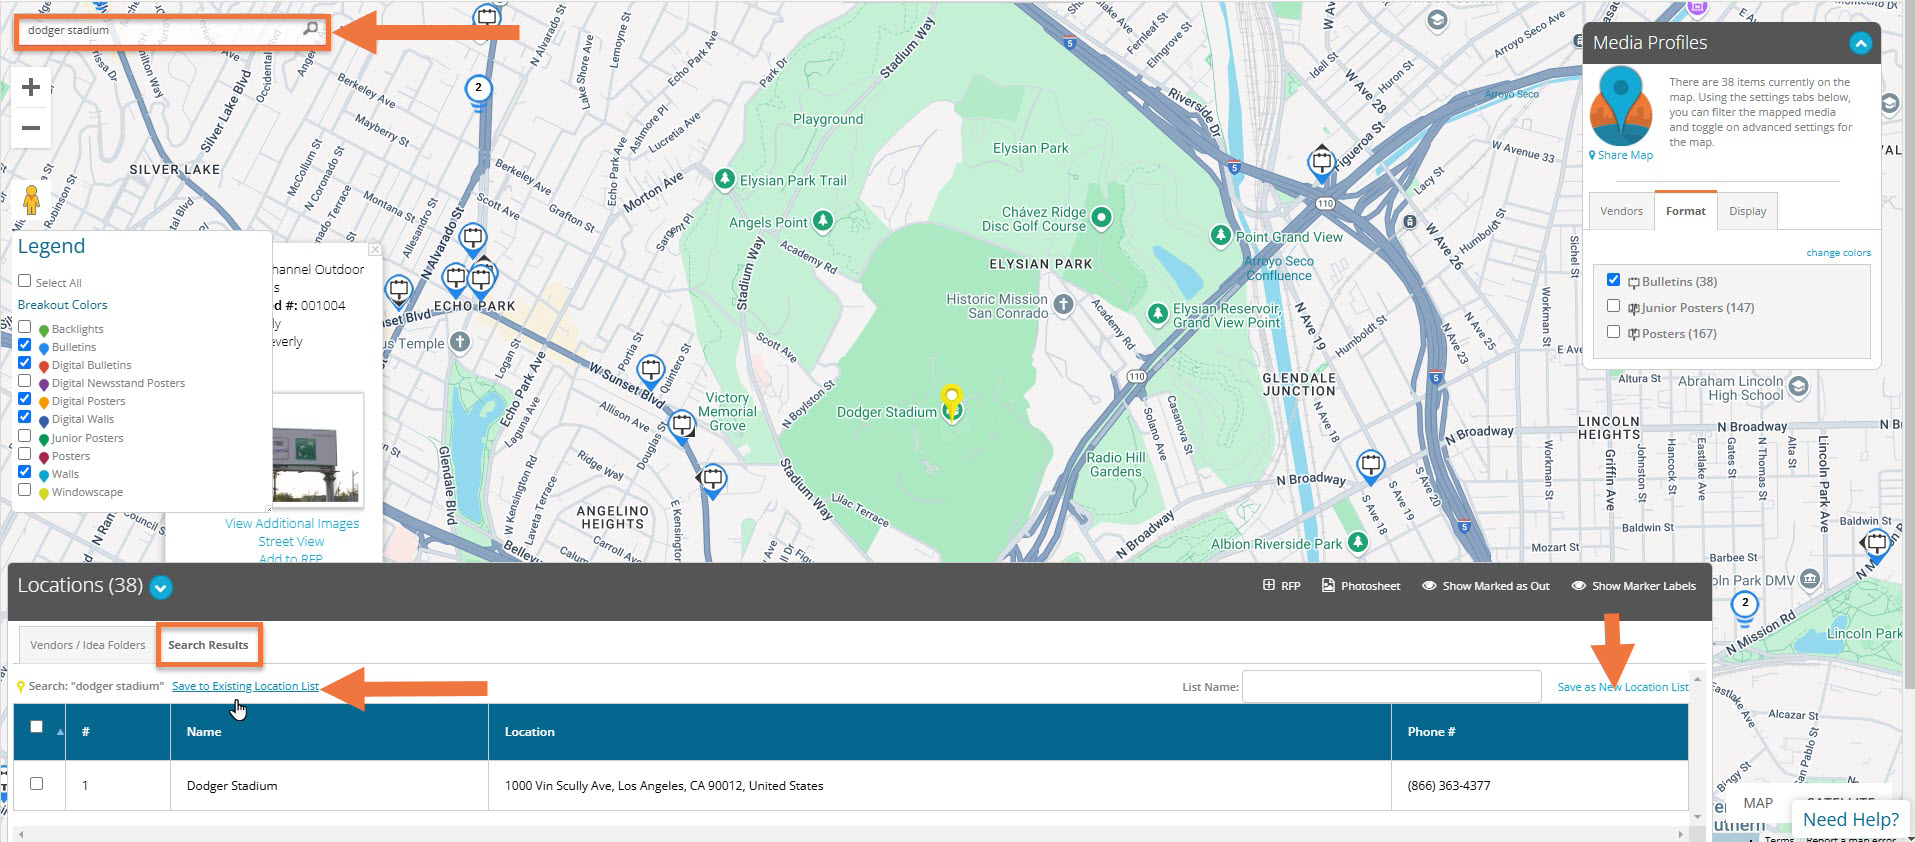
Search Bar - The search bar returns Google search results and populates them on the map (i.e. Starbucks locations, hotel locations, etc.). To clear the icons that represent your search results on the map, right-click anywhere on the map, and then click 'Clear search markers'.
Zoom - The + and - buttons found in the upper left-hand corner of the map allow you to zoom in and out of the map. You can also zoom in and out using the mouse scroll wheel.
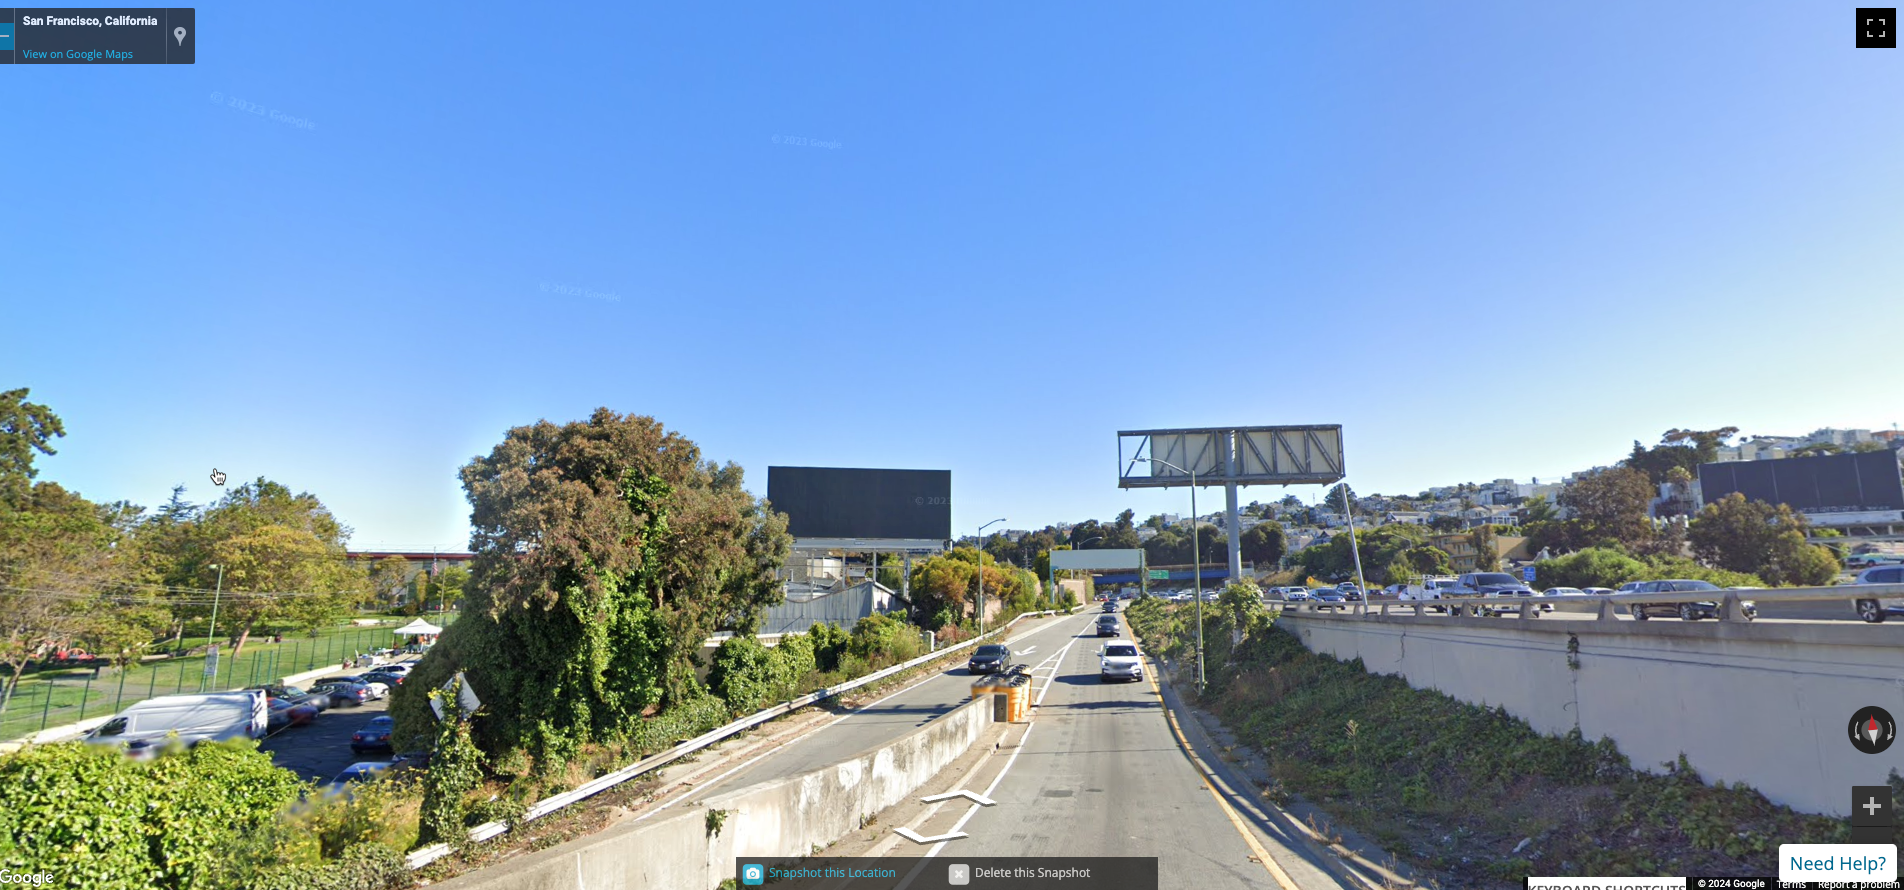
Street View - By clicking on the yellow person icon on the left-hand side of the map and dragging this icon to any area on the map, street-level imagery of that location is provided. Snapshotting street view is unavailable whenever a proposed unit cannot be found in the vendor's DOmedia inventory (our system only supports street view on assets in the system). This is because, without that piece of inventory, there is nowhere to save and store the street view snapshot. Vendors are able to update their inventory at any time for free though if it's something you want to request from them.
Asset/Location Icons - Each icon represents a specific media asset or location on the map and provides additional location information when clicked. If the vendor has included an image for an asset, it will appear in the box. If they have not, the Google Street View image of the location will appear. You can also access additional photos from this box, as well as, the view of the asset from Street View in Google Maps.
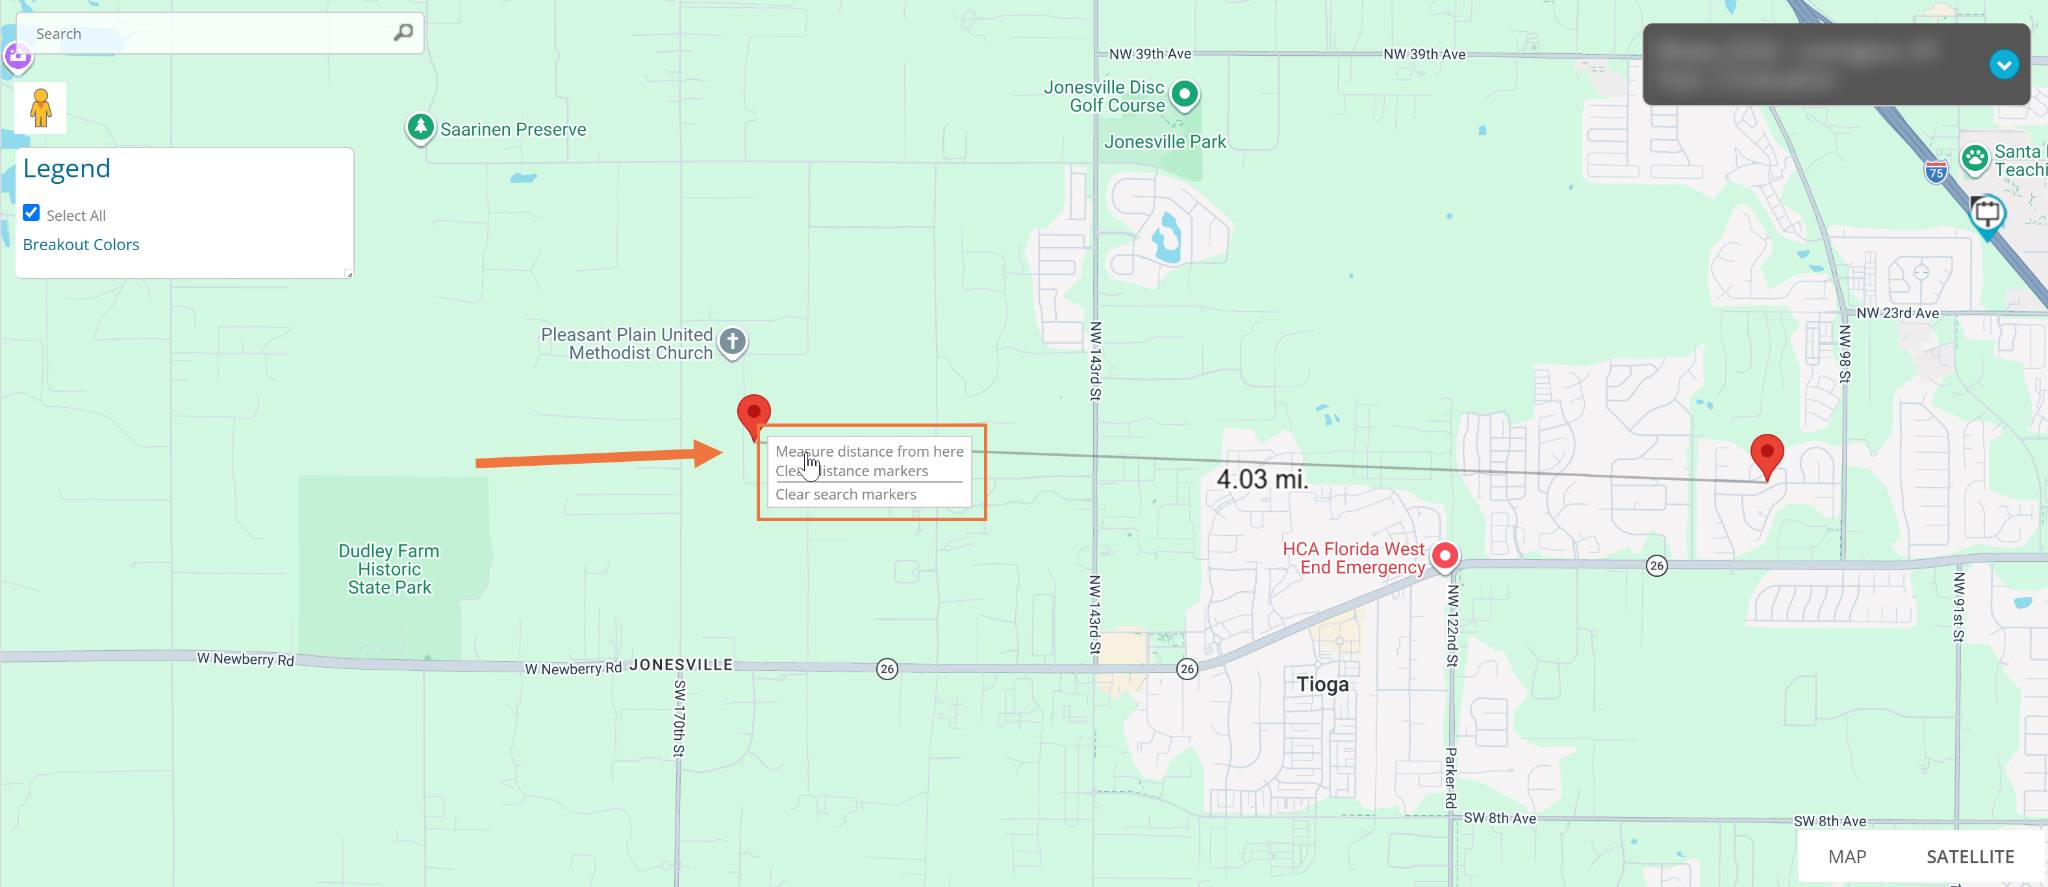
Measure distance from / to here - By right-clicking anywhere on the map, you will have the option to measure the distance from that particular location. Then right-clicking on another location on the map and clicking 'Measure the distance to here' will display that calculated distance. Right-clicking on the map also gives you the option to clear those distance markers.
Locations panel - This tool is found in the bottom left-hand corner of the map and provides a list of each asset/location included in the map and populated in the current view. Specific details about each asset/location, such as vendor, location description, format, and face (the direction, N S E or W, that the asset faces), to name a few, are also provided.
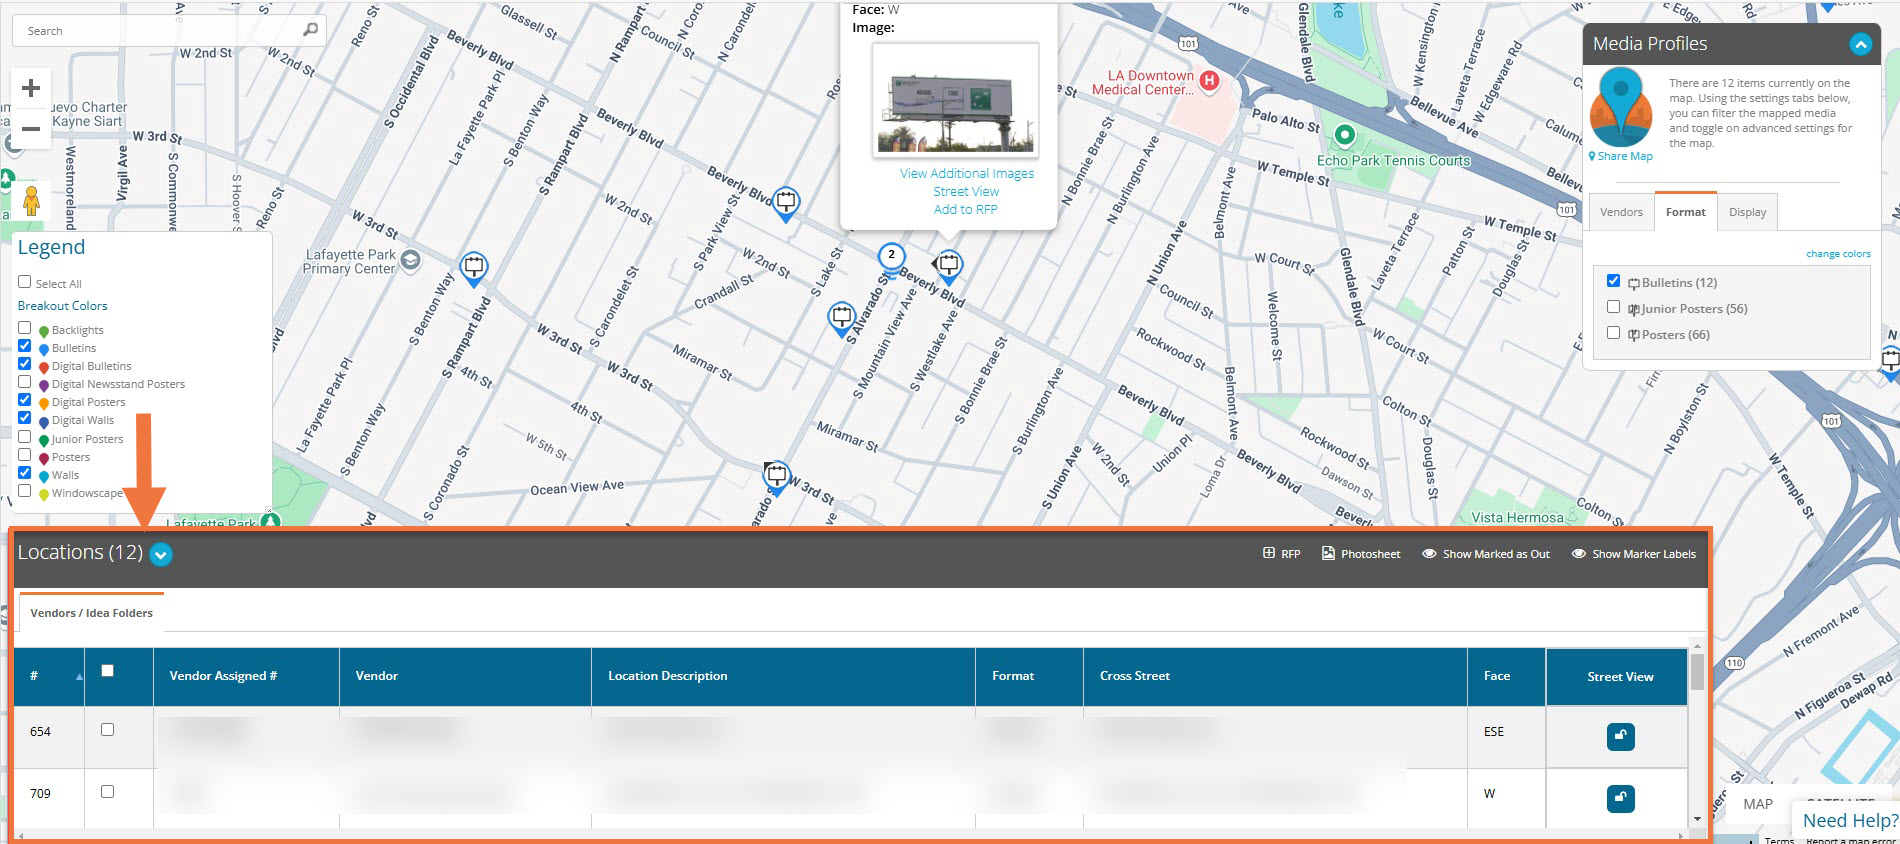
Photosheet - Clicking on this button will generate photosheets for all of the units shown in the Locations table.
Show Marked as Out - If you are a buyer, this allows you to display, any units you have marked OUT, on the map.
Show / Hide Marker Labels - The toggle to show or hide marker labels is located in the upper right-hand corner of the Locations panel. Showing marker labels will display the marker label number next to each asset/location icon as it correlates to the list in the Locations panel.
Action - Any available actions will appear in the Action column at the end of the Locations table. Depending on your map, you may have the option to 'Remove' or if you are a buyer, 'Mark Offer Out'. Click 'Remove' to keep that specific asset from displaying on the map. If you are a buyer with the action available, click 'Mark Offer Out' to mark the unit as 'Out' on the RFP Compile grid and remove it from the map when refreshed.
Search Results tab - This tab can be viewed from the Locations panel. It provides a list of each resulting location from your search that is included in the map and populated in the current view. Specific details about each location, such as marker label number, name, and location address are also provided. In addition, your search results can be saved as a location list by clicking the 'Save as Location List' button shown above the right-hand corner of the table.
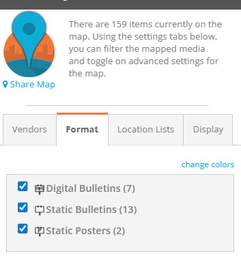
Settings Panel - This tool is found in the upper right-hand corner of the map and provides advanced settings that can be used to filter mapped media.

Vendors tab - Media assets are filtered by company and can be viewed by company or collectively. The Vendors tab lists every vendor included in your current view of the map with the number of units populated in the current view for each vendor in parentheses. Each company is represented by a different color. A legend of these colors is displayed in the Vendors tab.
By checking and unchecking the box next to each vendor, you can adjust which companies are populated on your map.

Format tab - Media assets are filtered by format (i.e. bulletins, walls etc.) and can be viewed separately or collectively. The Format tab lists every media category included in your current view of the map with the number of units populated in the current view for each media format in parentheses. Each format is represented by a unique icon. A legend of these icons is displayed in the Format tab.
By checking and unchecking the box next to each category, you can adjust which formats are populated on your map.
Display Menu
Sharing - From this tab, you can choose whether or not to 'Anonymize Vendors' and 'Share Marked as Out' units for the generated shareable map.
Starting Position - You can click Save Map Position to lock the zoom level of the map.
Marker - When the "Show Multiple Call-outs" is checked, the pins clicked will overlap and show as many as you click. Uncheck this box to close all other pins except the one being clicked on.
Marker Color - This allows users to break out map pin colors by Vendor, Format, or Markets (just Format and Markets if you are a seller). Buyers can also select to color map pins by Audience if your map contains RFP data and the RFP has TAB columns added.
Demographic Shading - This allows the user to display shading based on the demographic selected from the drop-down menu. The chosen demographic and the values that correlate with the different degrees of shading are shown in Legend. The shading is determined by U.S. Census Bureau data.
Inventory Data - This allows the user to control the information displayed in the asset icon pop-up. Options include vendor, format, Geopath panel ID, vendor assigned #, DOmedia assigned asset #, location, cross street, face, line, size, source, and image.
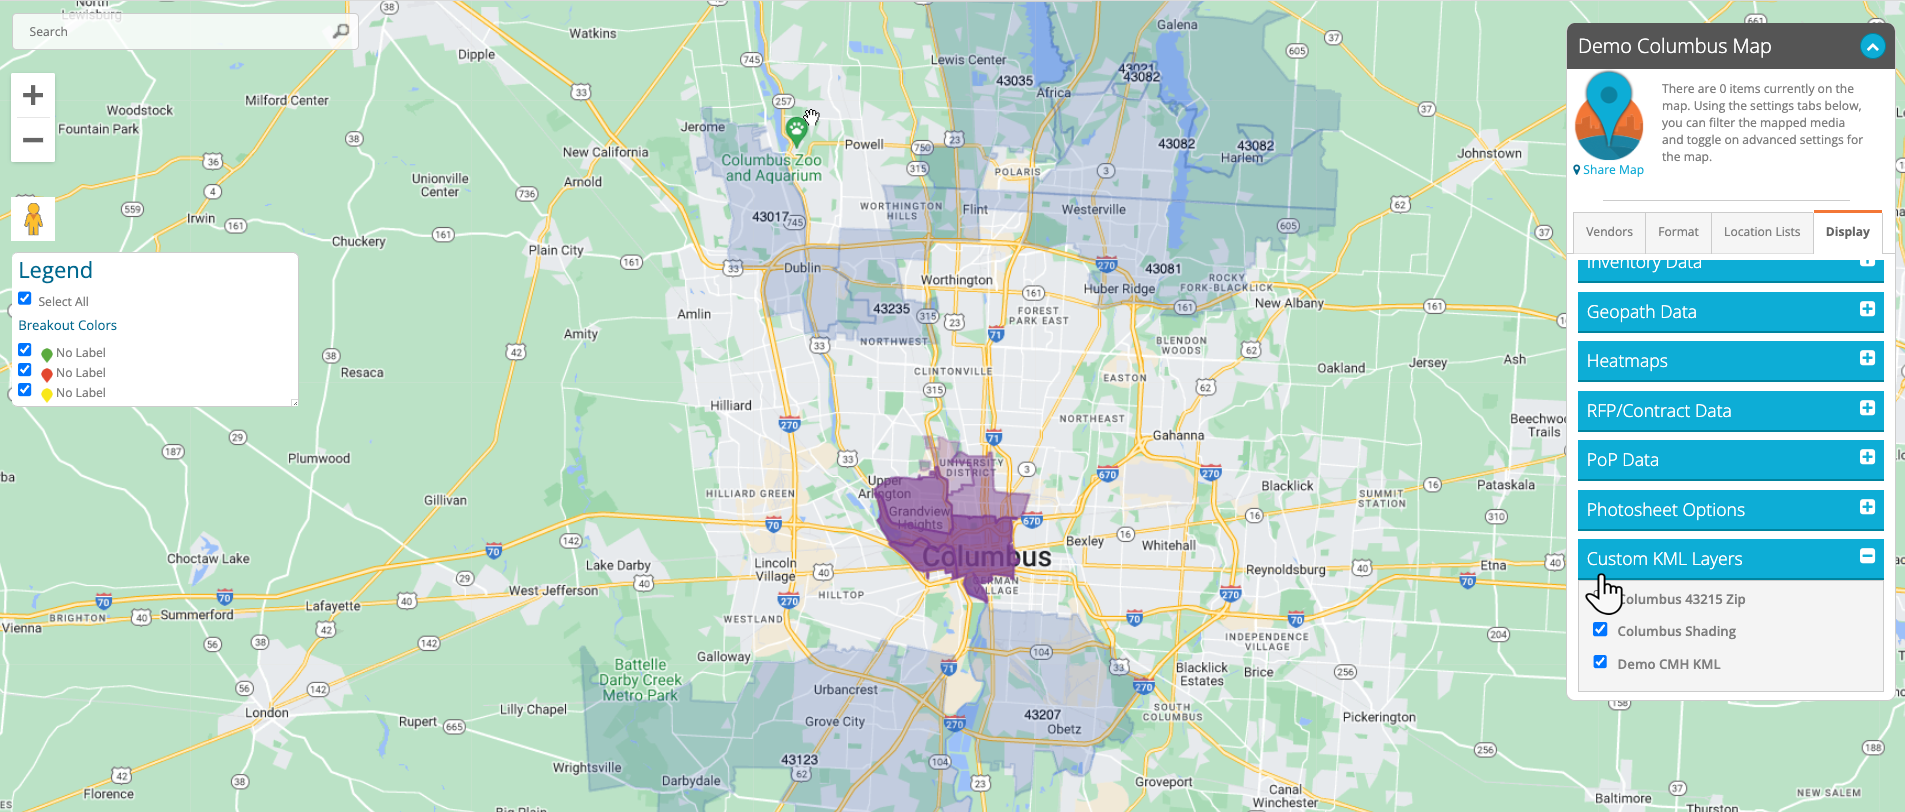
Custom KML Layers - This allows the user to toggle which Custom KML Layers should be displayed on the map. In the example shown below, the custom KML layers depict selected market locations by zip code.