
Buyer: Programmatic
DOmedia offers programmatic advertising to complement your guaranteed campaigns. Programmatic advertising is an automated process that uses algorithms and data to buy digital ad space in real-time.
Programmatic is essentially an auction with dynamic pricing. You place bids and publisher/vendors see your bid and respond with a win (your ad will run) or loss (e.g. your bid price was not high enough). Your ads will continue to run until your budget has been spent.
Getting Started
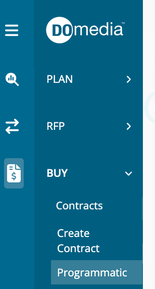
In Navigation go to Buy > Programmatic. The tool will open in a new tab.
Enter the email you use for DOmedia and your programmatic password. If you do not know/have a password, email agencysupport @ domedia.com and we will provide you a temporary password.

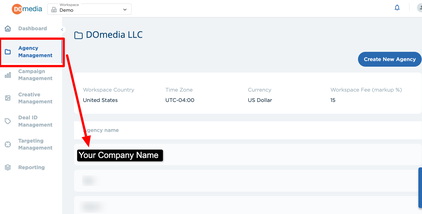
In Navigation, Click Agency Management and Click Your Agency’s name.
Clients
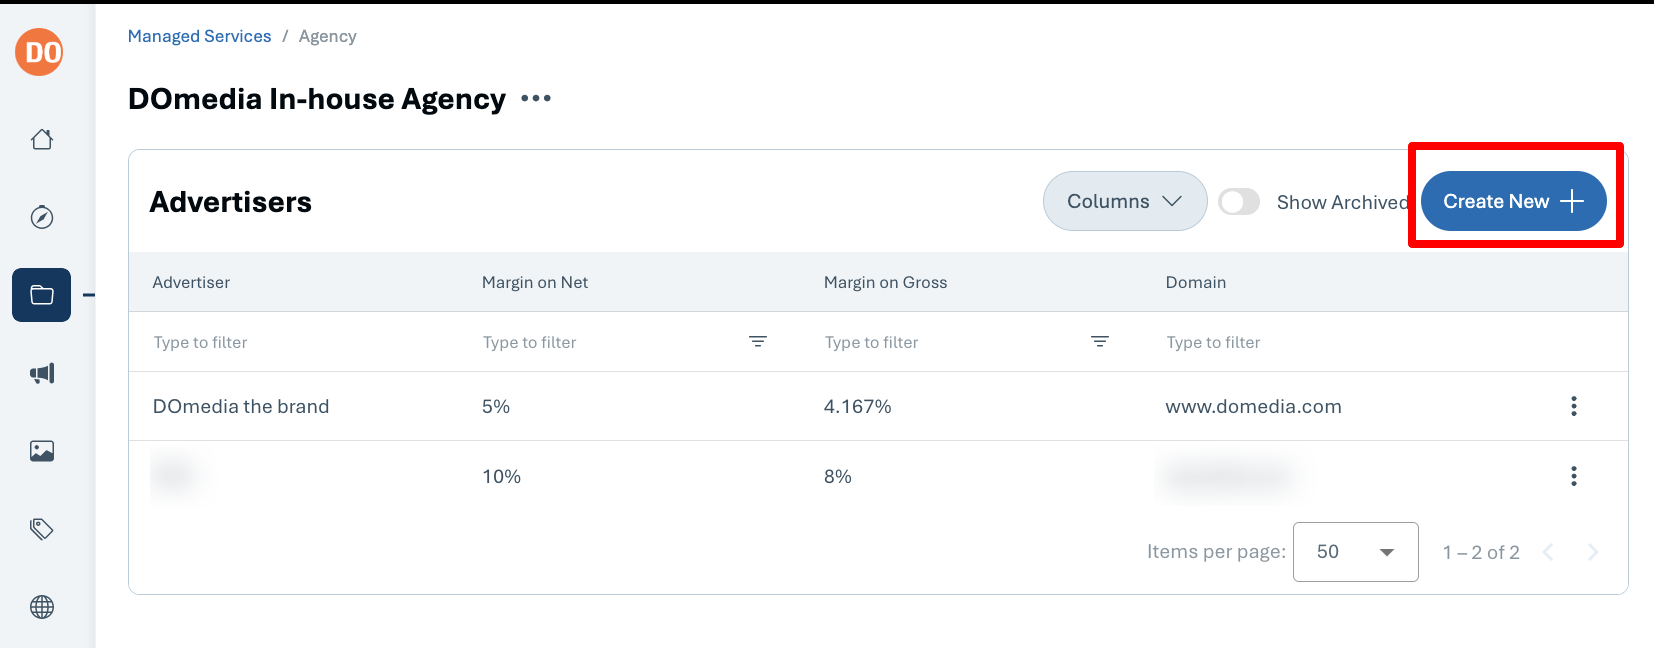
Check to see if your client is already listed/set up. If not, click Create New Advertiser (your client).
If you need to Create a New Advertiser:
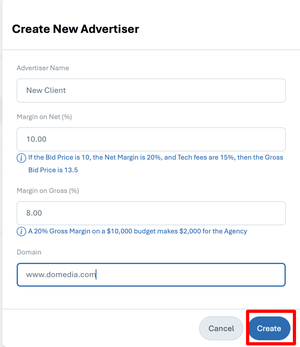
- Enter Margin on Net %
- Enter Margin on Gross % (how much your agency charges as a percent)
- Example: The client has $10,000 to spend. Your agency makes/charges a 20% Gross Margin fee. That means your agency will make $2,000.
- Click Create (Advertiser)
Campaign Setup
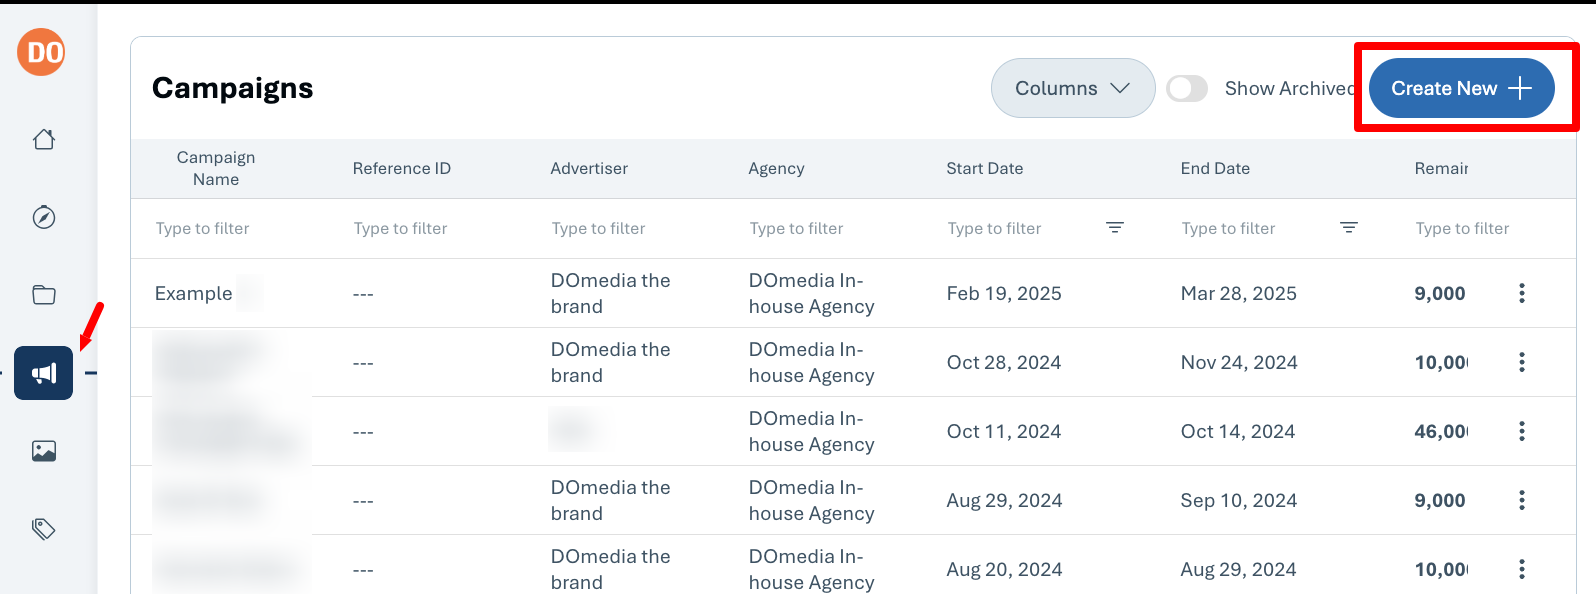
In Navigation, Click Campaign Management and click Create New (Campaign)
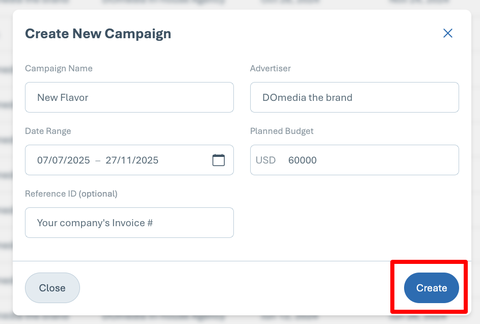
- Enter Campaign Name
- Select Your Advertiser/Client
- Enter your overall Start and End Dates
- Enter the client's overall budget for the campaign
- Optionally: include a reference ID so your accounting team can match this campaign to invoices.
- Click Create (Campaign)
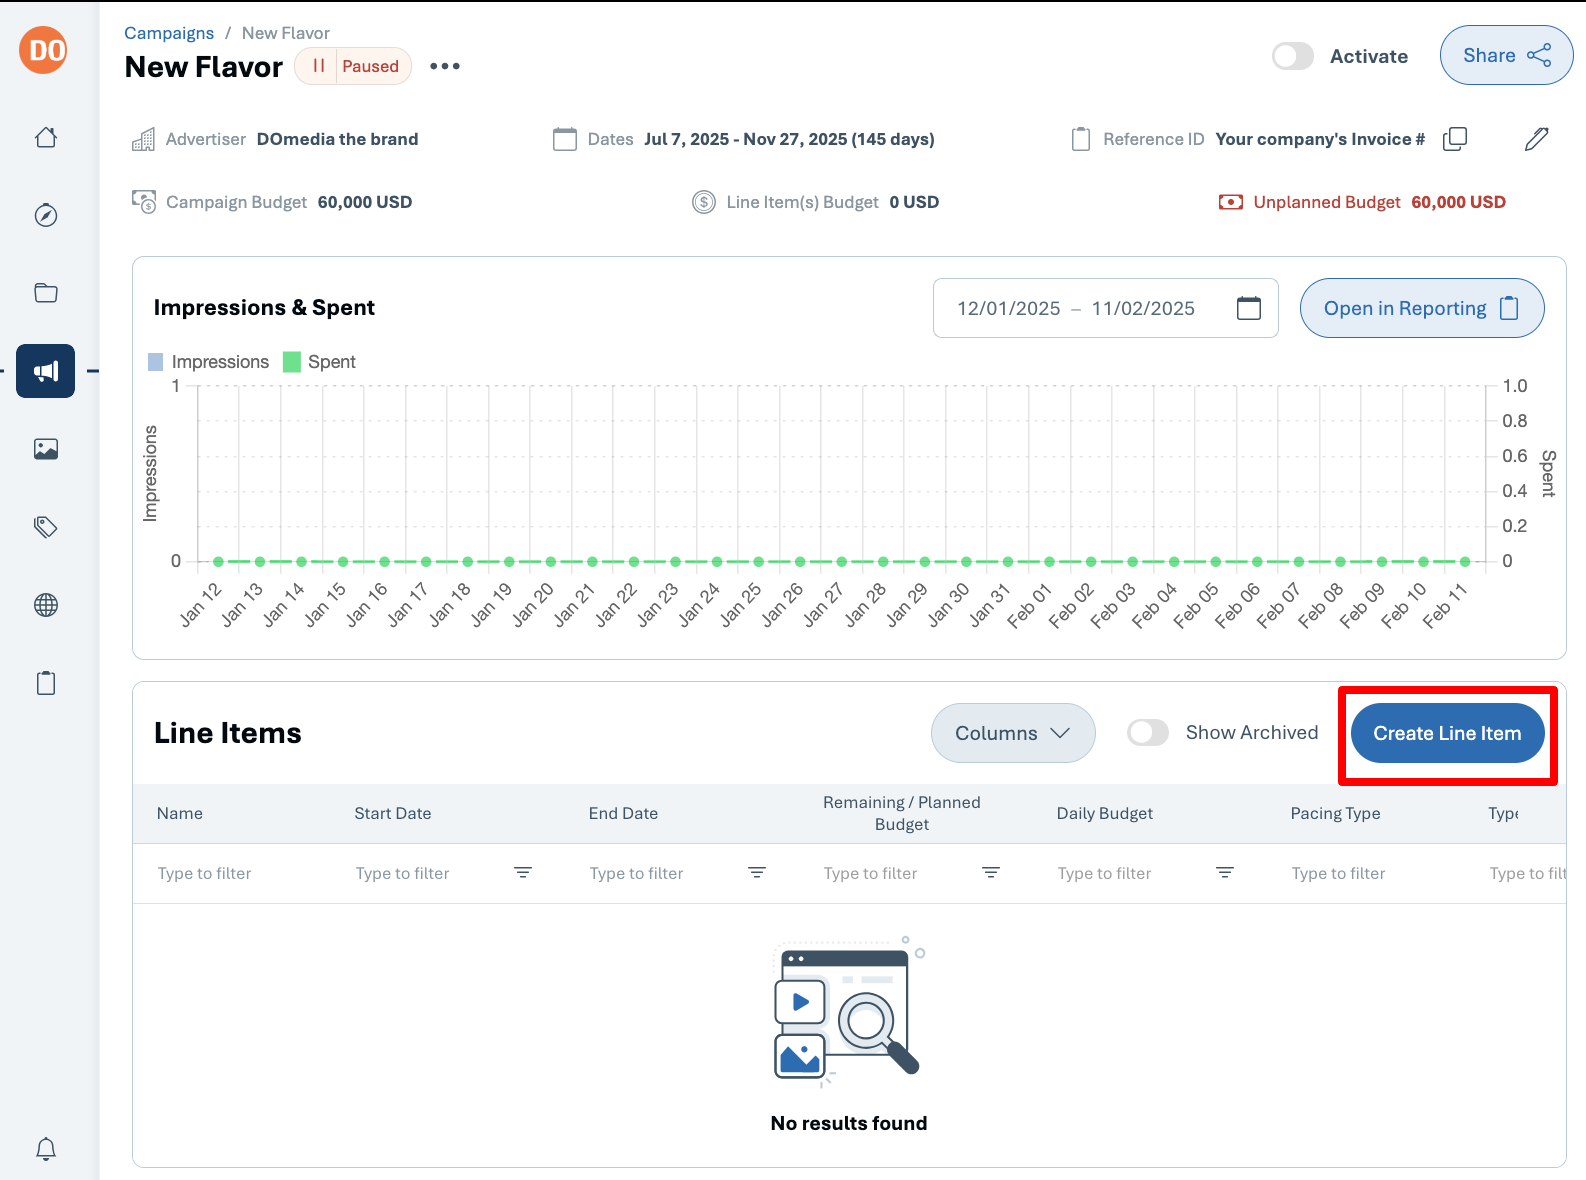
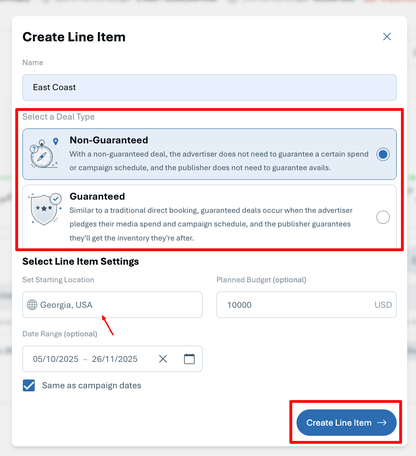
On the campaign view, click Create Line Item
Give the line item a name, choose a starting location, and choose whether the line item is Non-Guaranteed or Guaranteed.
Choose between Non-Guaranteed (specific screens and timing not promised) and Guaranteed (specific screens and schedule are promised by publisher/vendor). Guaranteed campaigns require a deal to be set up before screens/line items can be associated with the campaign.
Planning
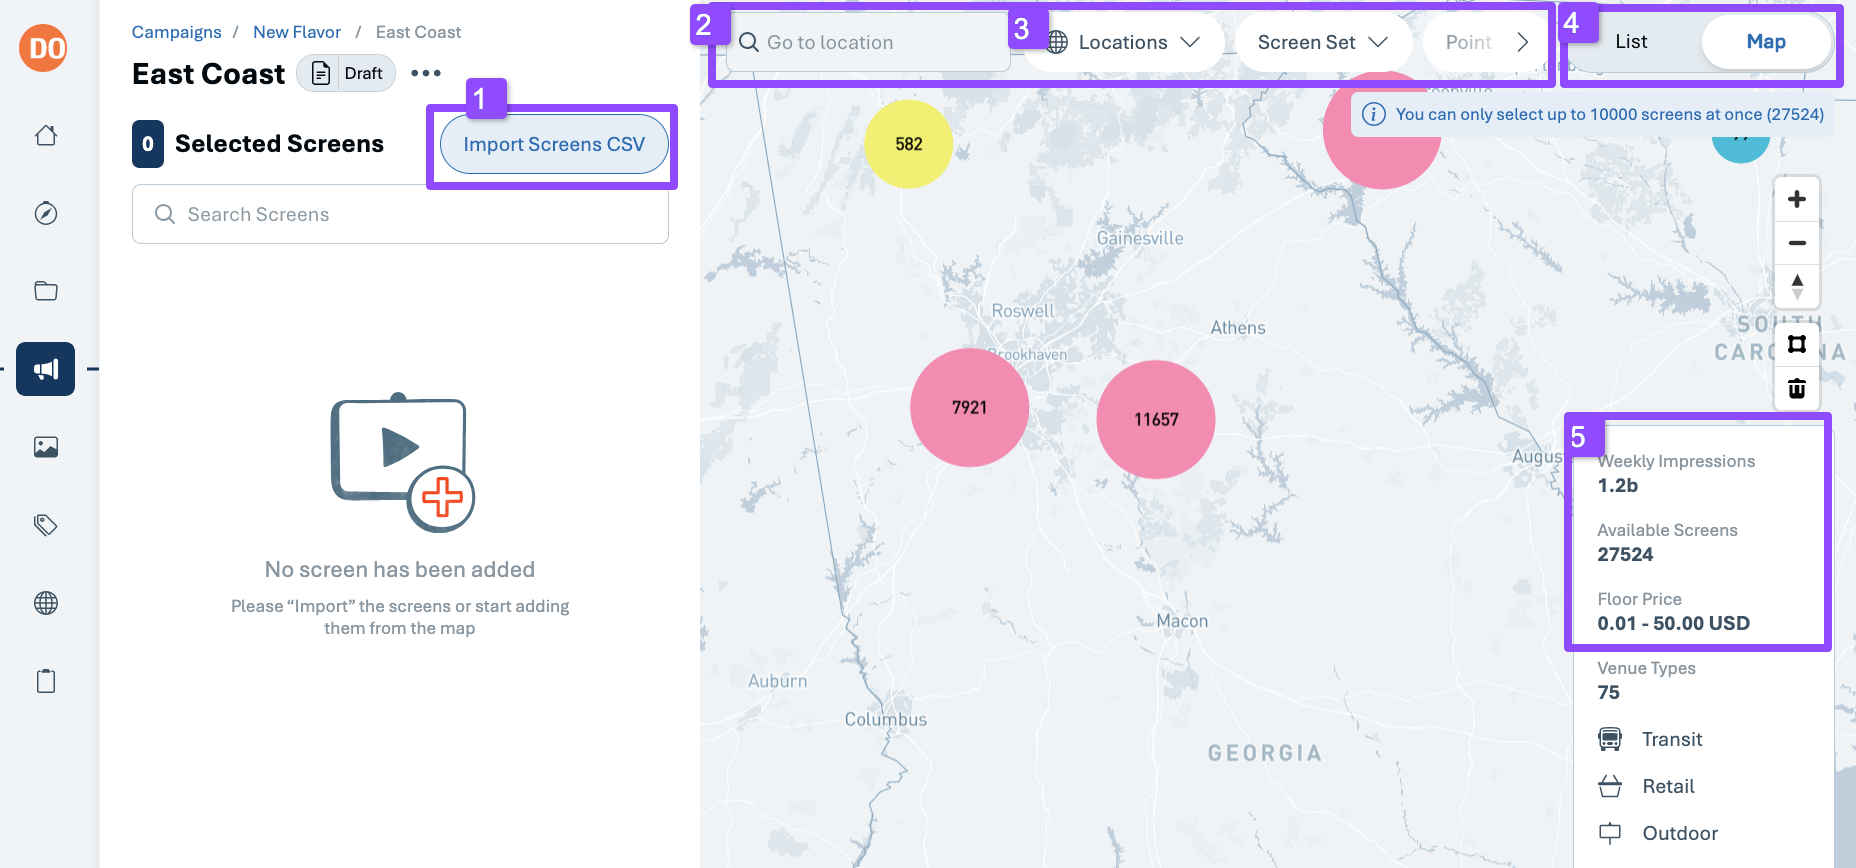
You will be taken to a map centered on your desired location.
- Optional: Import screens with a CSV
- You can choose to change your location
- You can use filters to narrow down your screens:
- Locations
- Screen Set
- Points of Interest
- Venue Type
- Resolution
- Publisher
- DMA
- Ad Format
- Floor Price
- Weekly Impressions
- Audience Targeting
- Deals
- Toggle between list and map view
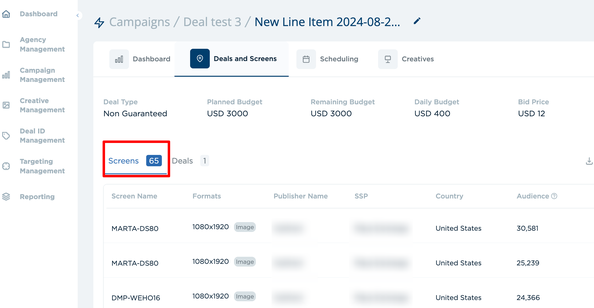
- See estimated weekly impressions and the total number of screens available
Optionally you can filter on:
- Points of Interest
- Screen Properties (e.g. Publishers/Vendors)
- Audience (note: there may be an additional cost to use audience data)
Campaign: Settings
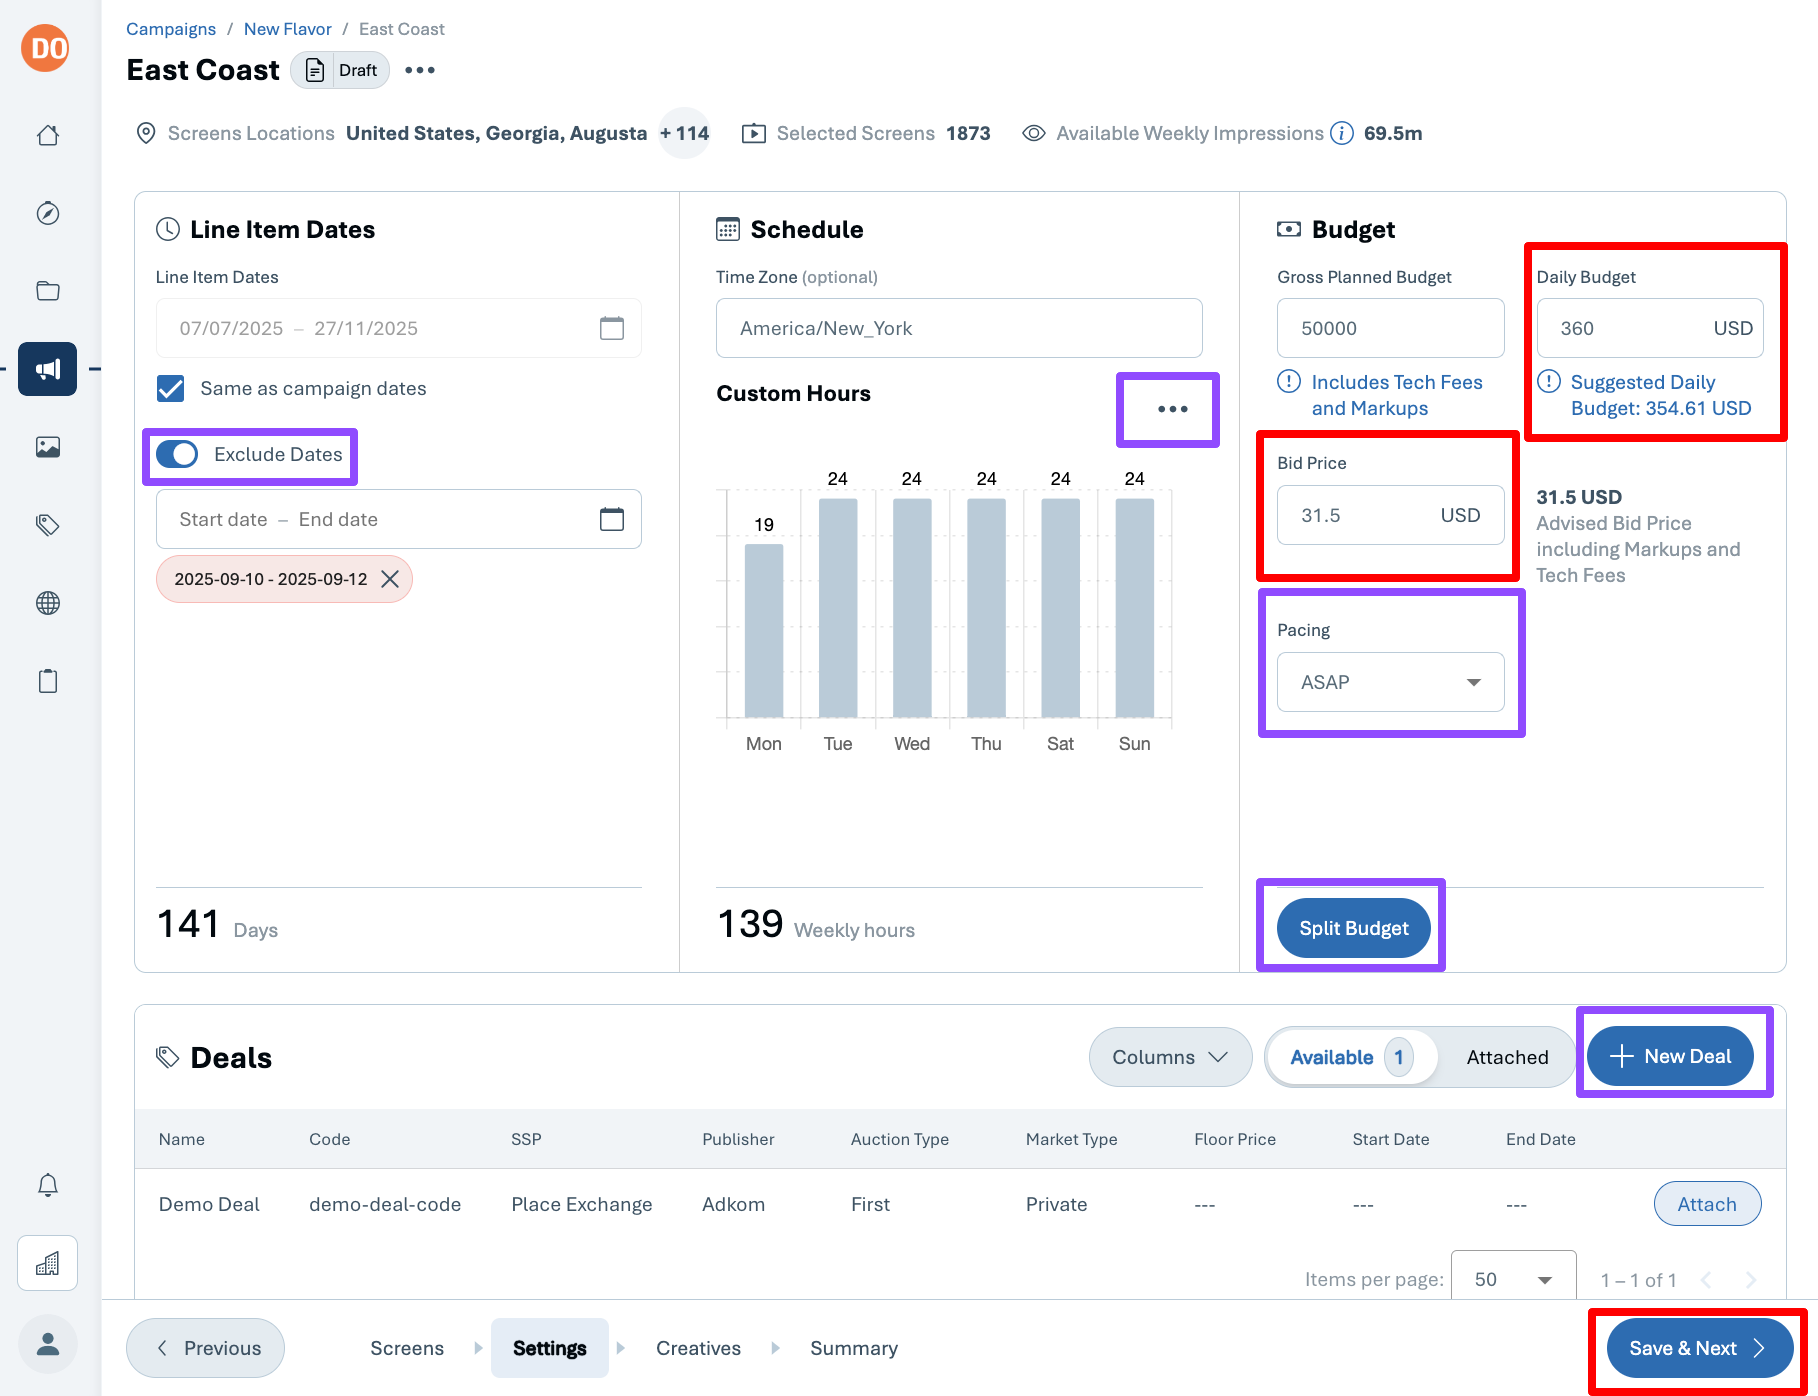
When the Campaign Settings are complete, click Save & Next
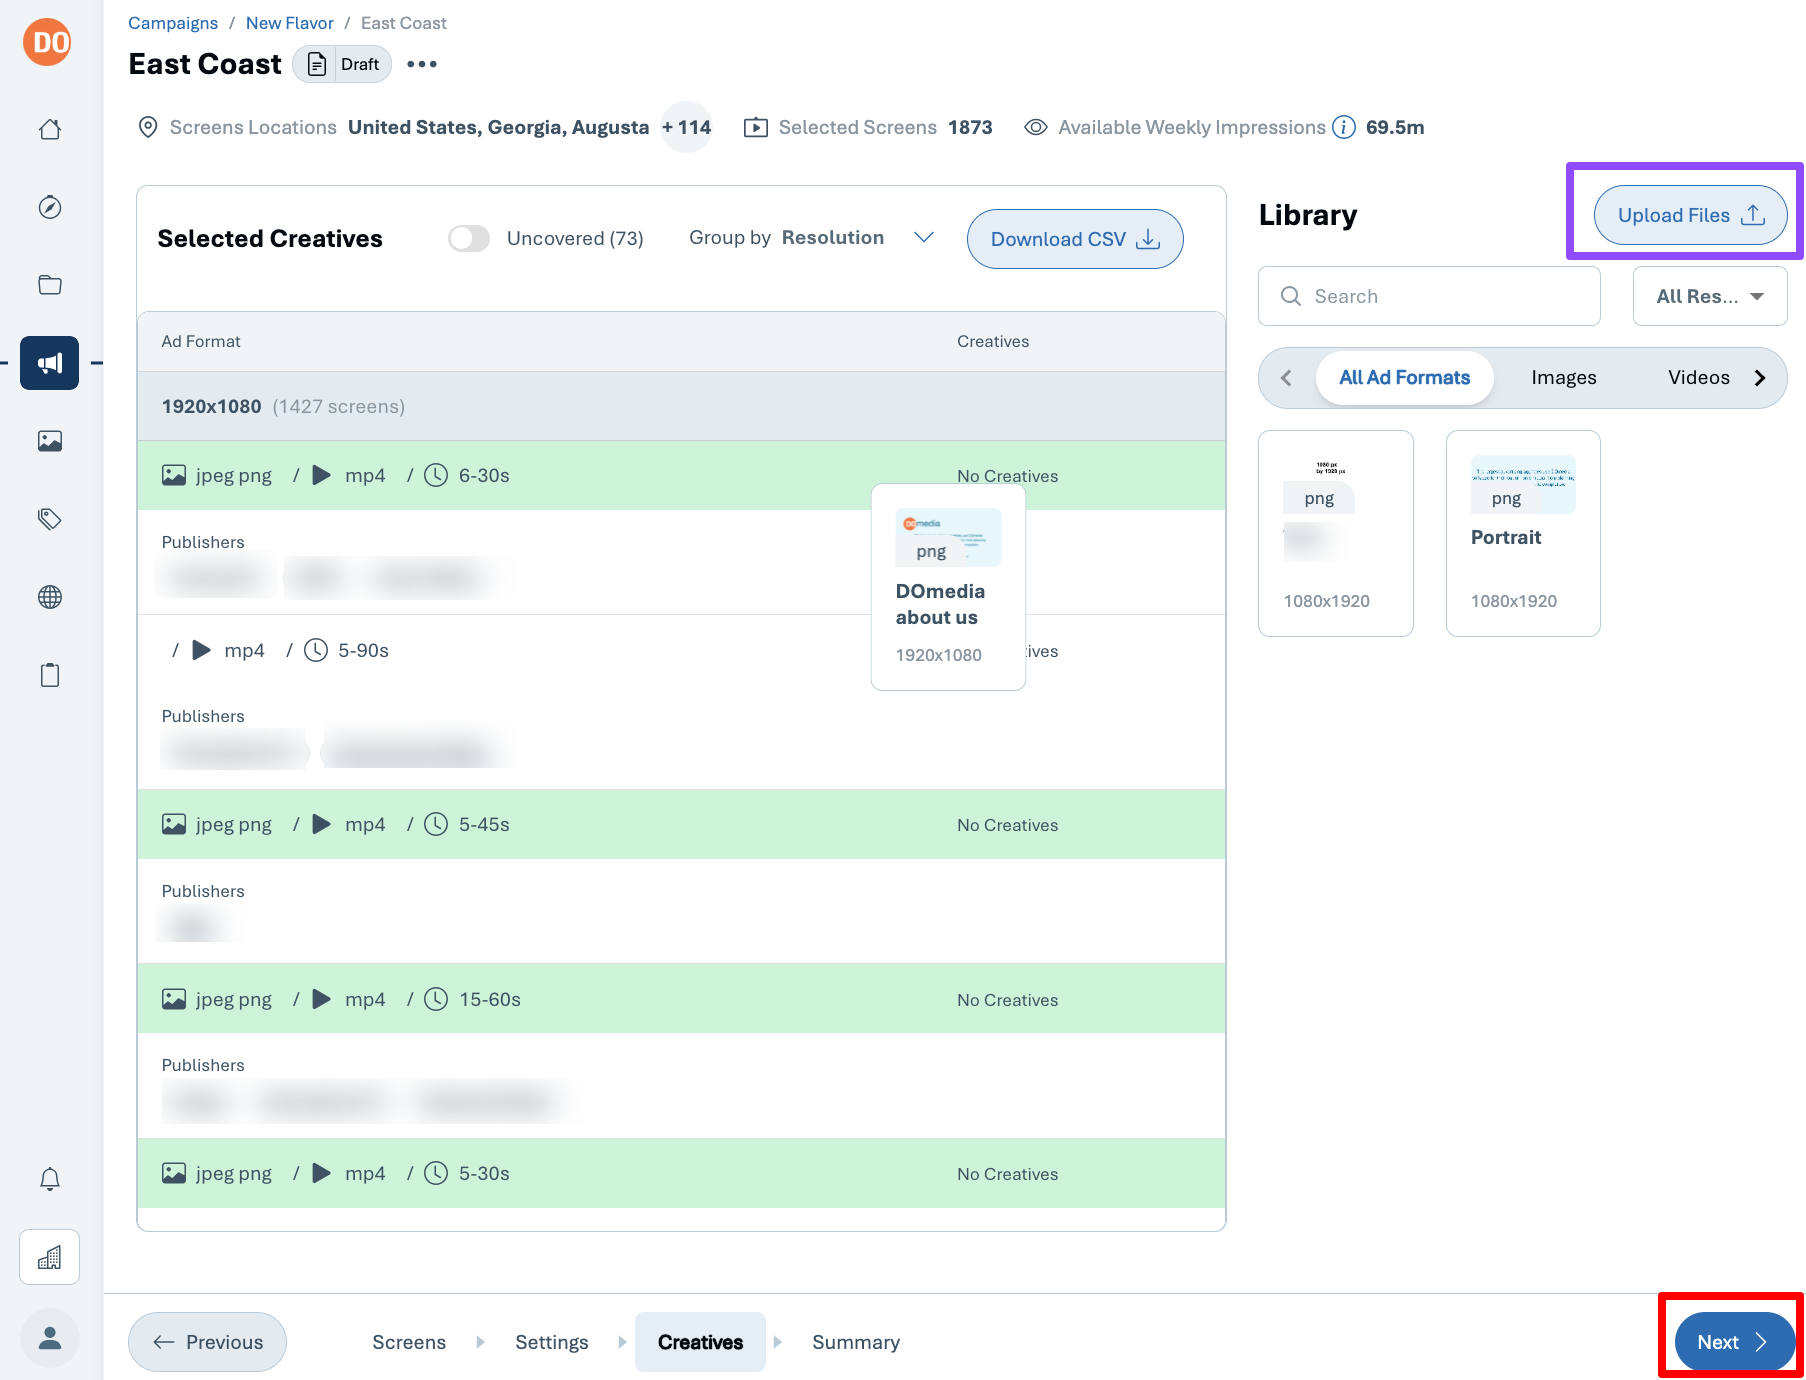
Campaign: Creatives
- A list of ad formats is conveniently grouped by resolution.
- Drag and drop creatives (from right to left) from your creatives library.
- Optional: click upload files to add new creative.
- When all ad formats have creative click Next

Campaign: Summary
- Review everything and toggle activate when you're ready
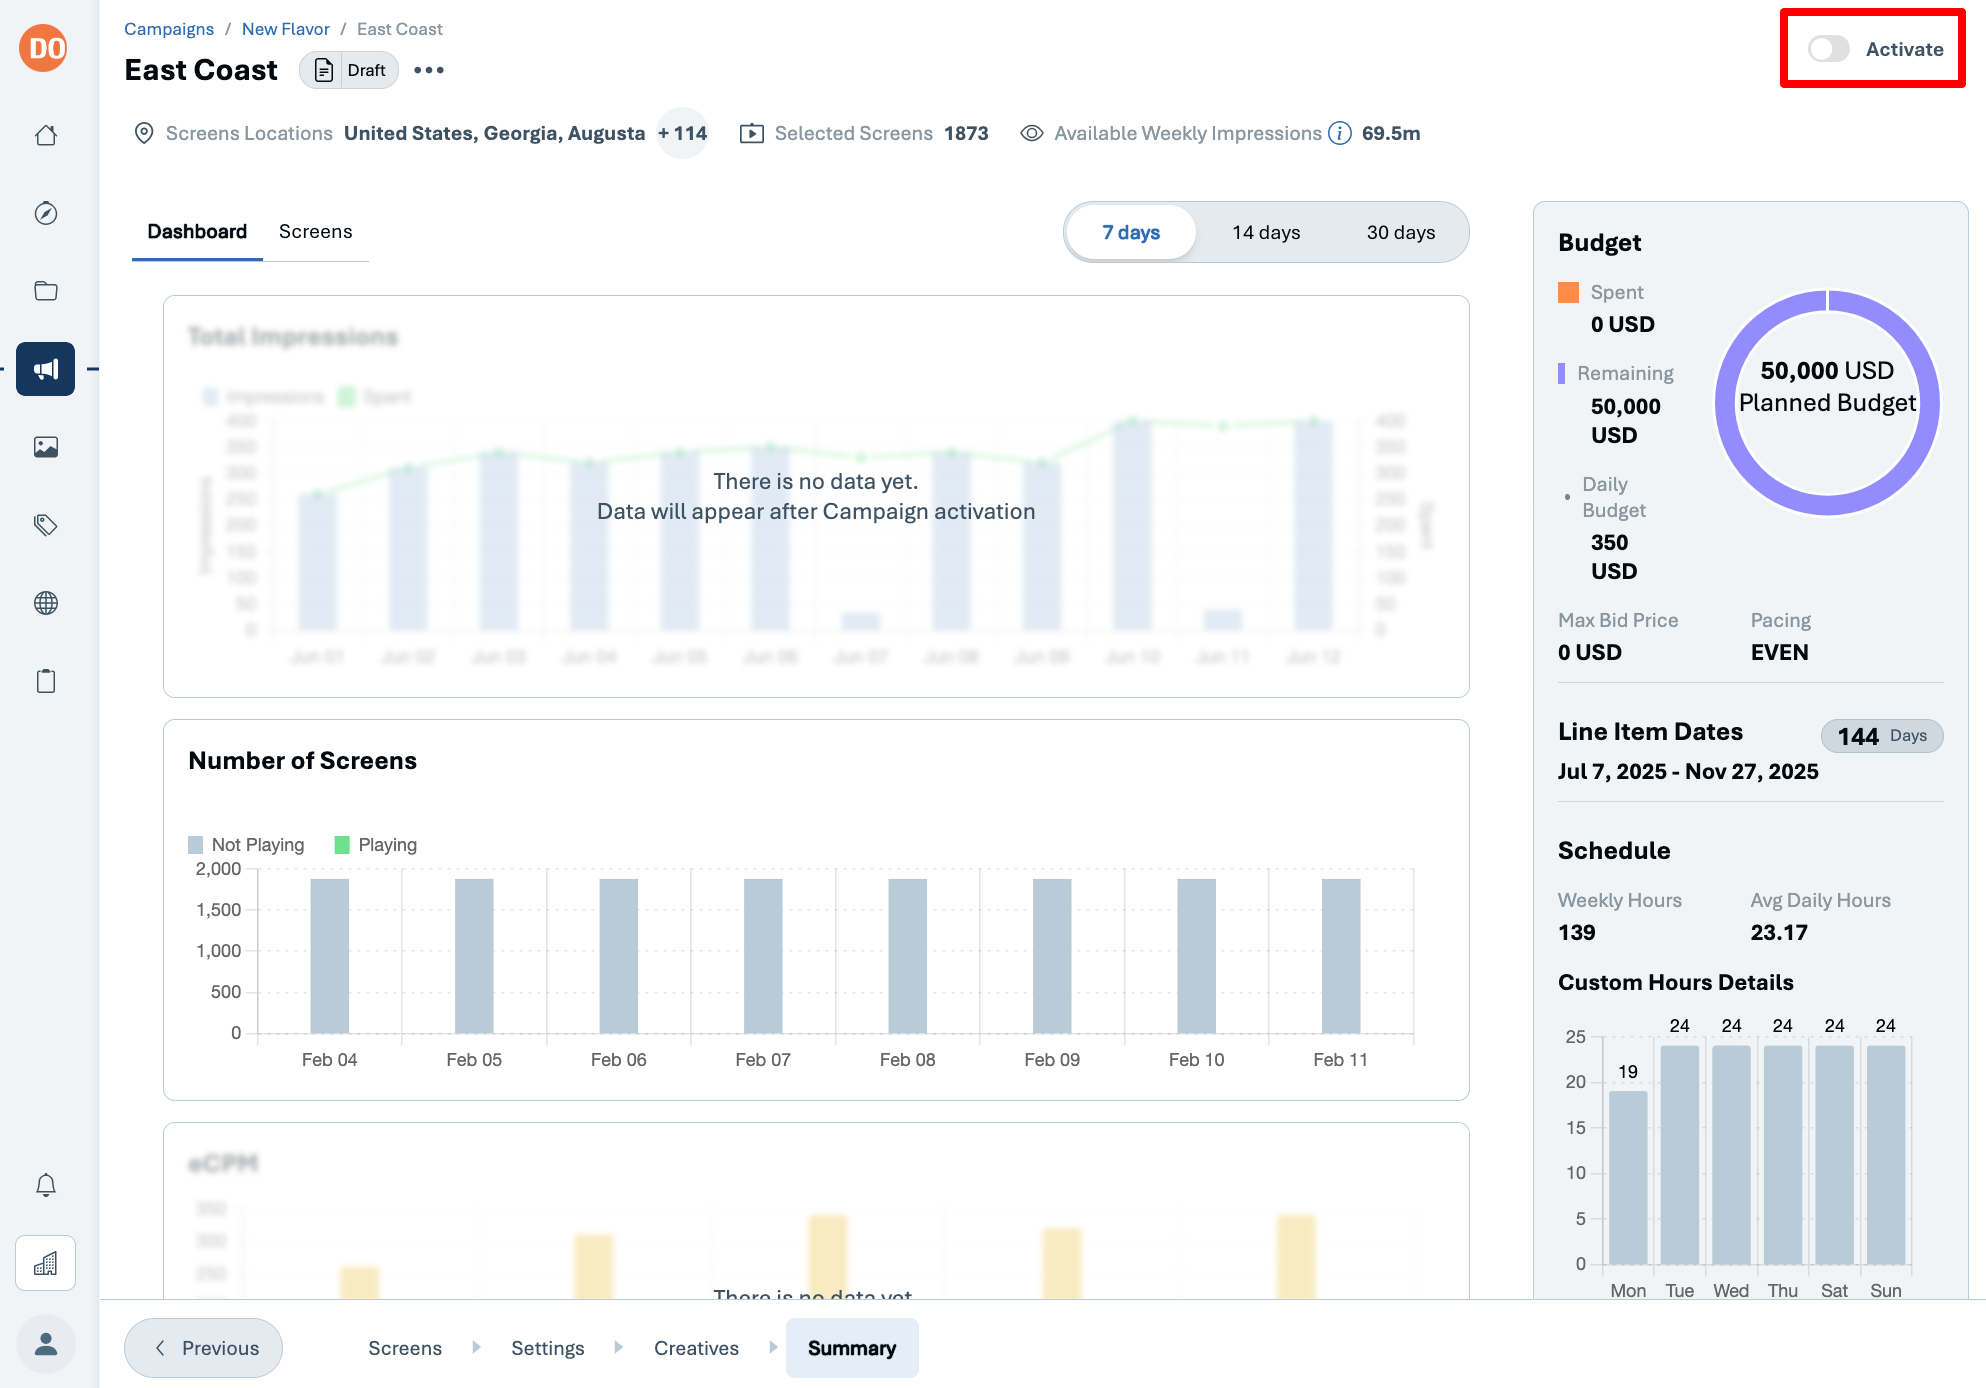
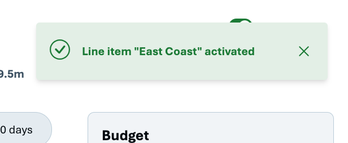
Congratulations, your campaign is now active
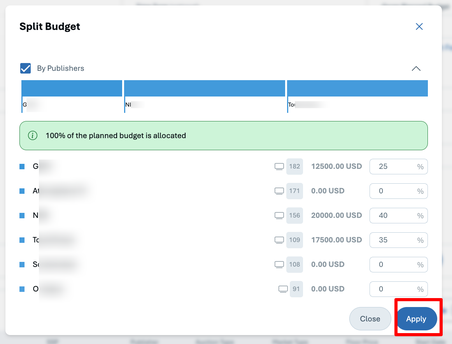
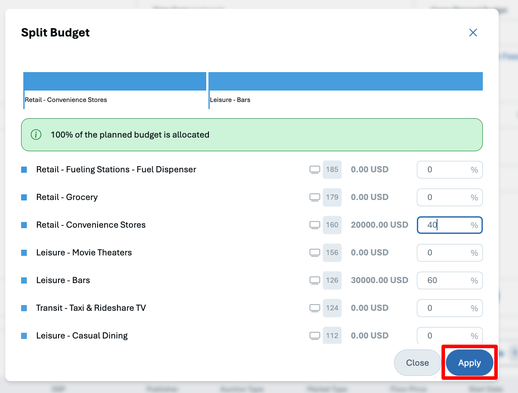
Deals/Packages of Screens
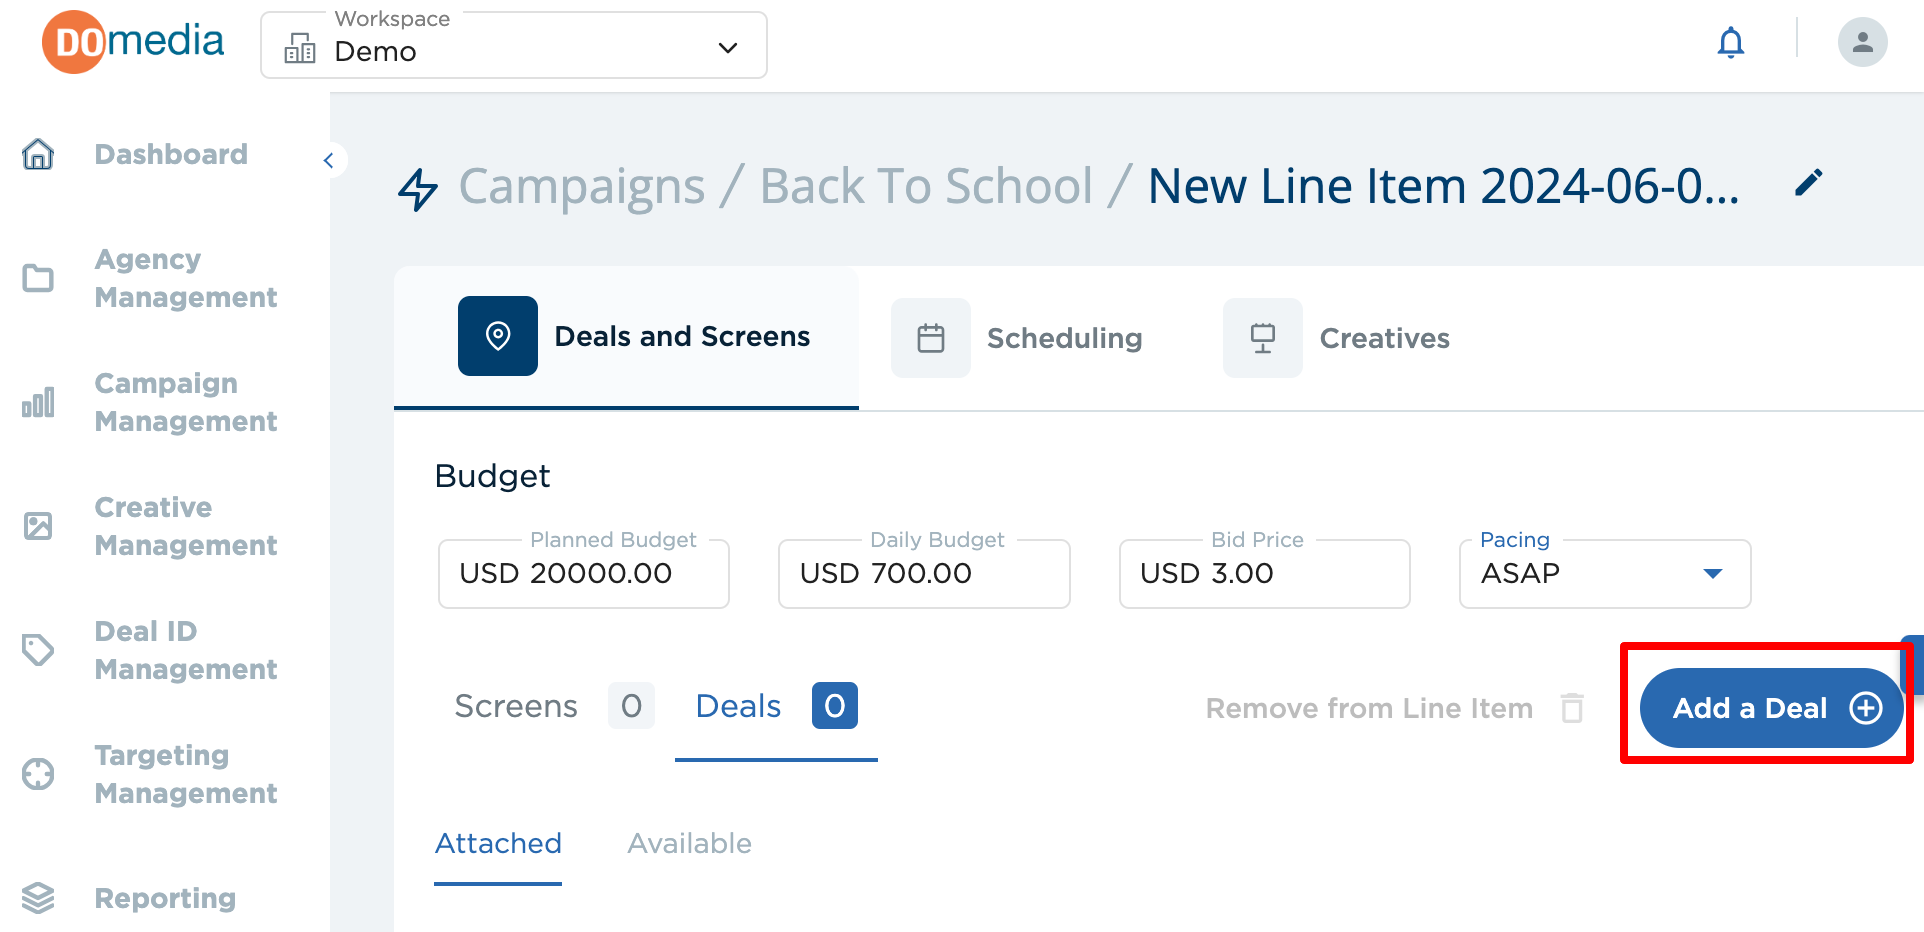
Optionally, if a publisher/vendor proposes a set of screens and gives (emails) you the Deal ID, SSP, and floor price, you can enter it to pull the deal into your campaign.
Click Add a Deal
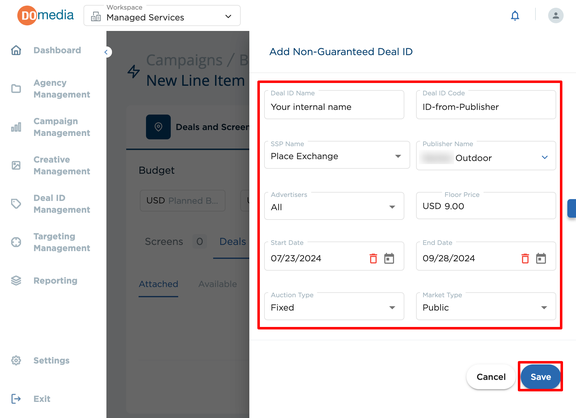
- Give the Deal ID Name. This is for your internal purposes. Publishers/vendors do not see it.
- Use the Deal ID spelled exactly as the publisher/vendor sent it to you.
- Select the corresponding SSP, Publisher, and Advertisers.
- Set a floor price (required). It is recommended to ask the publisher/vendor what the floor price is.
- Select Dates. The publisher/vendor has the option of limiting the deal to certain dates.
- Select Auction Type and Market Type and click Save.
Other helpful info about Deals:
The same Deal ID can be used multiple times across any number of campaigns as long as it's within the specified timeframe.
A deal can target a defined screen list and/or defined geographies, venue categories, and networks.
Setting up a deal does not automatically pull in screens. Screens must be added.
Adding Screens to a Deal
On the Deals and Screens Deals section, look at the available Deals.
Click Manage Screens

Click Browse to pull the CSV from your computer
Select which column in your CSV represents the Device ID
Click Submit
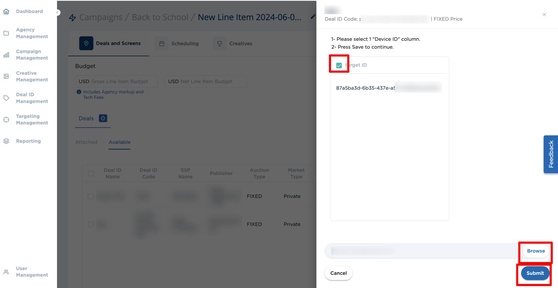
You will now see the screens you uploaded attached to the deal
Click save (if necessary).
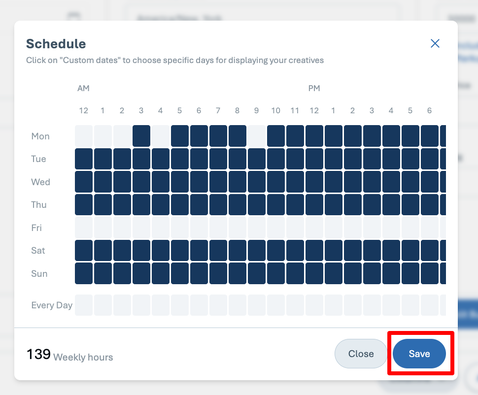
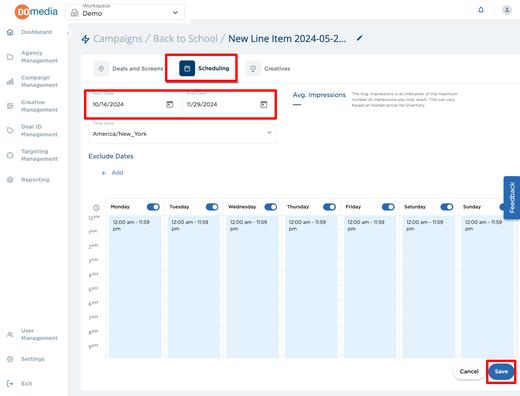
Scheduling when ads run/play
Click the Scheduling tab, enter dates, and click Save.
Creative (Artwork/Copy)
All the creative ads your company has uploaded are available for reuse. Click Creatives in the navigation bar

If you do not have the creative files yet, note (e.g. copy and paste, screenshot) the size/dimensions/pixels and file format combinations needed.

Generate the creative files offline. You can upload images here or in Creative Management.
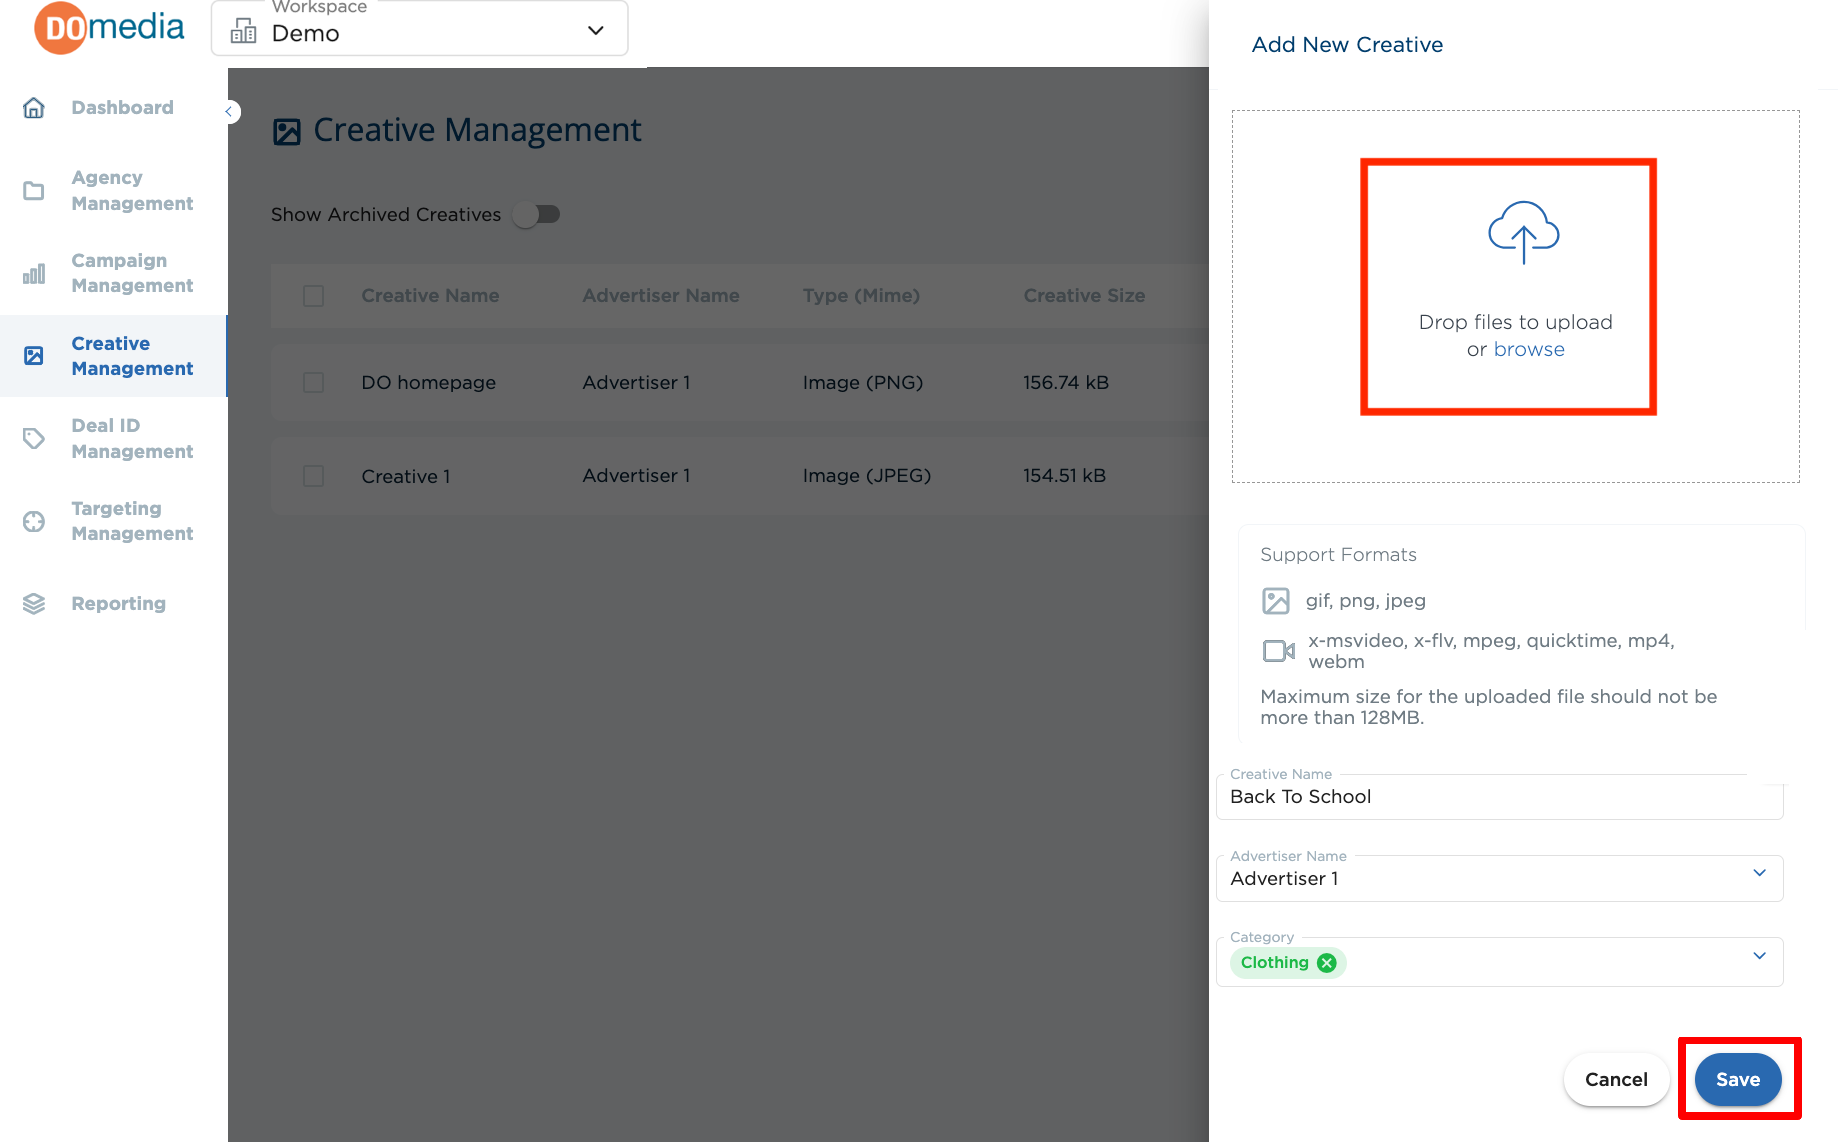
In Navigation, click Creative Management and click Create New (Creative).
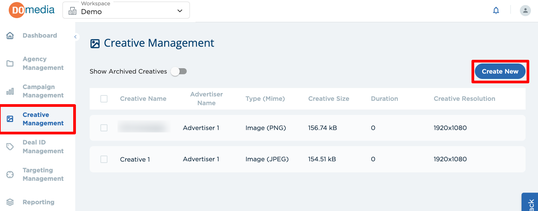
Select the file from your computer, give it a creative name, associate it with a client, and assign it to at least one category. A category is the industry your client is in. This prevents issues with vendor restrictions (e.g. adult content or competitive brands). Then click Save.
Click Campaign Management and click on the corresponding campaign name.
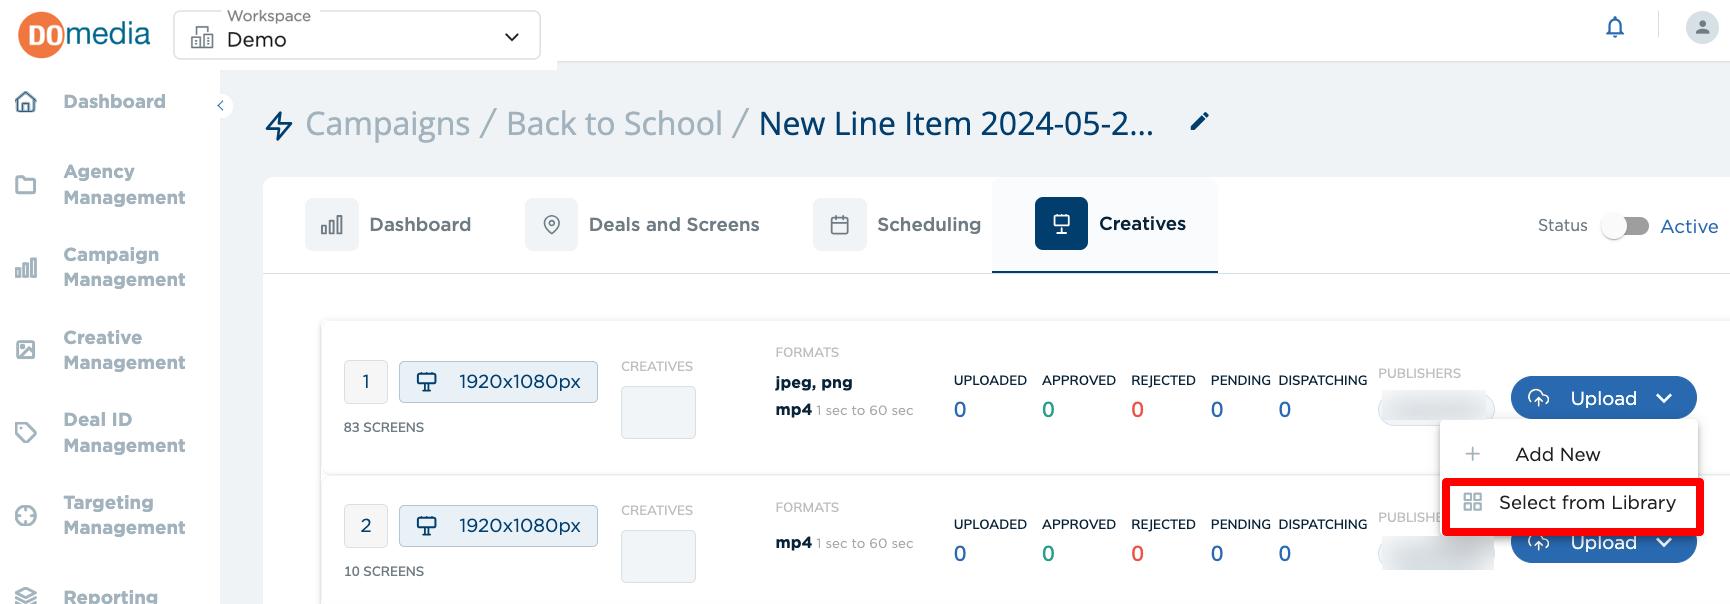
Click Line Items then click the Line Item row, then click the Creatives tab.
Click Select from Library and select the corresponding file for the screen(s).
Campaign: Creatives
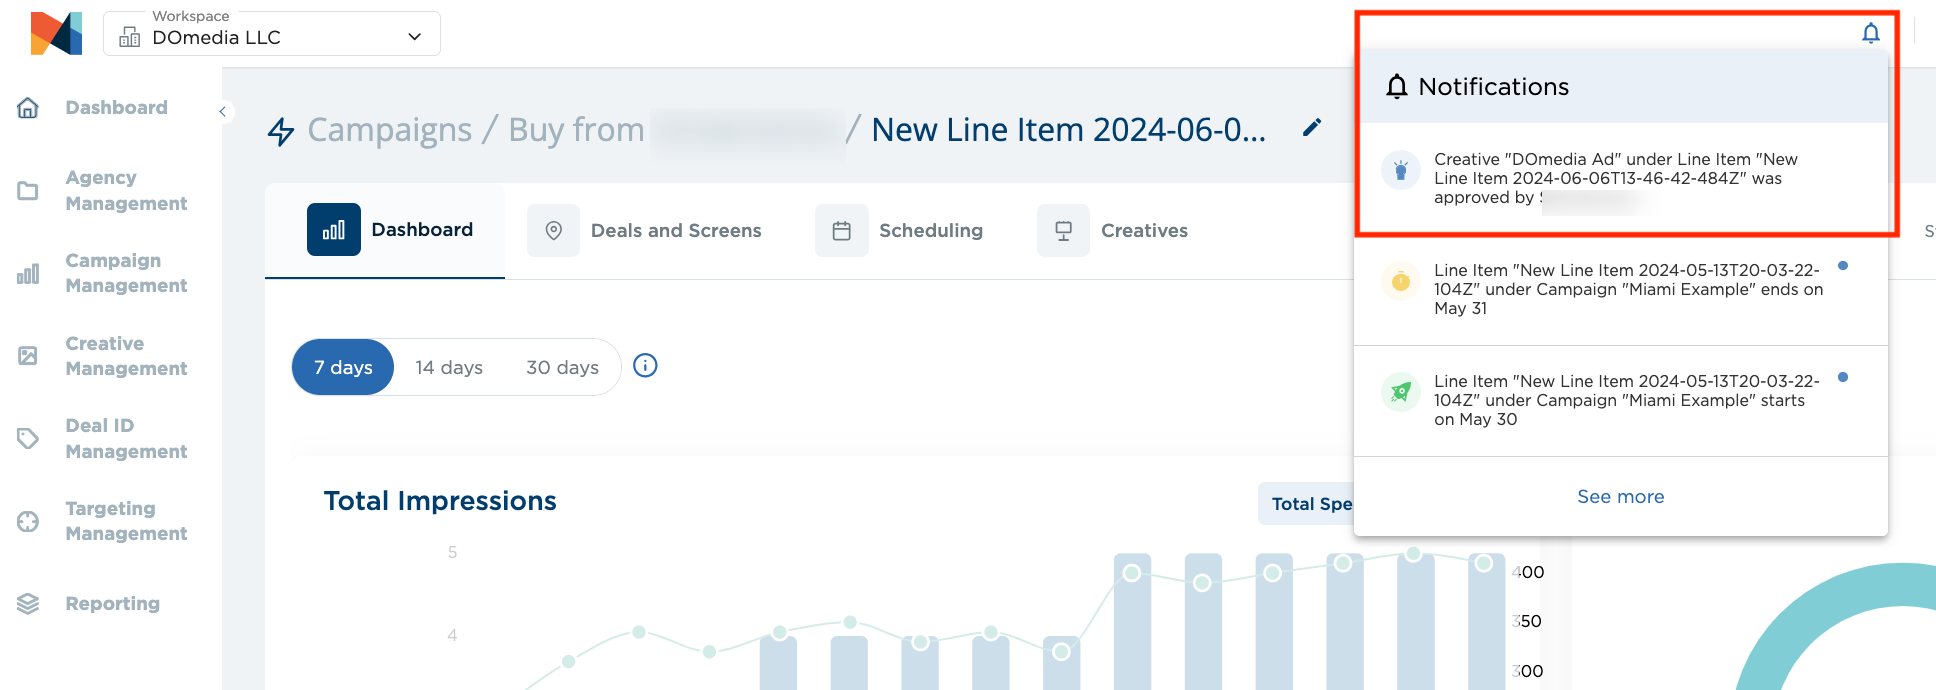
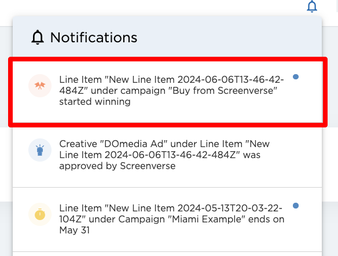
When the creative is approved you will see that in your notifications. This currently is the only place you will be notified of creative approval.
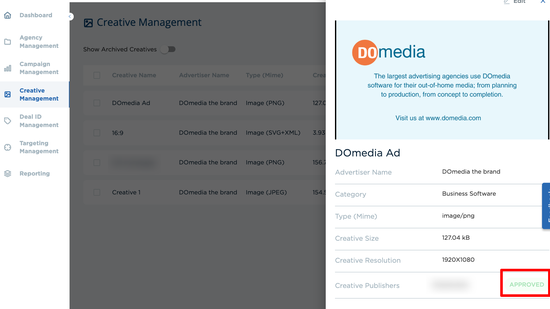
Rejected Creative - if the publisher rejects the creative, you can go to Creative Management > Click on the creative and see the reason your creative was rejected if the publisher provided a reason.
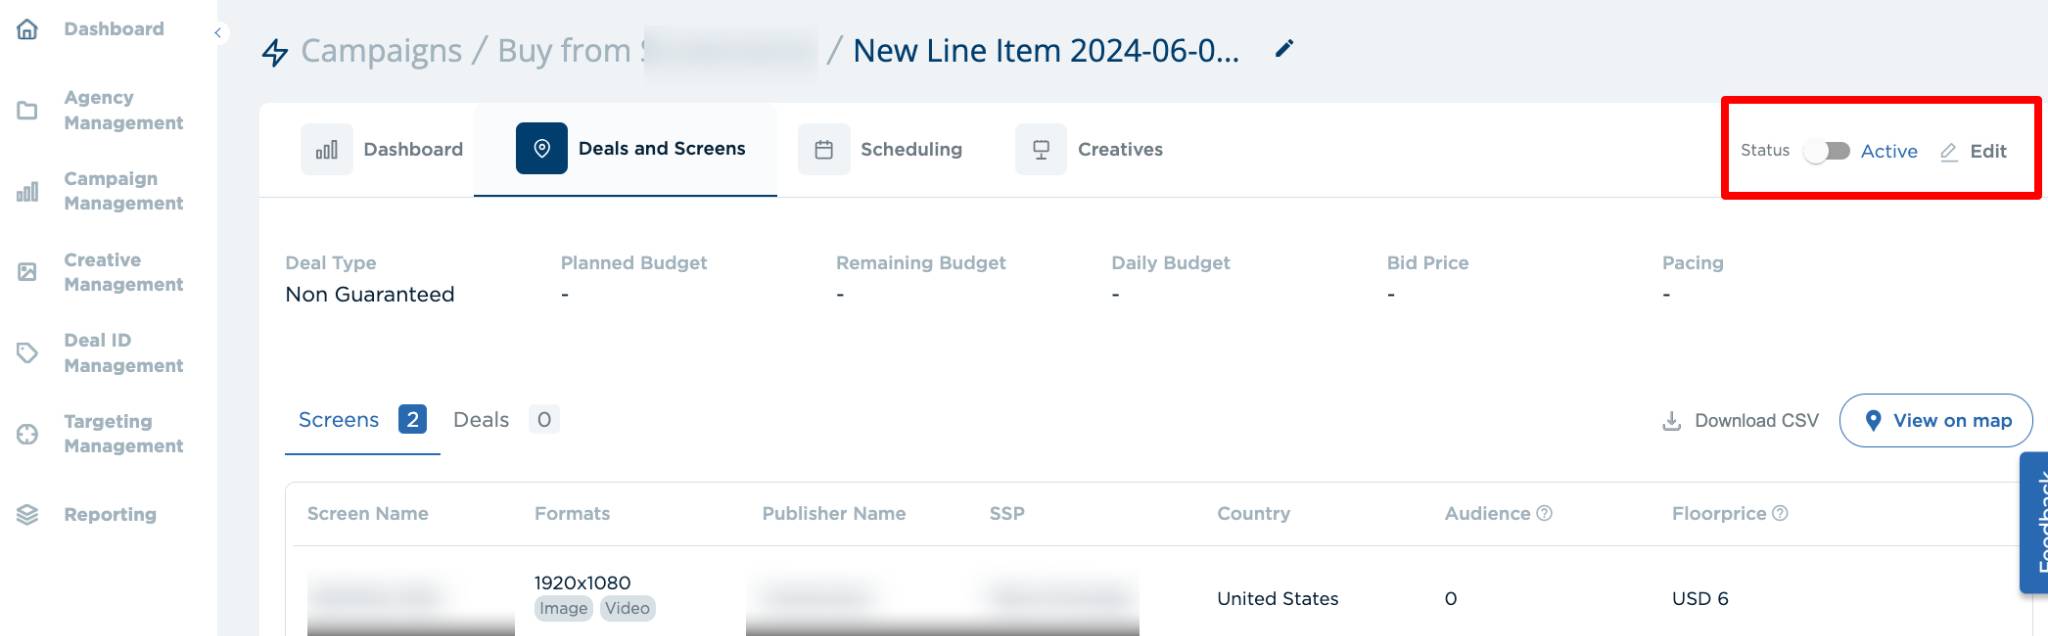
Activate/Start Running Campaigns
When your line items, schedule, and creative all look correct, you can activate your campaign. That will send your creative to publisher/vendors for approval and start actively bidding based on your set start date.
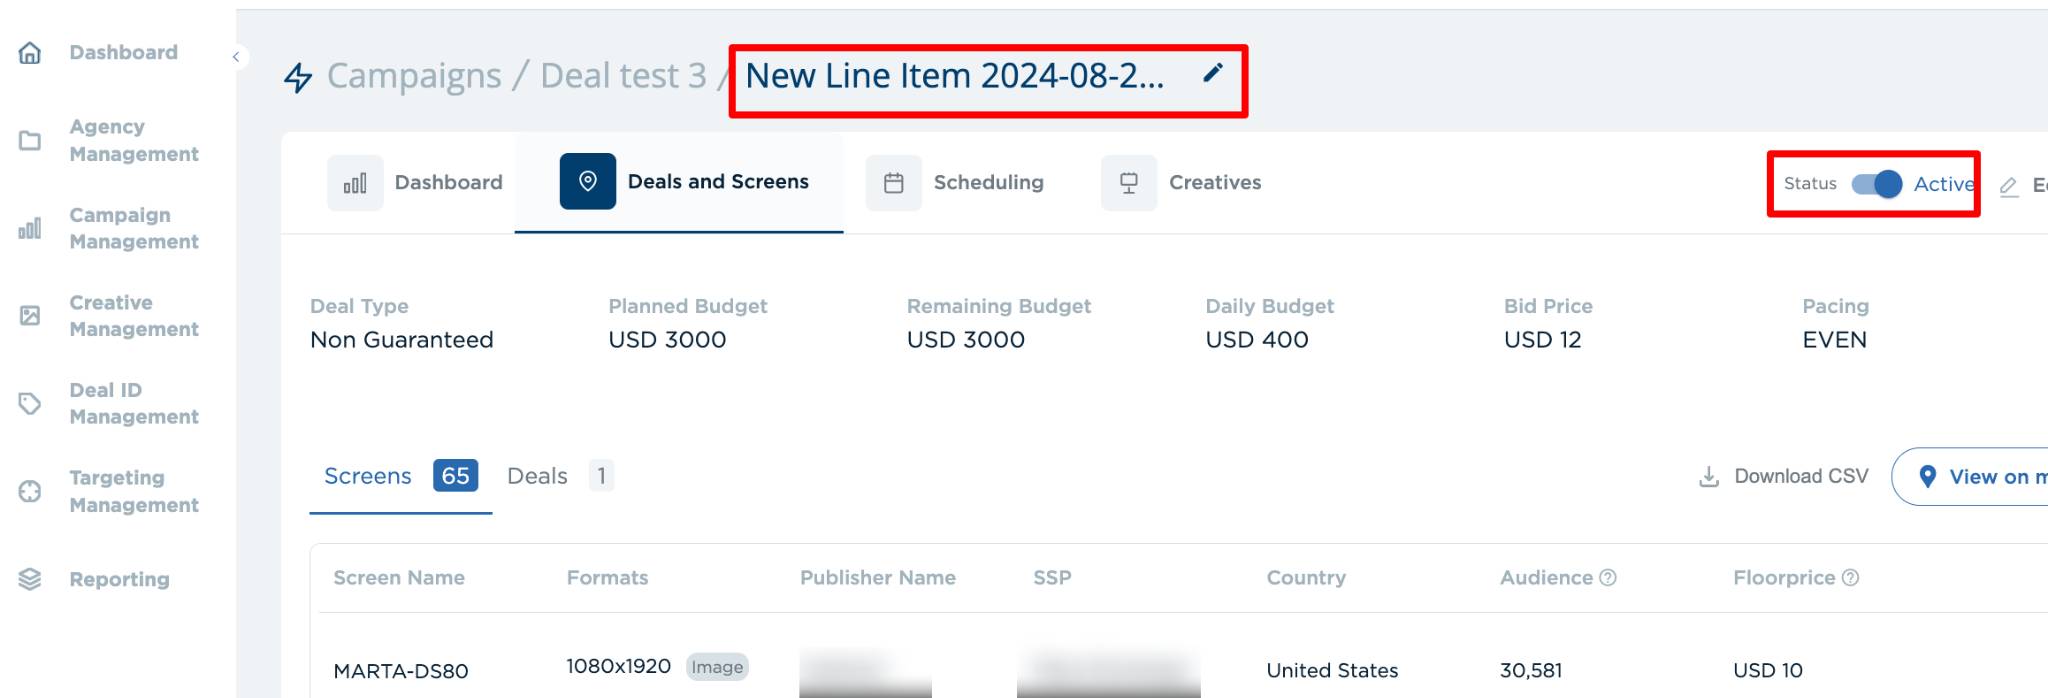
Click the status toggle to make the line items active.
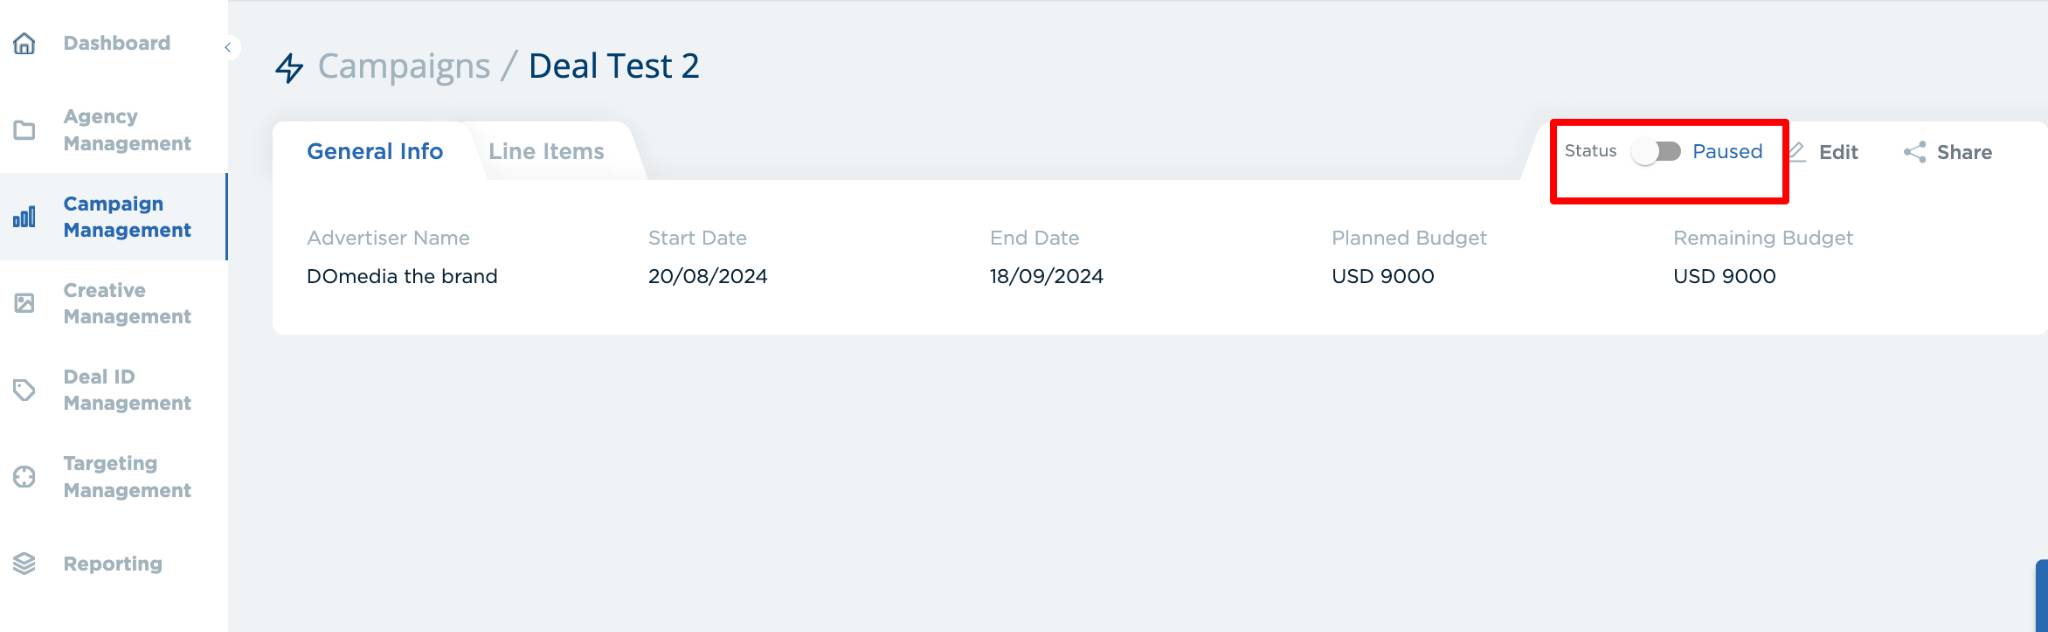
Make the overall campaign active. There are two optoins to do this.
Option 1 on the Campaign Management list, click the 3 dots to show actions and click Activate
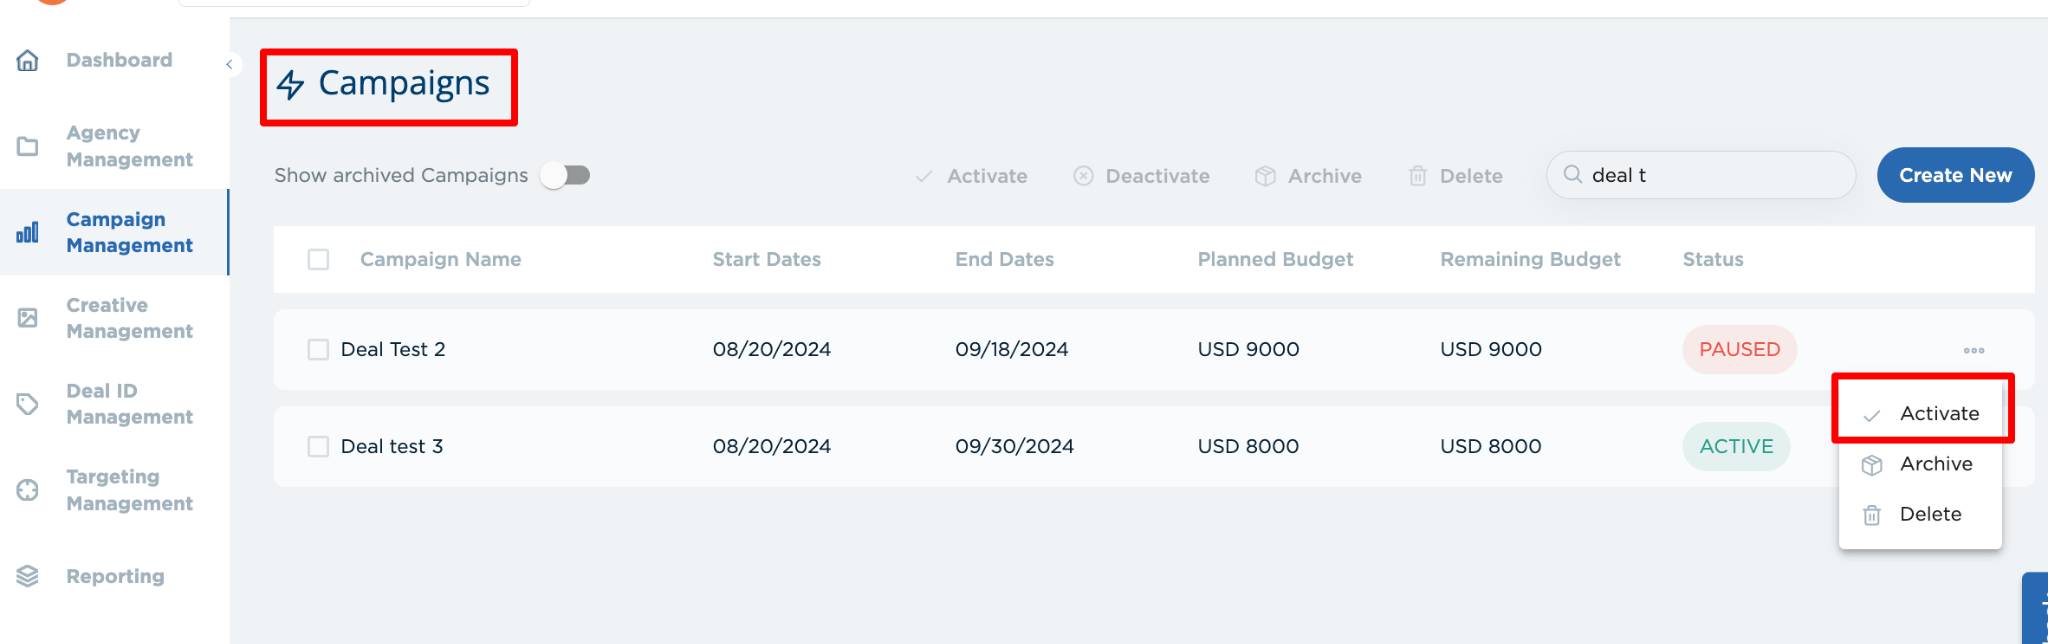
Option 2, within the campaign, on the General Info tab, click the Status toggle to make it Active.
Congratulations, your campaign is now active!
Monitoring Campaigns
- You will see a notification when your ad starts running. There will be a win notification in your notifications section in the top right.
- Status - analyzes the campaign spend and time left. The ideal scenario is when time and money are consumed at approximately the same rate.
- Underspending - when the ratio of time passed compared to the total time scheduled for the campaign is greater than the amount of money spent.
- Overspending - when the ratio of time passed is less than the spending ratio.
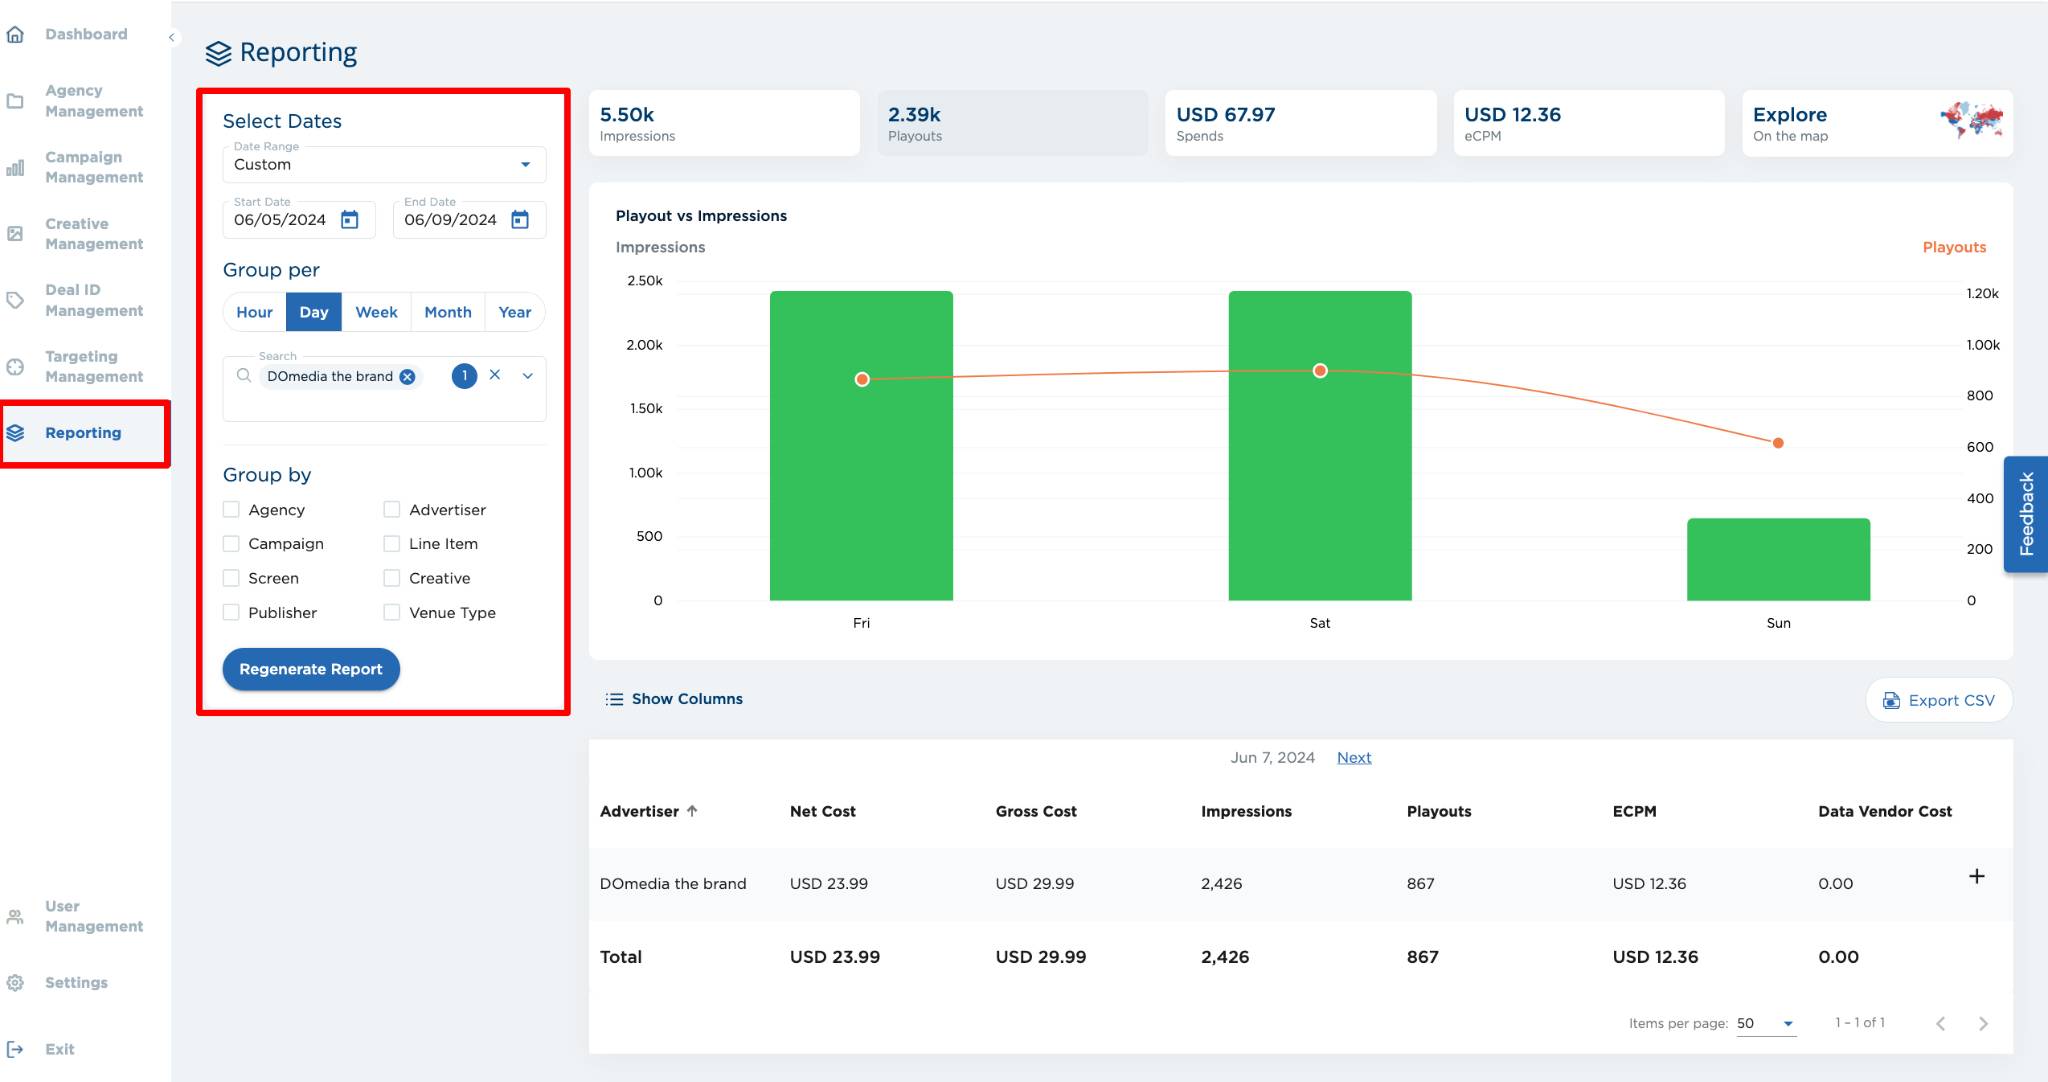
Reporting
Reports continually update. It can be as often as ten minutes.
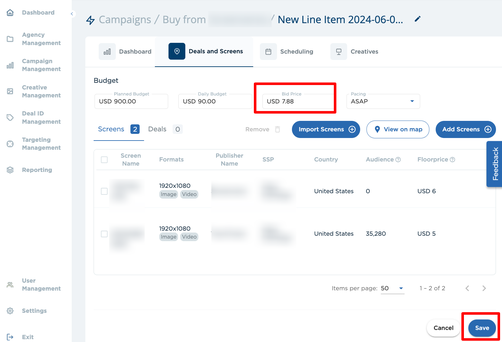
How to win bids
- The first thing to consider is increasing your (Max) Bid Price.
Go to your campaign, click on the line items, ensure the lines are not active, and click Edit.
Increase your (Max) Bid price and click Save. Set the line items to Active.
2. Consider increasing the types of creative files you have to open up the pool of possible screens your ad can run on.
Payment & Invoices
- You will receive invoices from DOmedia. Depending on your billing setup, it may sync with the DOmedia Contracting module.
Troubleshooting
- Campaign Not Running - Make sure your billing is set up. Make sure your campaign is set to active. Make sure the line items under your campaign are active. Make sure the line items have 1+ screen/deal, scheduled dates, and at least 1 valid creative ad. Make sure your creative was approved.
Terminology
DSP - A demand/buyer-side platform. The tool explained in this article is a DSP.
SSP - A supply-side software platform that allows publishers/vendors to list their inventory/screens, handle auctions, talk to DSPs, and select the highest bidder.
Publisher/Vendor - the company that owns the physical screen at a venue.
CPM - cost per thousand impressions. It represents how many dollars it will cost to have 1,000 views of an ad.
Bid Price is a CPM - Is the price you’re willing to pay per thousand impressions.
Floor price - the lowest CPM a publisher/vendor is willing to accept.
Playout - when an ad actually runs
PMP - Stands for private marketplace. This is when a publisher/vendor invites a selected set of buyers to bid on their inventory. Buyers get access to premium inventory they would not otherwise have access to. Publishers/vendors have more control over what kind of advertising runs on their screens. The vendor/publisher creates a deal which is a set of inventory/screens tailored to the advertiser.