
Buyer: How do I create and issue Client Authorizations?
What is a Client Authorization?
Within DOmedia, a Client Authorization is a digital document that outlines the specific details of a campaign and is generated from one or multiple RFP responses. The Client Authorization is intended to be sent to your client for final approval before contracting those units with vendors. The authorization can be customized to show your client exactly what you would like them to see regarding the details of the campaign.
How do I create and issue Client Authorization?
Client Authorizations can only be created from RFPs, meaning that you will first need to send an RFP to vendors and wait for responses, or create a Buyer-Only RFP and fill in the necessary information on your own.
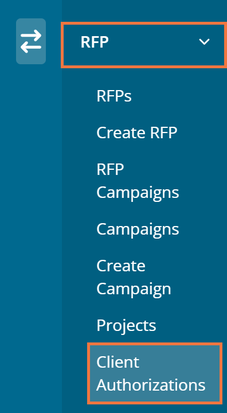
Once the RFP has been issued, below are the various ways you can create a Client Authorization. Click RFP in the menu on the left side, followed by Client Authorization.
Then, from the Client Authorization Dashboard, click Create New Client Authorization.

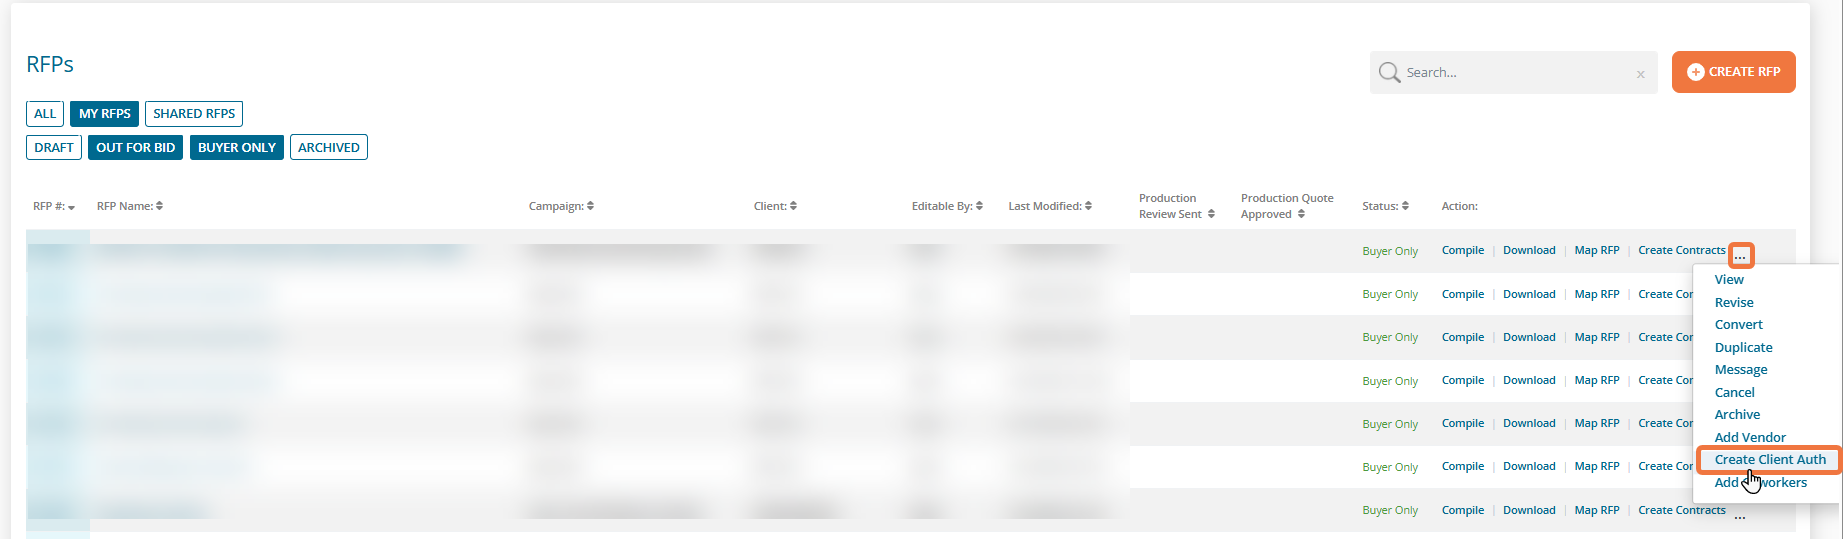
Alternatively, you can create a Client Authorization directly from the RFP dashboard by clicking the "..." in the action column, and then selecting Create Client Auth.
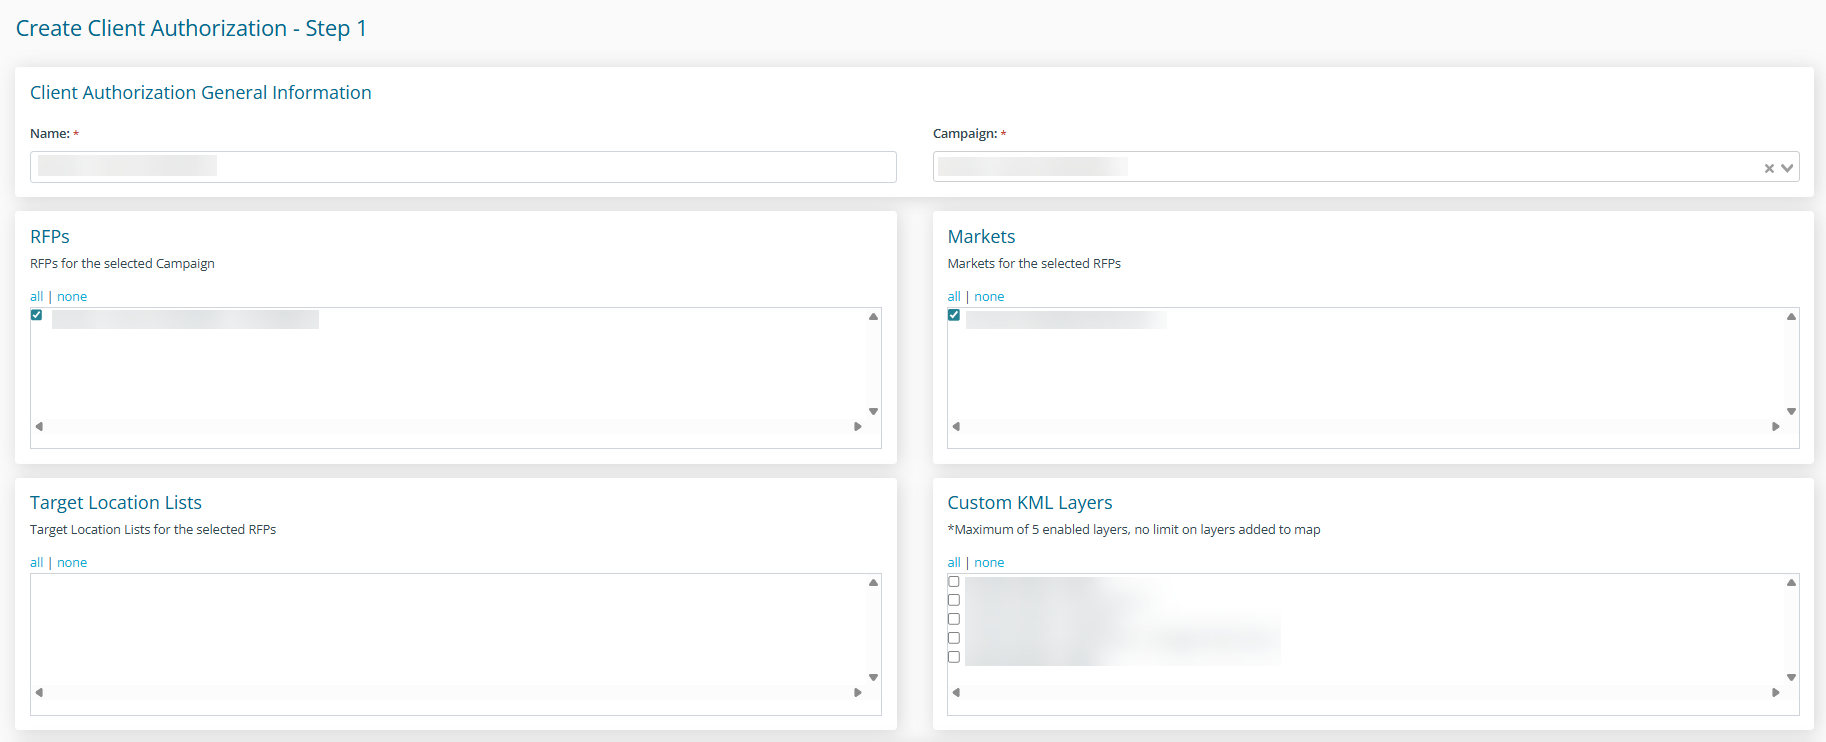
This will bring you to the Create Client Authorization page. Next:
- Select the Campaign
- Name the Client Authorization
- Select the RFP from which you would like data to be pulled
- Select Market(s) and Target Location Lists if applicable
Selecting a market will only pull in inventory in that market from the RFPs.
Client Authorization Terms (Campaign, Market, RFP) may be selected, but must be set up prior to creating the Client Authorization; you can see the specific terms by clicking the details link. These selections must remain synced with the RFP. To learn more on how to create Client Auth terms, check out this support article.
Additional Terms, Name, Target Location Lists, KMLs, and Comments will be editable fields if you need to go back and make revisions later.
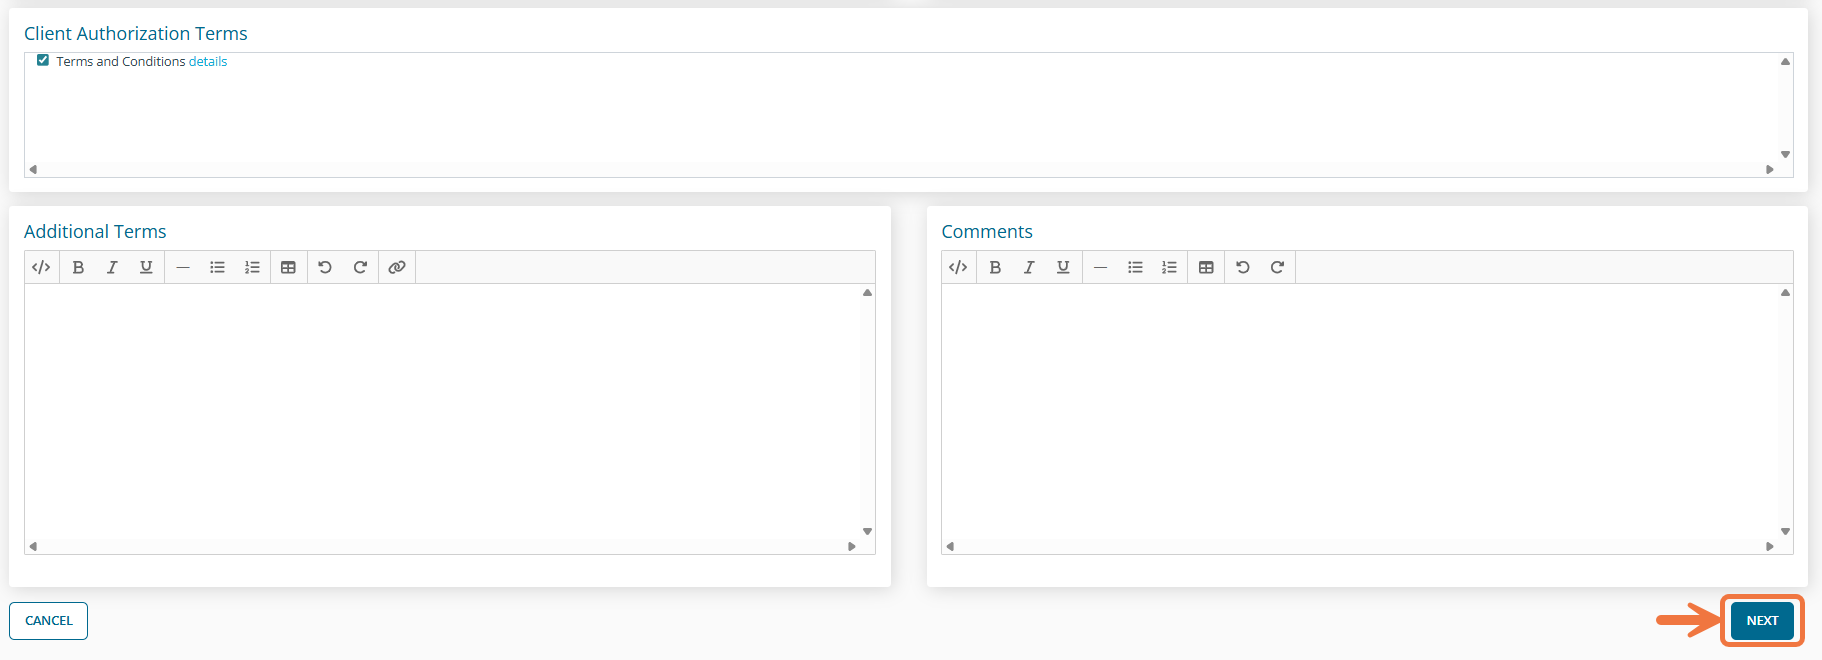
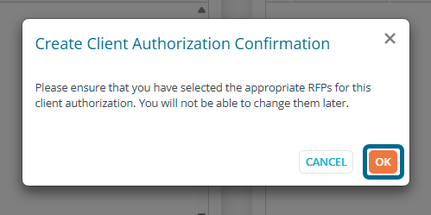
Once you click Next, click "OK", to confirm the RFP and Markets. After this, any necessary changes will require a new Client Authorization.
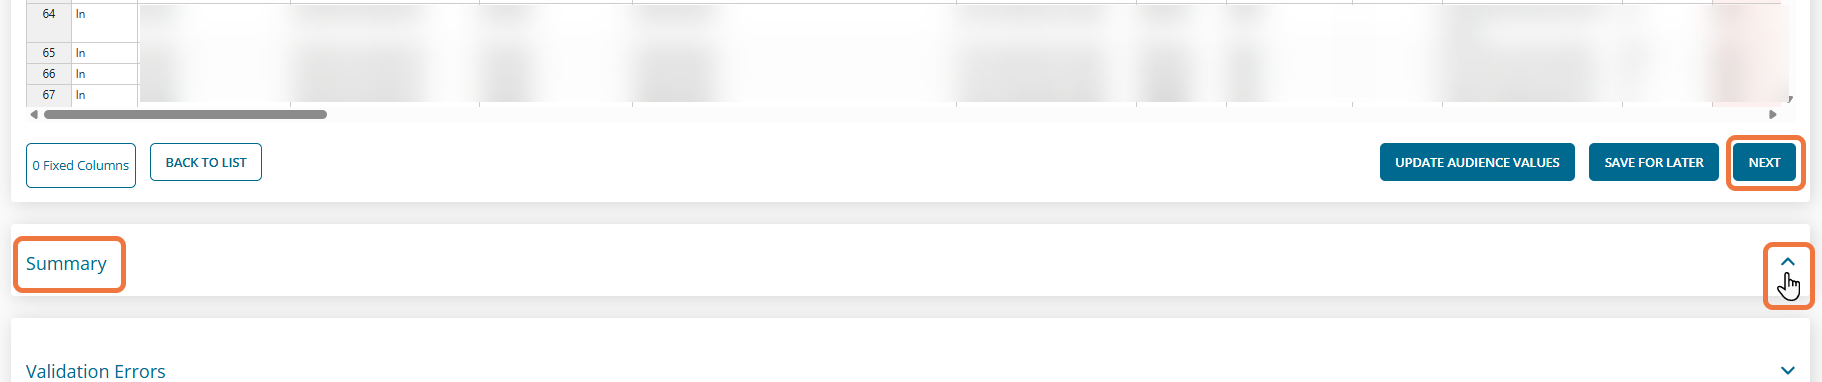
This will bring you to the Inventory Information section to review and edit. Expand the Summary section beneath the Inventory Information to see totals at a glance.

Clicking Next will create the Client Authorization in Draft status. By default, the Agency Fees at the top are set to be hidden — this can be made visible to the client by clicking the corresponding link. The fees that appear are calculated based on the Total Client Cost minus the Net Media Cost for all cycles, Total Production Cost, and Installation Cost.
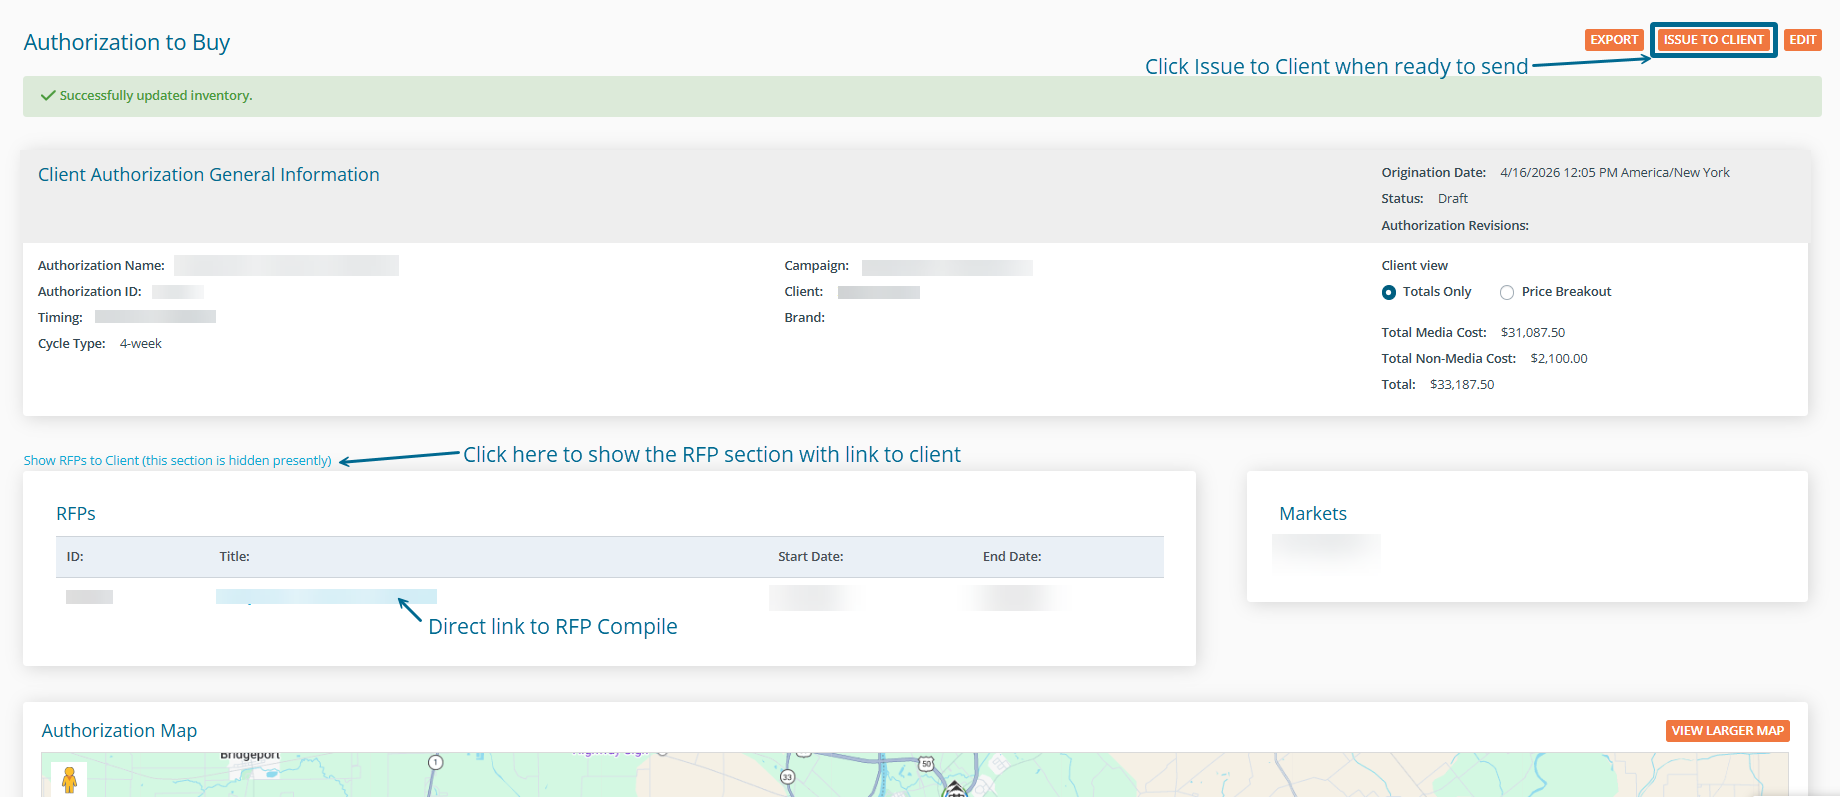
Under Inventory Information, you can Update Inventory and Download the data. You can also view the client map or navigate directly back to its RFP via the link.
You can also toggle between Buyer View and Client View to preview how the authorization will appear to each party.
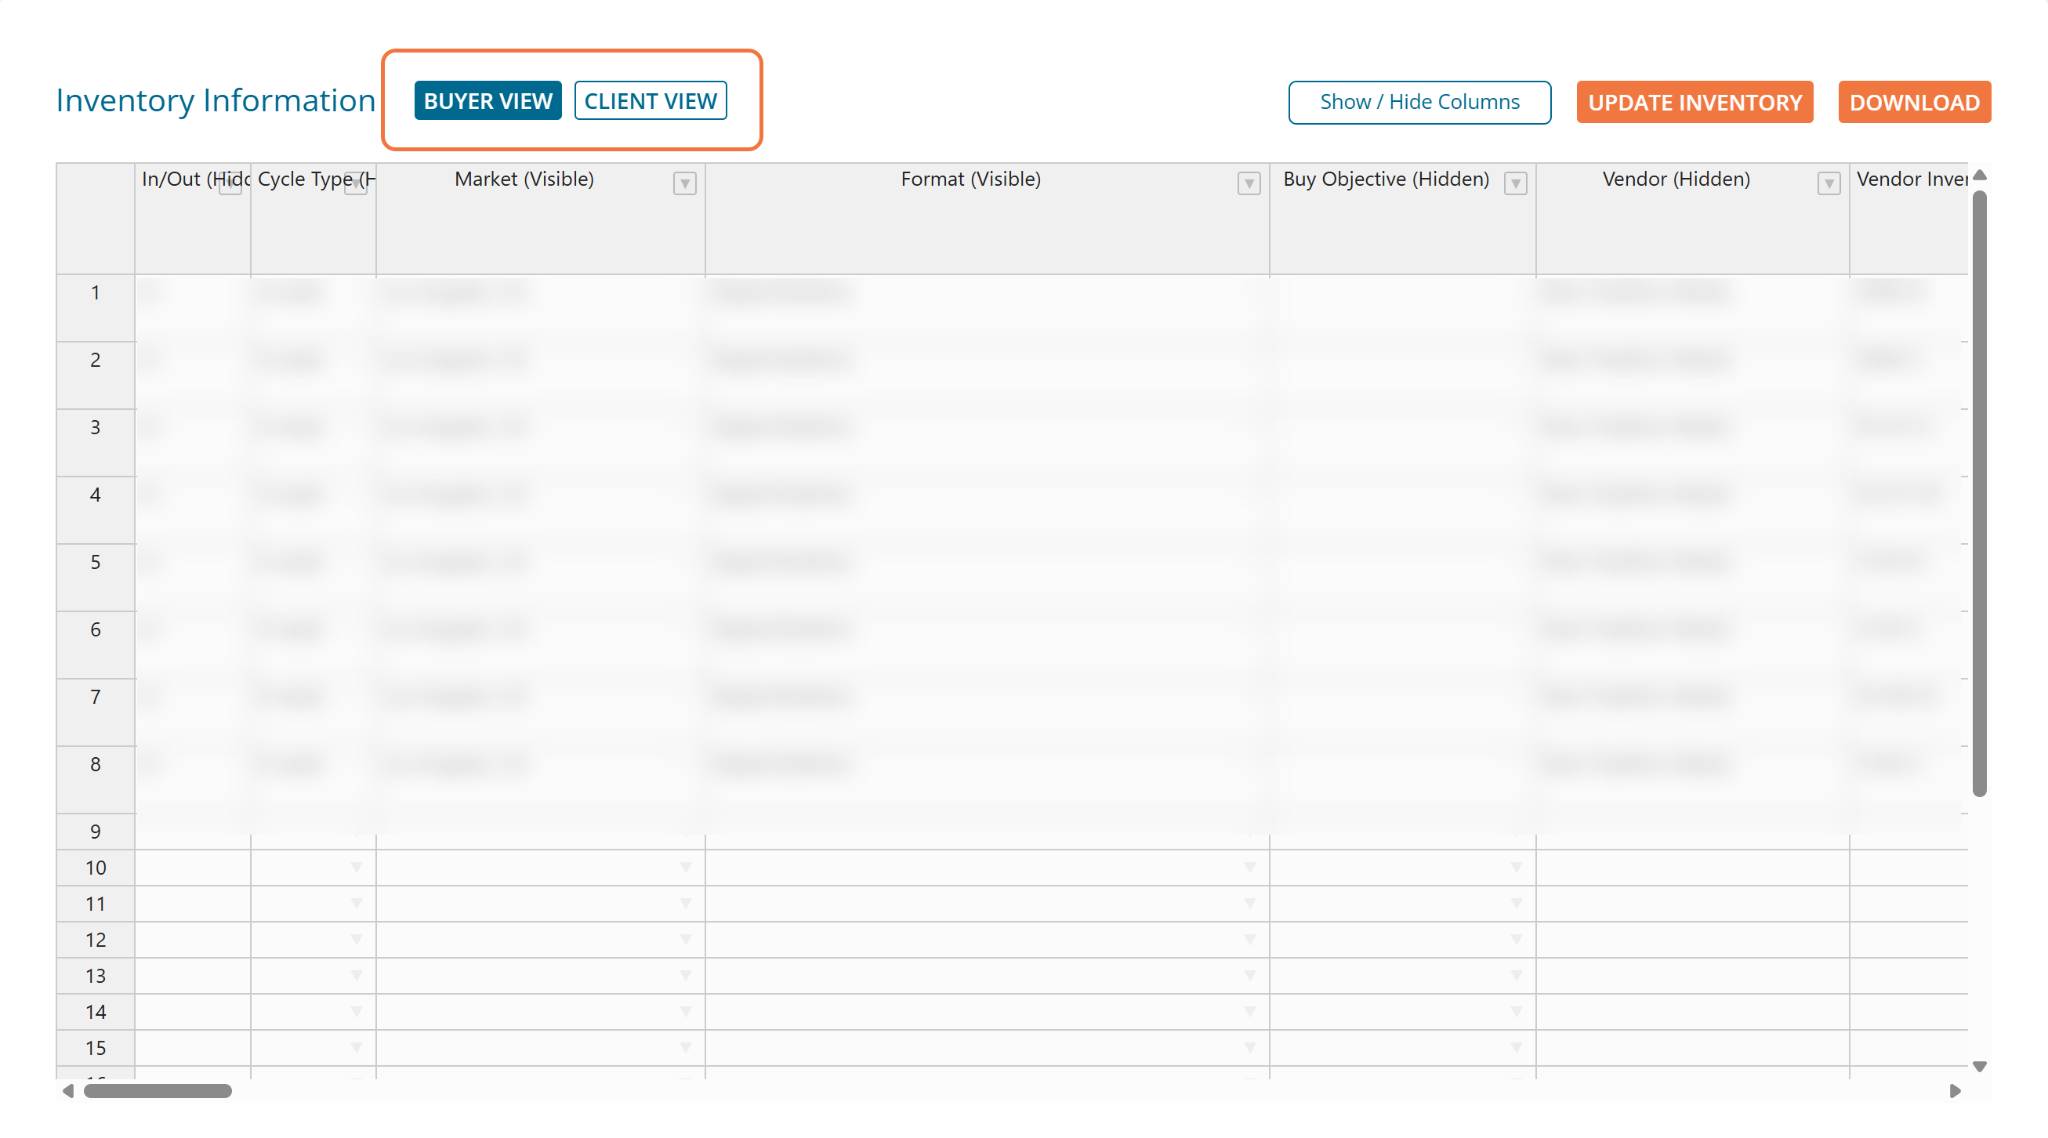
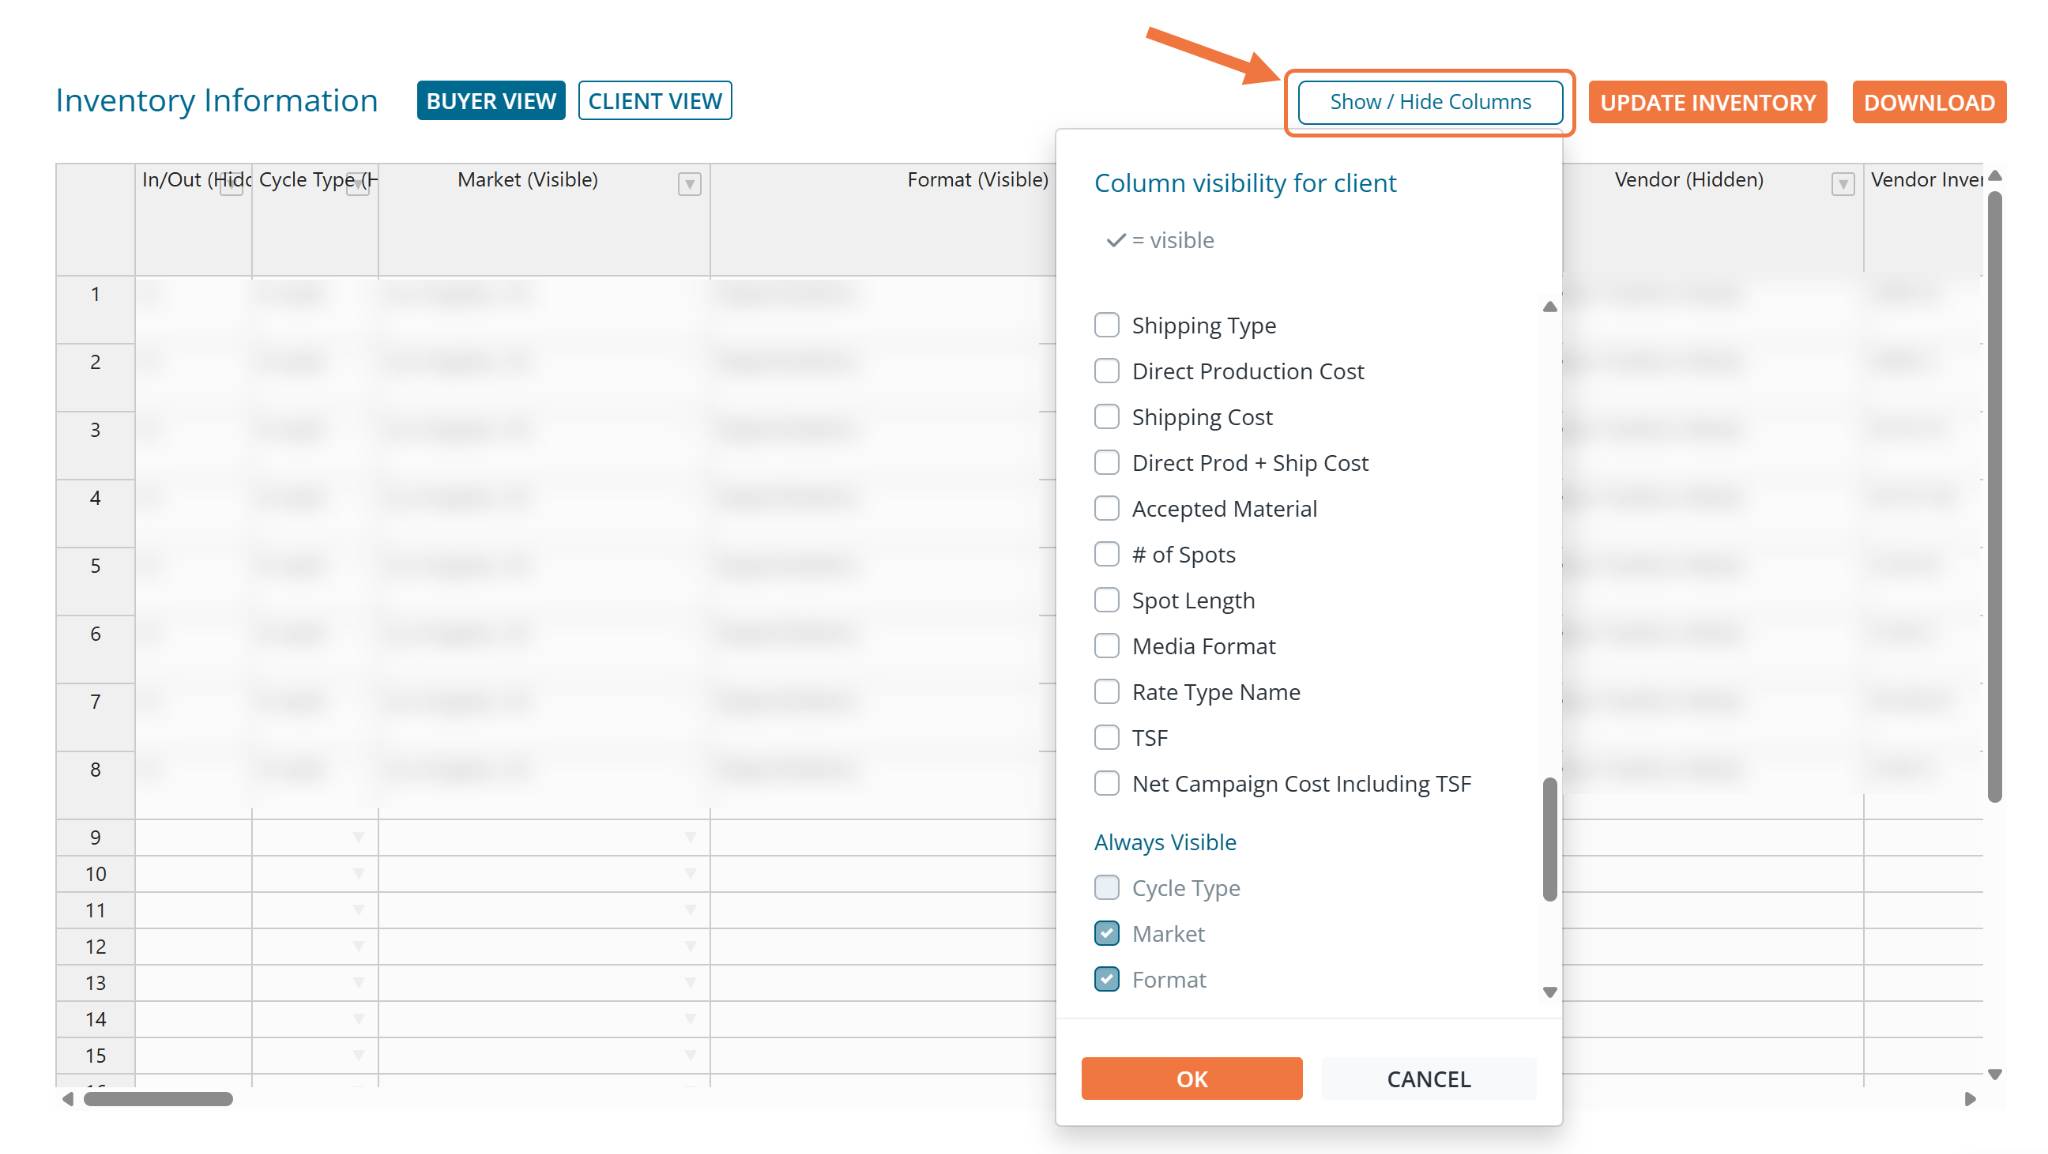
Show/Hide Columns
To control which columns are visible to your client, click the Show/Hide Columns button. This will open a dropdown displaying all available columns — columns with a checkmark are currently visible.
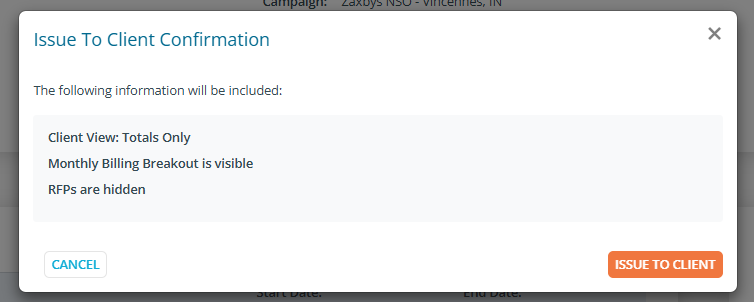
When you're ready to send, click the Issue to Client button at the top of the Client Authorization page.
This will open a pop-up for you to review the information that will be hidden or visible to your client.
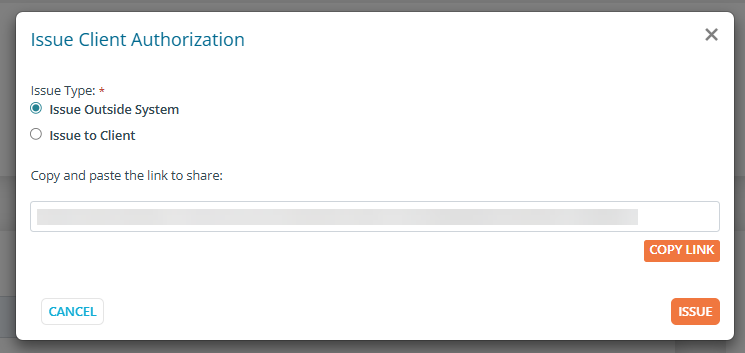
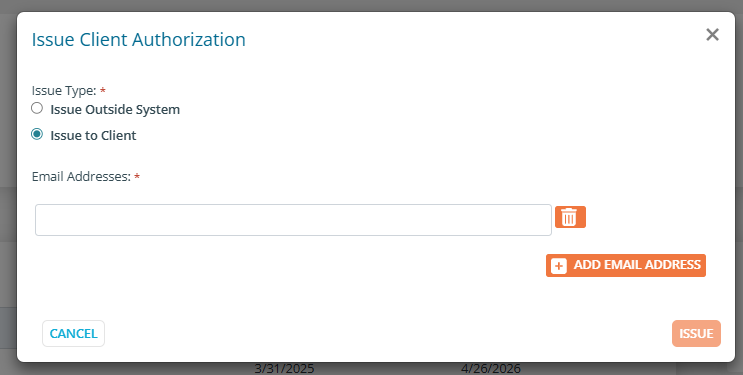
Once you click Issue to Client from the pop-up, you can choose how to send this Client Authorization.
- Option 1: Issue Outside System
- This option allows you to simply copy a direct Client-facing link which you would send outside of the system (via email). Once you've copied the link, click Issue, and it will make the link live.
- Option 2: Issue to Client (directly from the system)
- This option allows you to input your client's email address, and then have the system send it directly to your client. You can add additional email addresses to issue it to multiple people at once.
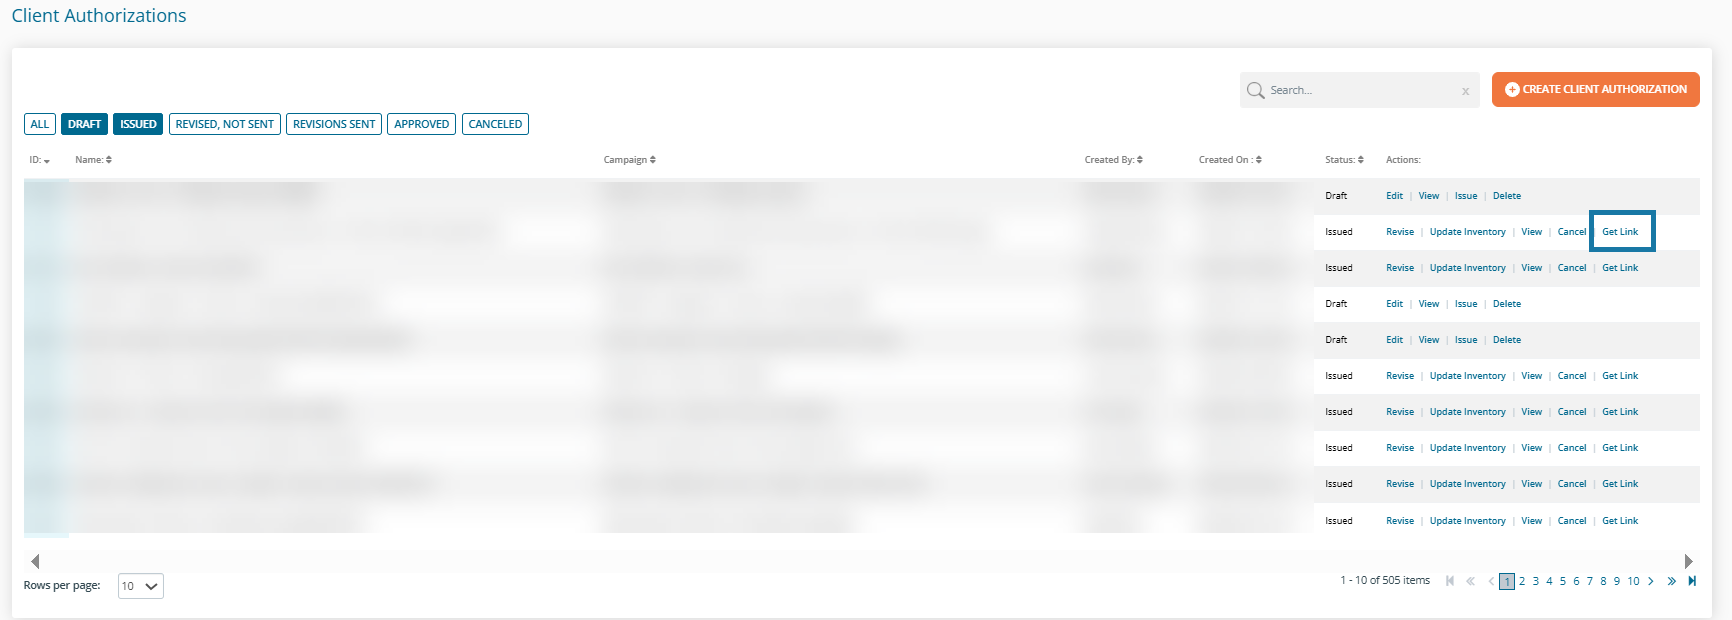
Once the Client Authorization has been issued, you will be routed back to the Client Authorization dashboard with a success message. The status of the new authorization will update to Issued.
If you need to get the link for your client again, click the Get Link button to retrieve the share link.
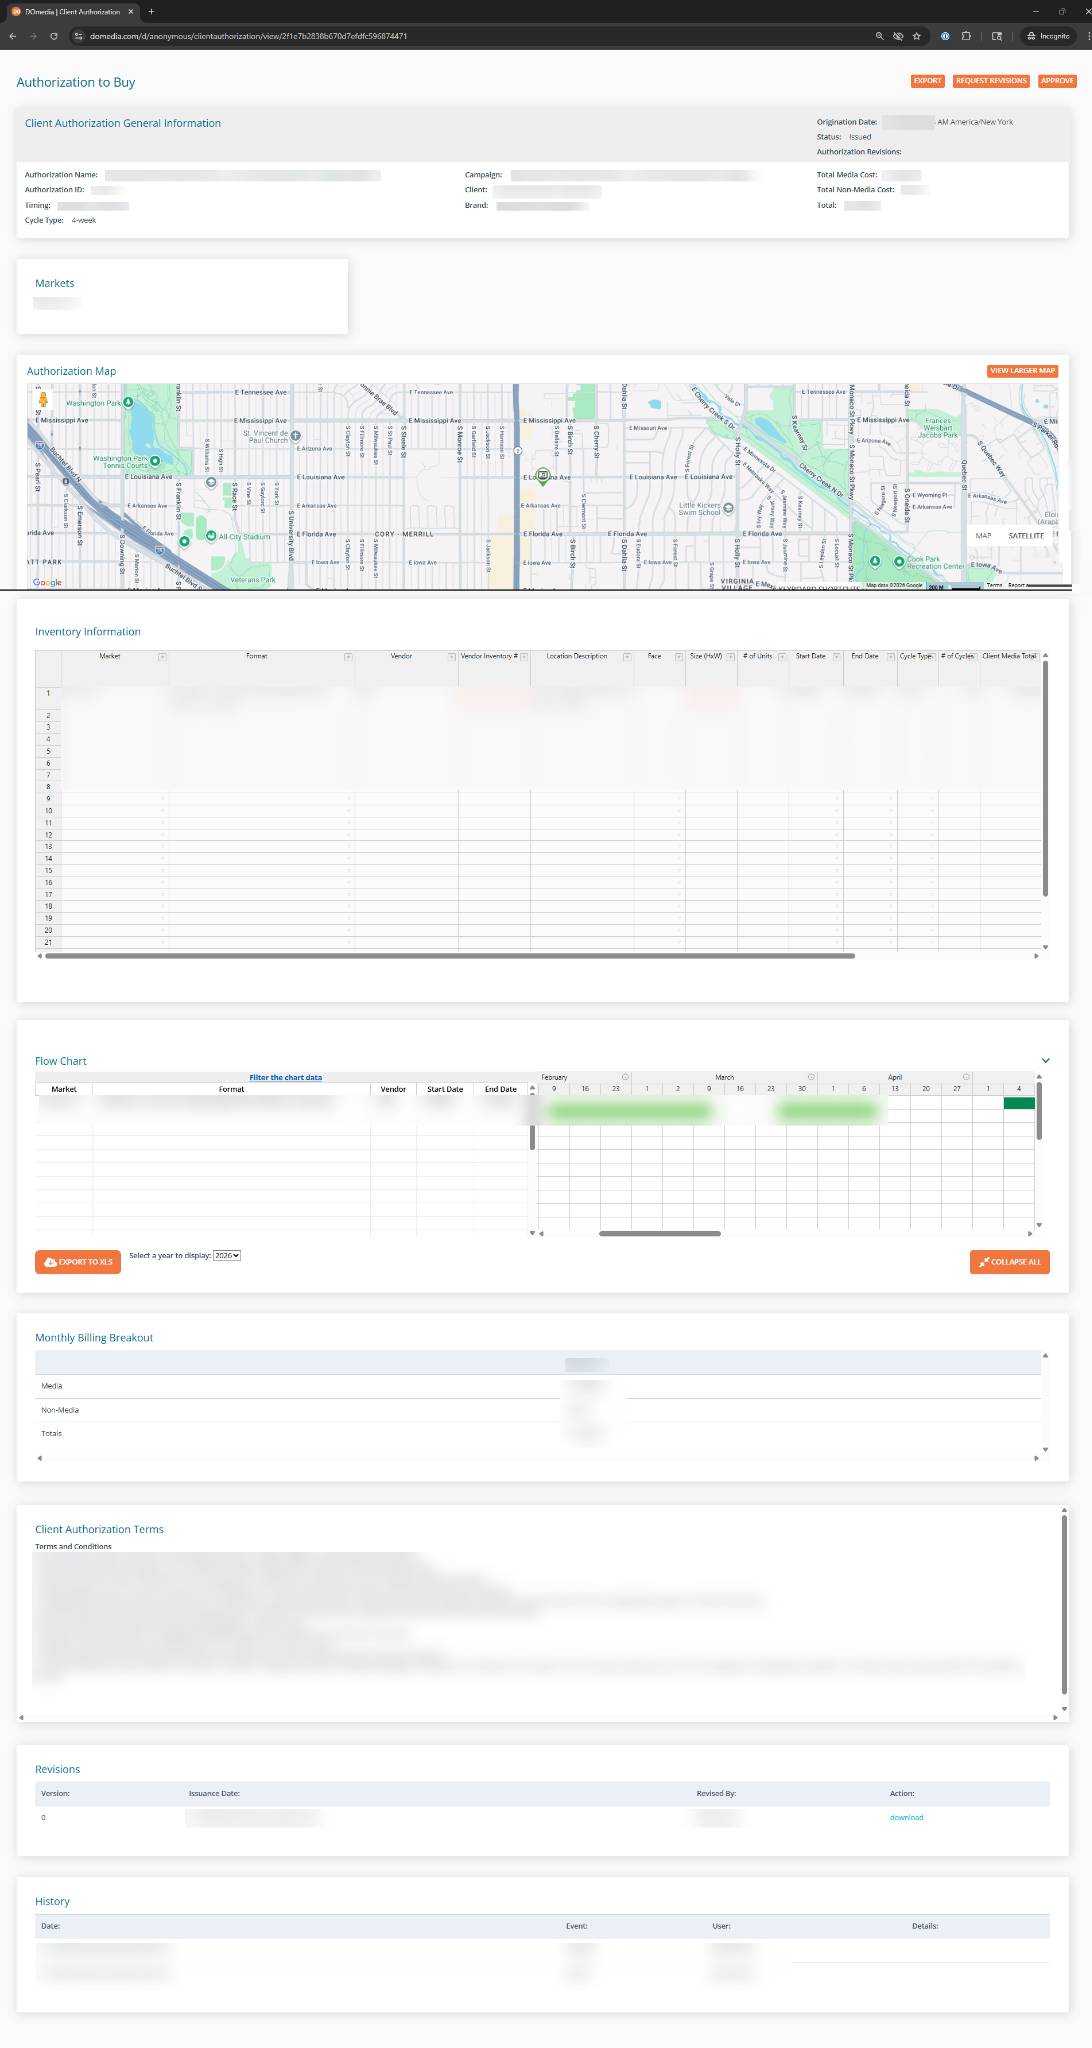
What will my clients see and do:
Now that the Client Authorization has been issued, your client can view and approve the Client Authorization! Below is what your client would see via the link they've received:
When your client clicks Approve, and they will see this pop-up with approval options.
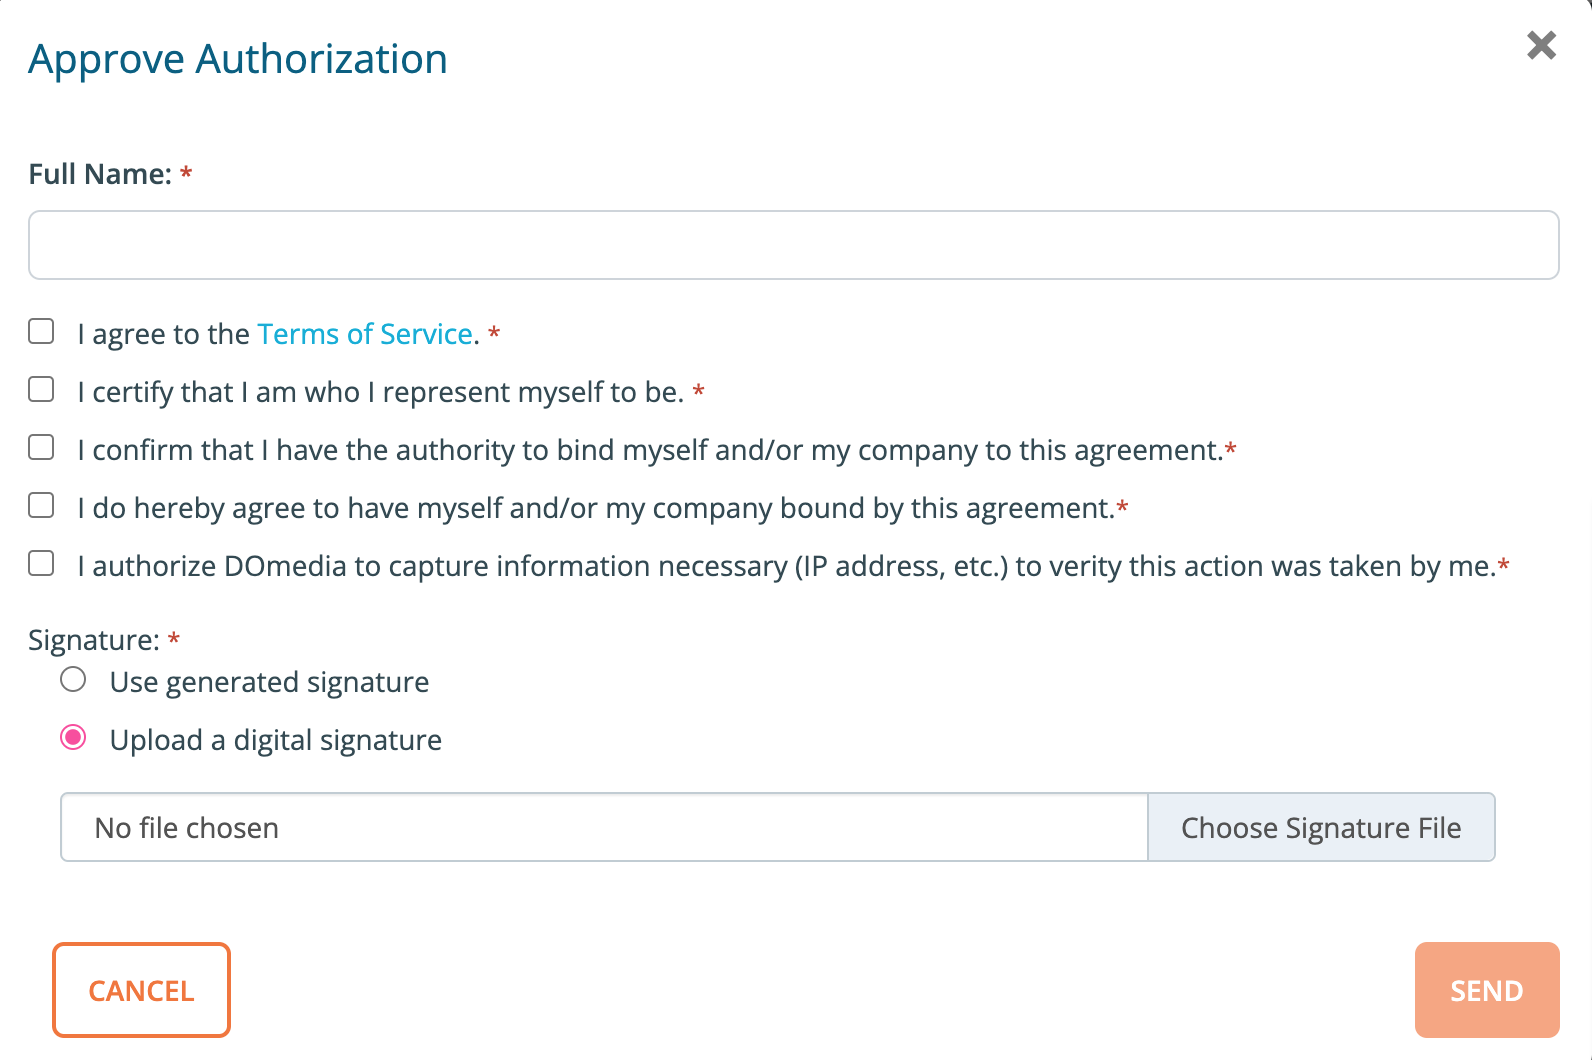
Once approved, the status will update to Approved in your dashboard. If you decide to export the Client Authorization PDF, you will see the client's signature applied at the bottom.