Seller: How do I use the 'Filter Inventory' feature?
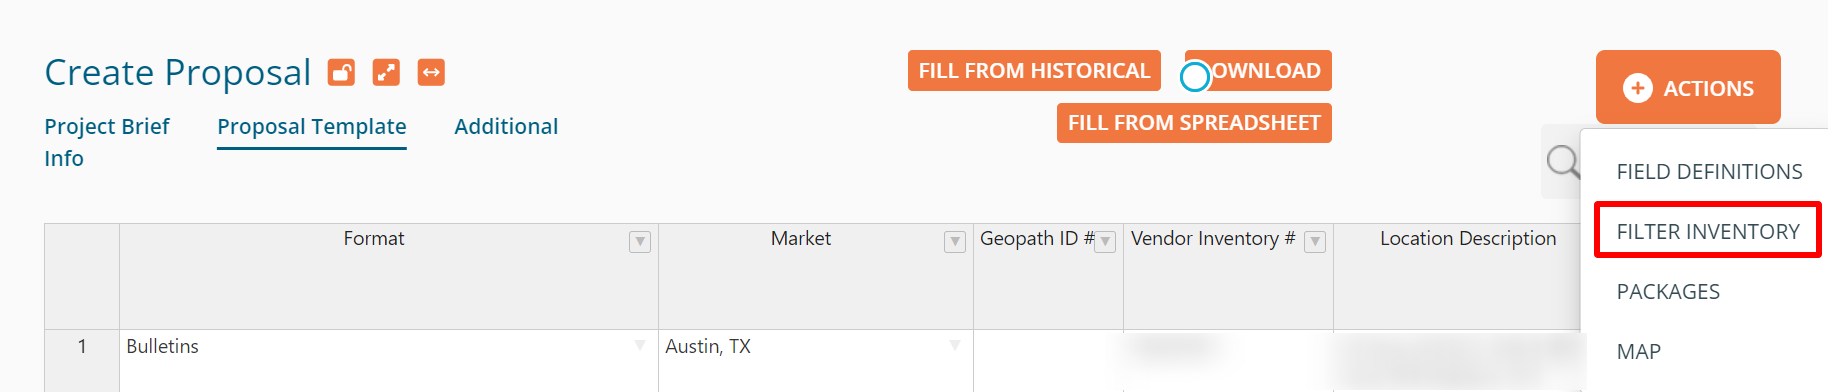
Have you ever received a BillboardsIn RFP with a TON of eligible assets to propose? Based on seller feedback, we’ve developed a new Filter Inventory feature, exclusive to BillboardsIn RFP’s (since assets are pre-populated for your convenience), allowing you to submit these in only a matter of minutes! The feature is available via button under the "Actions" tab on the top right corner of your Proposal Grid:
When clicking that, the Filter Inventory window opens:
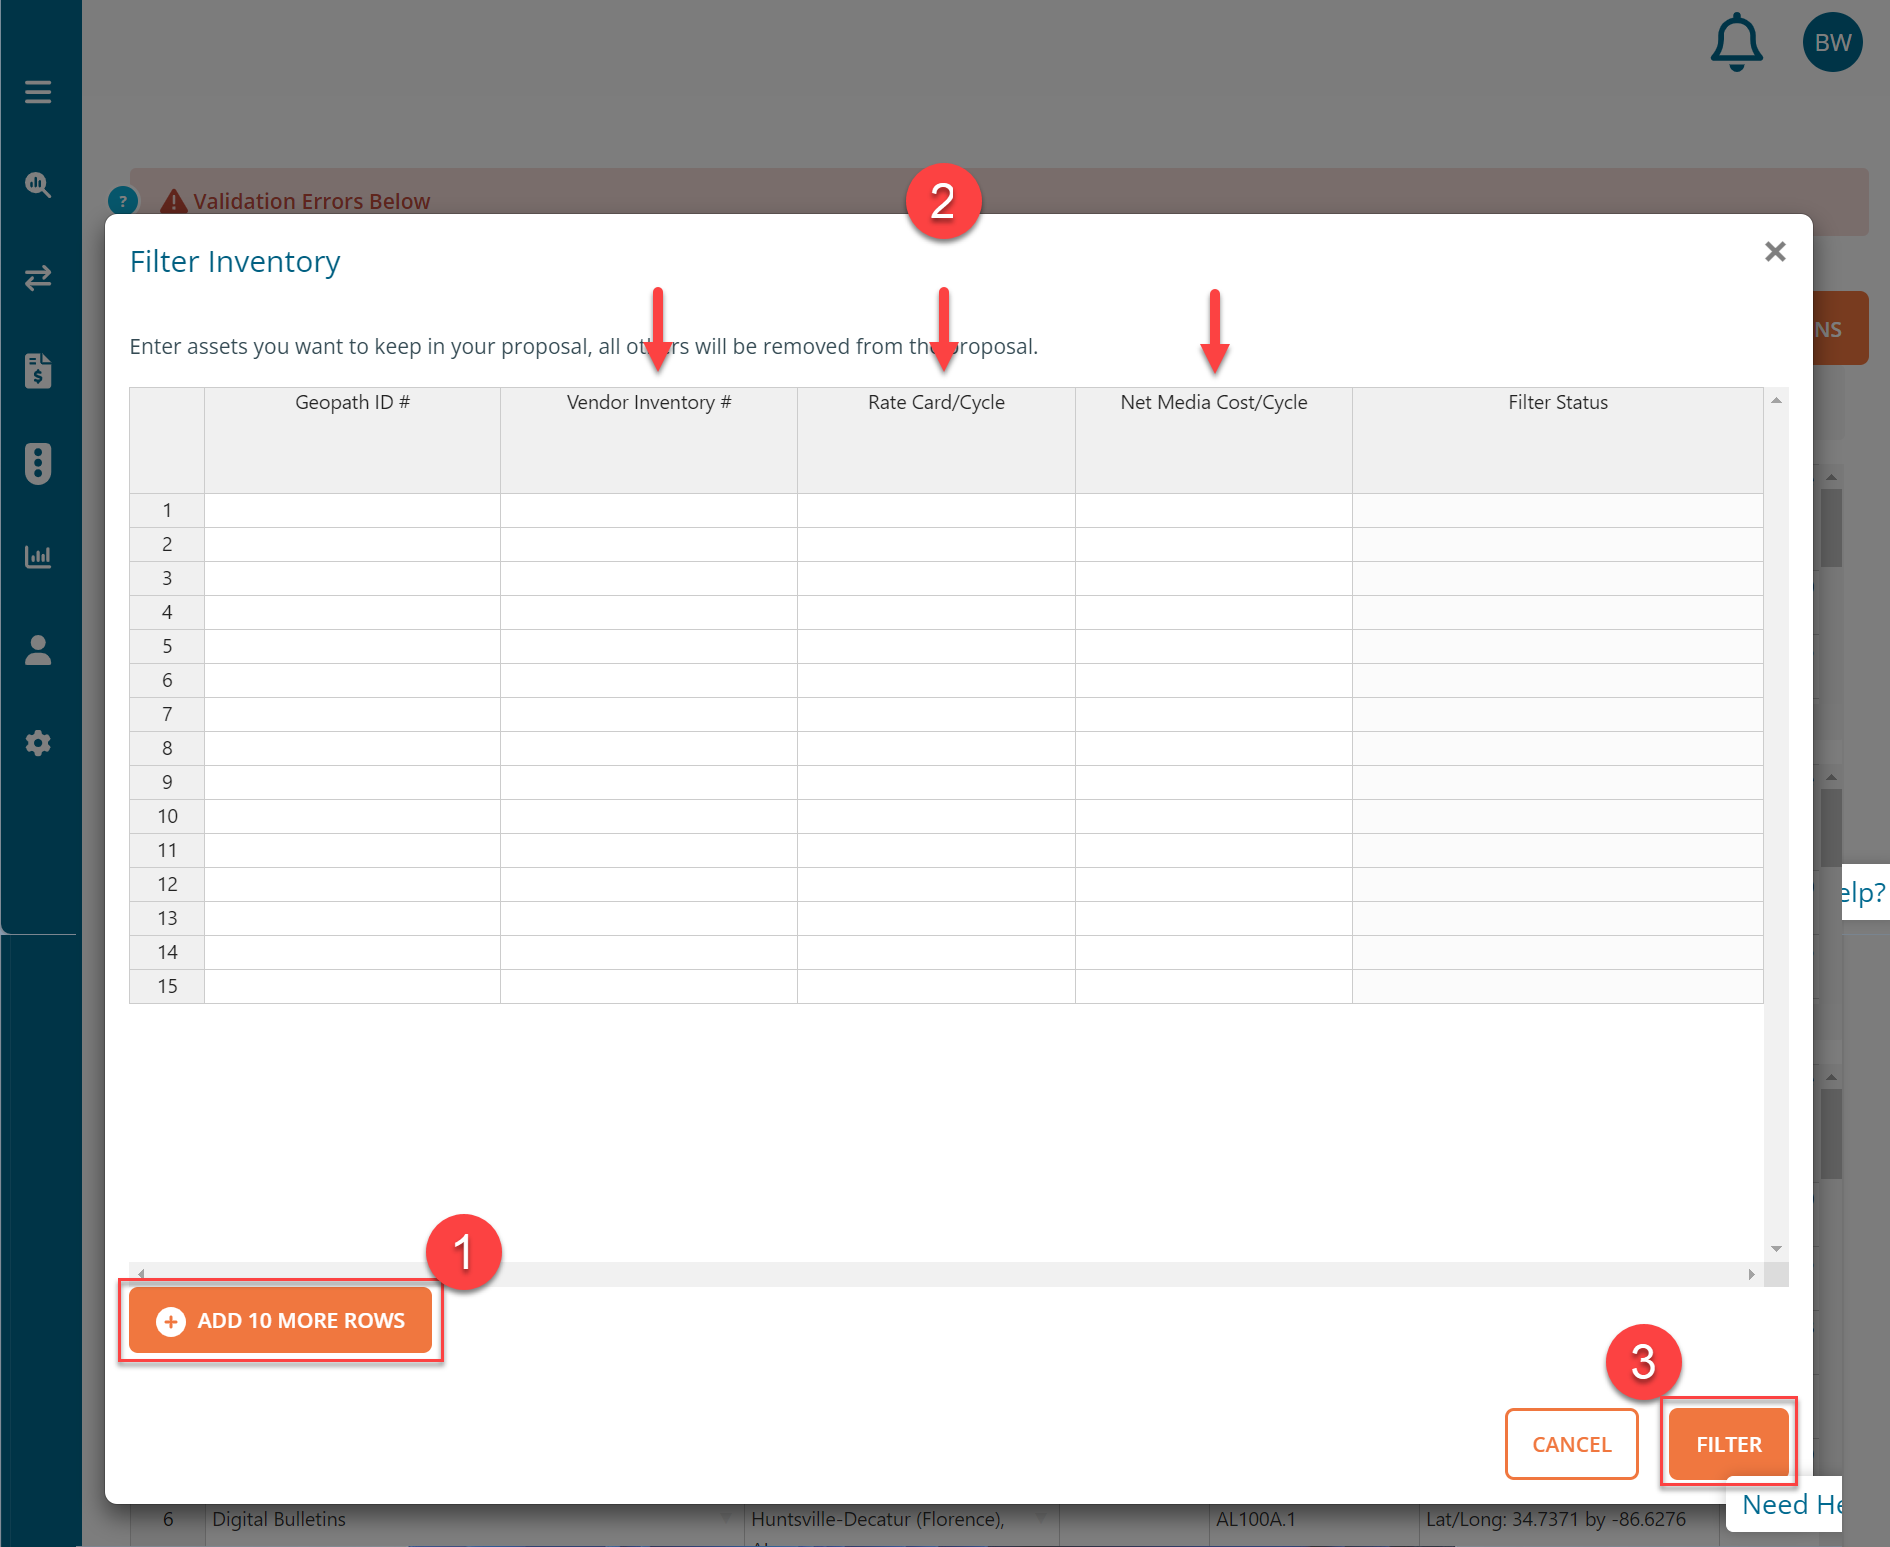
STEP ONE: Get your rows ready! If you want to propose more than 15 inventory options, click the “Add 10 more rows" button until you have enough rows available for all of your options. If you want to propose less than 15 inventory options, you’re good here! Proceed to the next step.
STEP TWO: Enter in the Inventory or Geopath #’s of the asset(s) that you want to propose. Additionally, if you have proposed with an asset before, the rate card and/or net media costs will pre-populate for you.
PRO TIP: To save the most time, you can literally copy and paste three columns directly from your Excel grid: the Inventory #, the rate card amount, and the net media amount into the three columns with arrows above.
STEP THREE: The bottom of the window will now show how many assets you are proposing out of the total options possible. Now, just click the “Filter” button and the proposal grid will automatically delete all of the other rows!
FINISHING YOUR PROPOSAL Click the “Save for later” blue button on the bottom right of your proposal grid. Then, refer to the remaining validation errors at the bottom of your proposal grid.

Since you have already filled in the rate card and net media rates via the Filter Inventory feature, there are only two items left required: image and production shipping address. Note: Both of these items are saved for future submissions, so this will only ever be required once for you per asset!
No Asset Image Found If you see this error, that just means you need to add asset image(s) before you can submit your proposal. To do that, simply click the Add Images button, and it will open up the Add Images window. There, you can either upload the asset image file (recommended - either a JPEG or PNG file; not a PDF file) by clicking the “Choose File” button or use Google Streetview (not recommended) by clicking the “Use Streetview” checkbox. Once you do that for all of the assets within the window, you simply click the “Add Images” button on the bottom of the window.
‘Production Shipping Address’ is blank If you see this error, simply just add a value within the Production Shipping Address column for each asset that does not have one within the proposal inventory grid. For non-digital inventory, this should be the address that the production company should ship the finalized copy to. For digital inventory, this should be the email address that the image will be sent to.
Installation Cost / Artwork Restrictions Both of these columns are completely optional, but include them where applicable.
Once you’re finished, click the “Save for later” button once more, and then (very important) click the final “Save & Send” button - and congrats, you just submitted a BillboardsIn RFP!